|
<< Click to Display Table of Contents >> Usage |
  
|
|
<< Click to Display Table of Contents >> Usage |
|
In this chapter we will explain how the Rule-Based Block Insert is used to insert your blocks.
Make sure you read and understood the Setup chapter first.
As mentioned under Setup, Rule-Based Block Insert is linked to PlantProjectCreate and therefore must be configured even if PlantProjectCreate isn't used.
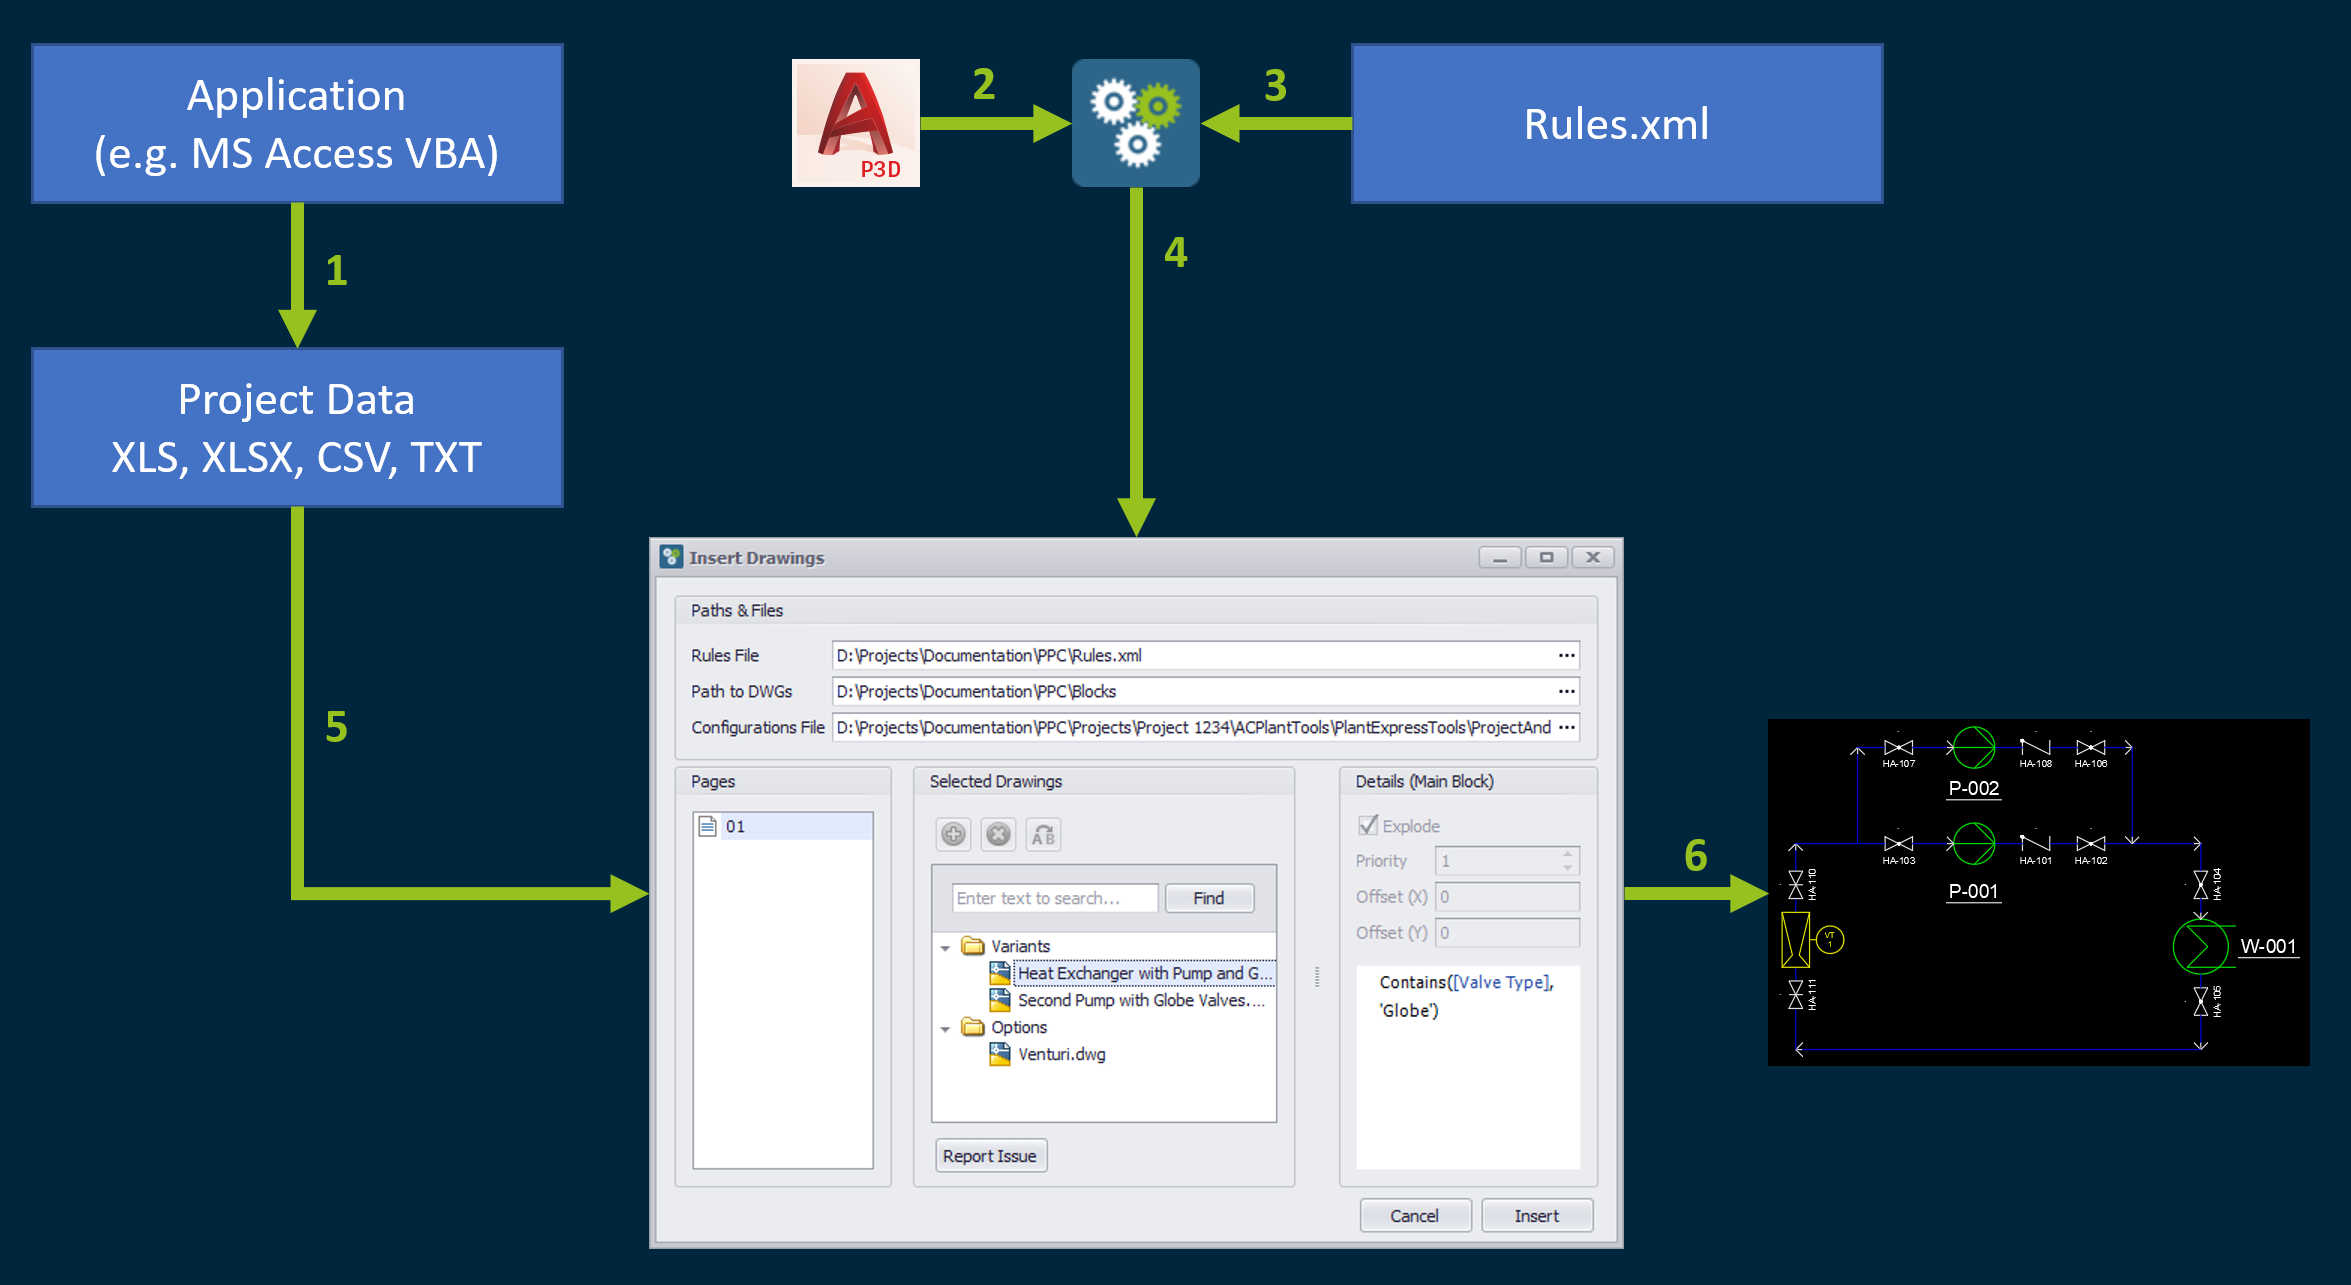
The typical use case for Rule-Based Block Insert is, that some application like MS Access creates a Project Data file (1). Next the user start the Rule-Based Block Insert function (2) which reads the Rules.xml (3). Before opening the dialog (4) it will also load the Project Data (5) and then inserts the blocks (6) based on the rules in the drawings.
Since we don't have an application we will handle the Project Data file manually.
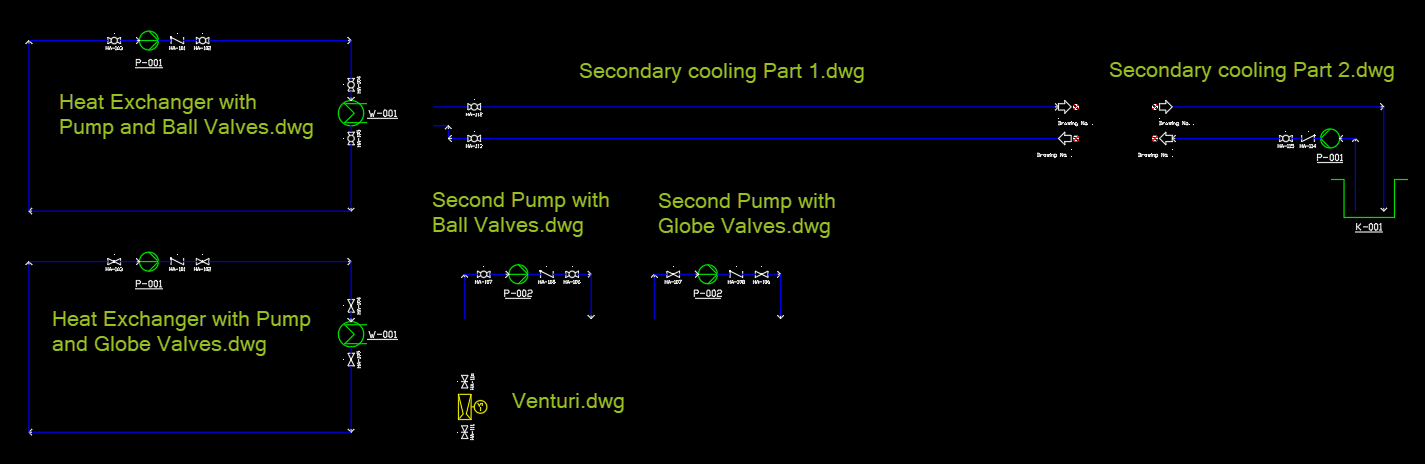
These are the blocks used in Setup where we defined the rules. We will create two outcomes depending on different Project Specific Data.
The first result we will create will be using these data:
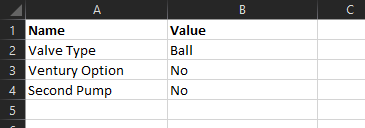
Then we switch to those data:

Make sure you have all your drawings are closed. If not, it may lead to having blocks inserted into the wrong drawing.
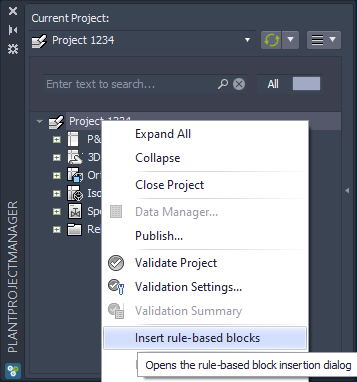
You start the inserting by starting the function from the project's context menu in PlantProjectManager.
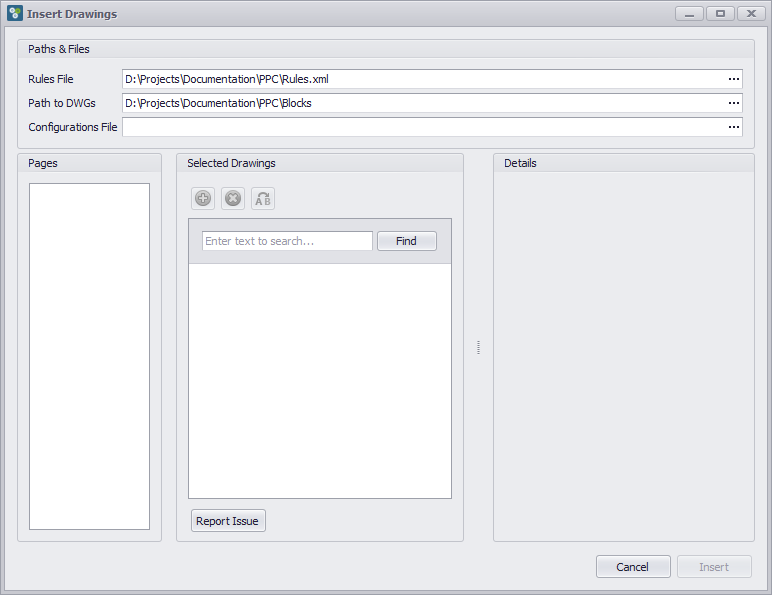
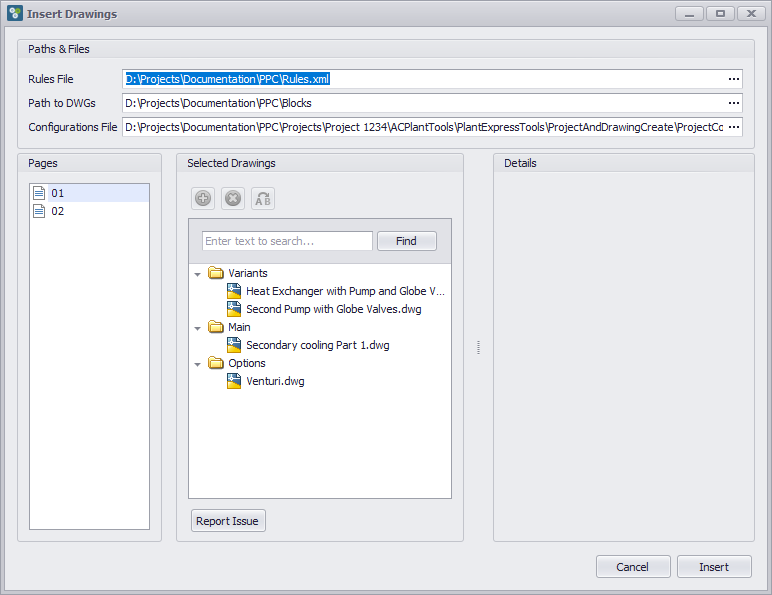
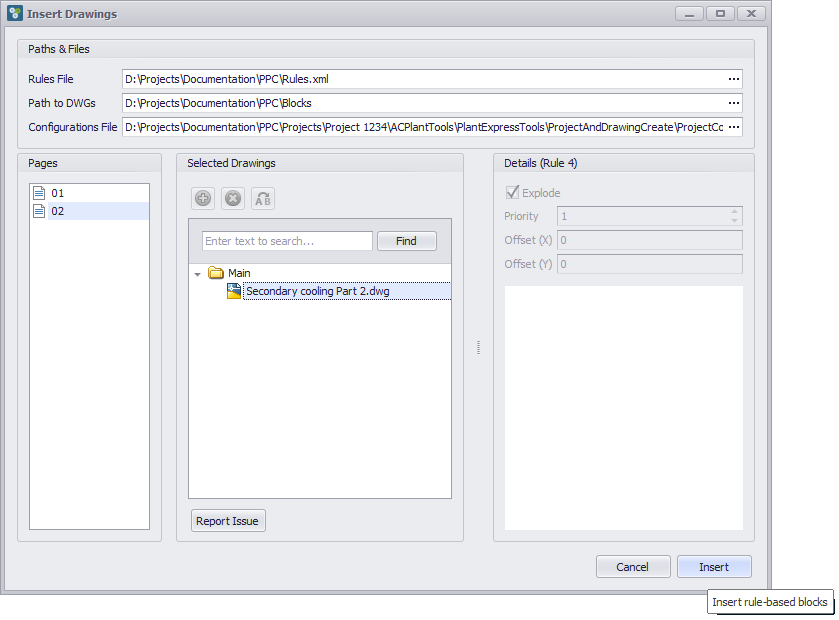
Then a dialog opens which gives you a preview of what will be inserted. The first two paths are set, because of the Rules.xml file.
Since the dialog couldn't find any project specific data to trigger the rules, everything else is empty.
The first example we want to use has the the following content:
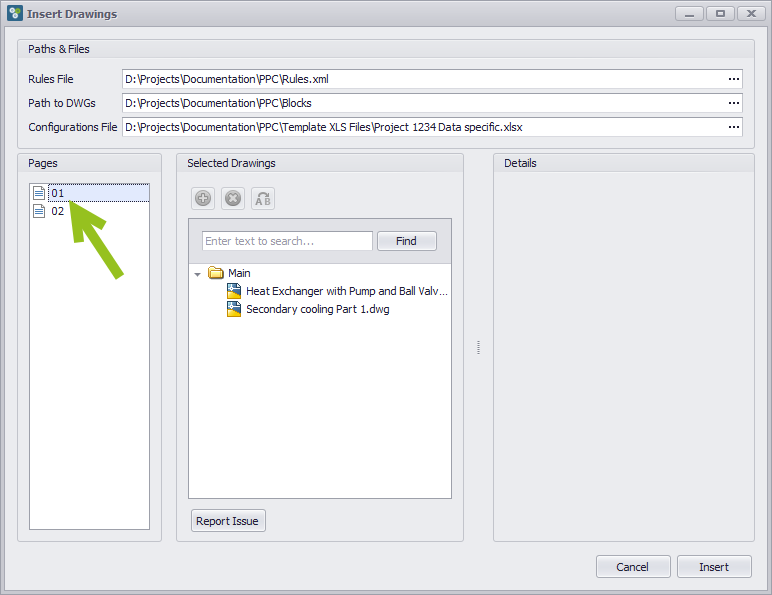
After dragging & dropping the file with the project specific data we see lines 01 and 02 under Pages. This means that there are blocks to be inserted on Pages 01 and 02.

If we click on 01 we see the two blocks which will be inserted.
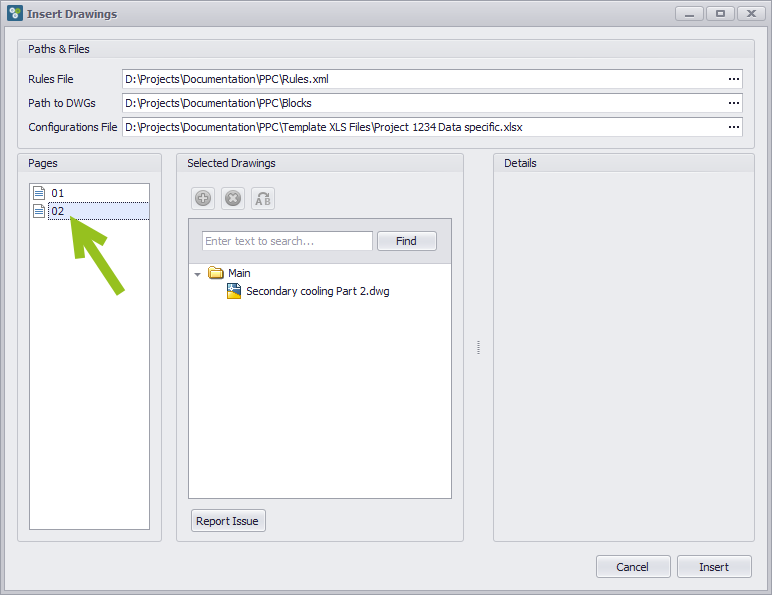
For 02 it is just one block.
This would result in these results. However, we will skip over this example, because the various options will be explained with the second example.
Instead of dragging & dropping the project data file in the Insert drawing dialog a better way is, that some application like MS Access creates the Project Data file (see Intro Step (1)). The file should be created within the project under the following path and the file name should start with ProjectConfiguratorData_*. If this is the case, then the Drawing Insert dialog will automatically use that file for the project data.
[PP]\ACPlantTools\PlantExpressTools\ProjectAndDrawingCreate\ProjectConfiguratorData_*.xlsx

In this second example the file has the following content:
If you now start the insertion process you will recognize, that the Configuration File is filled out.
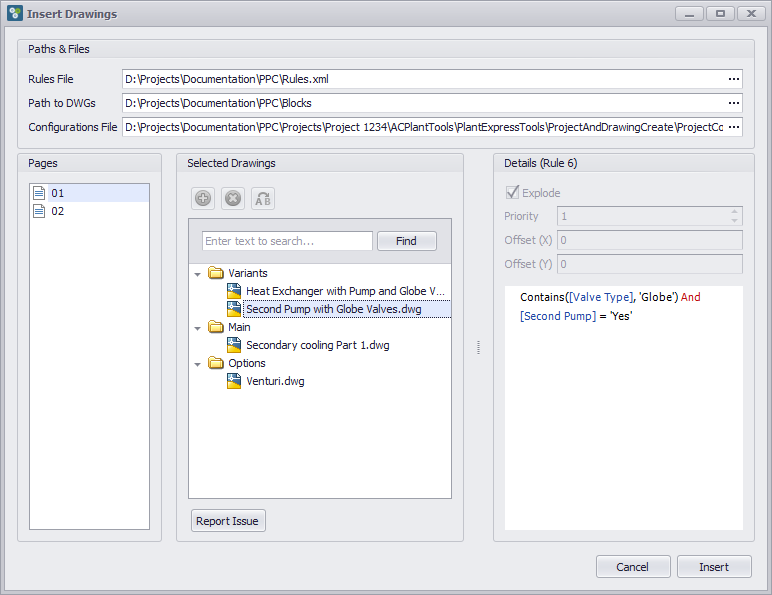
Now let's look at the Details box in the dialog. We click on the first block and see the name of the rule "Rule 2" and everything greyed out. This is because the "Allow Edit" option is unchecked. Hence the user cannot make any changes. However, all the options like Explore, Priority and Offsets can be seen. Also the expression of the rule.
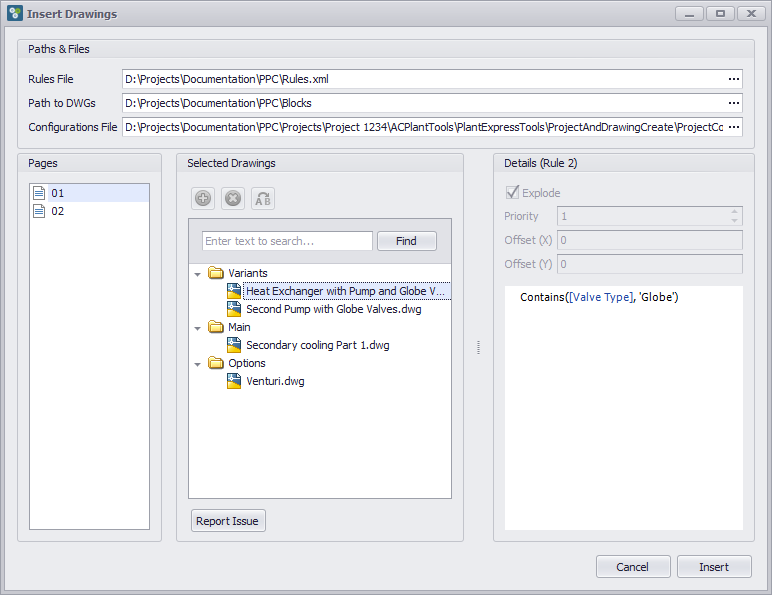
The same of the next block.
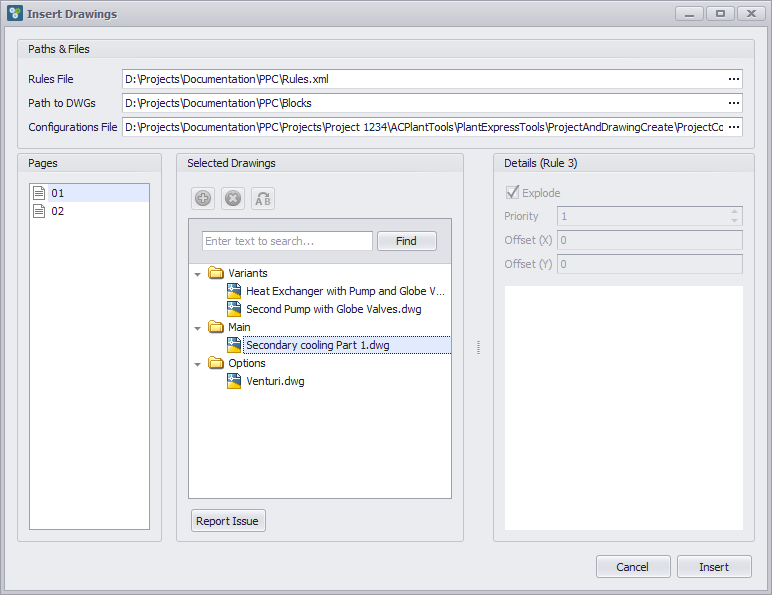
The third block didn't have a rule expression.
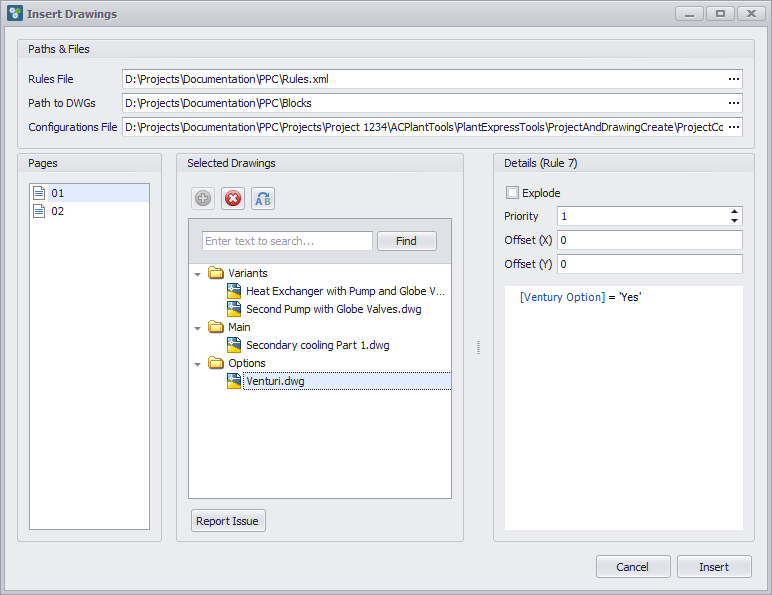
For the Venturi block we see that we can make changes to the details. The expression itself cannot be changed though.
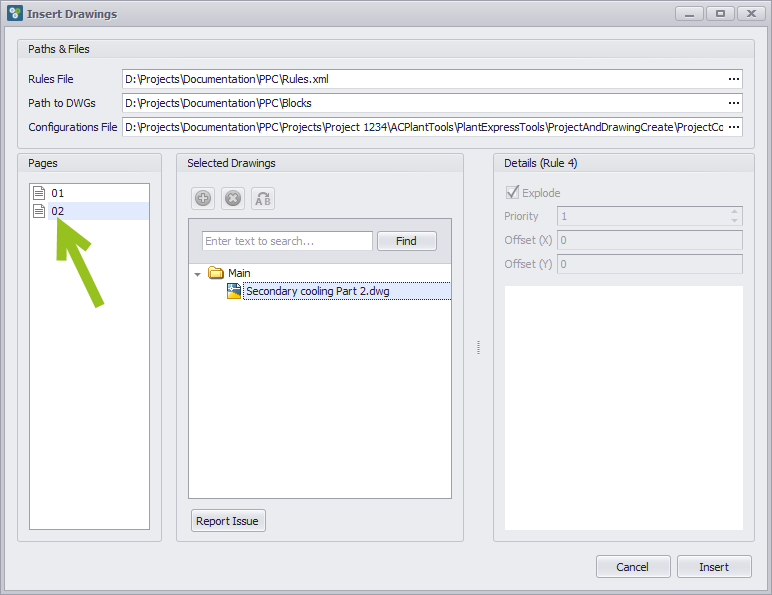
On sheet 02 we see one block being inserted.
Now we click on "Insert". As mentioned before, make sure, that all drawings are closed.
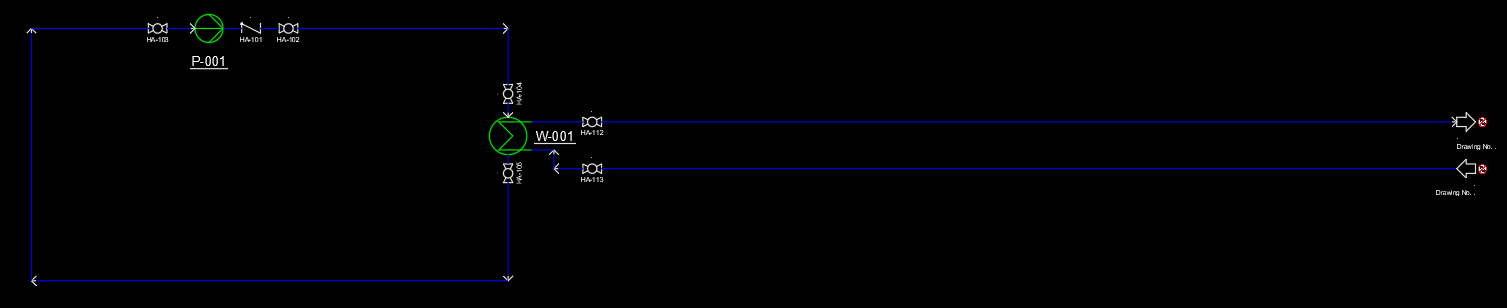
We see the one block inserted in drawing PID 002 (sheet 02).

Then we toggle over to drawing PID 001 (sheet 01).
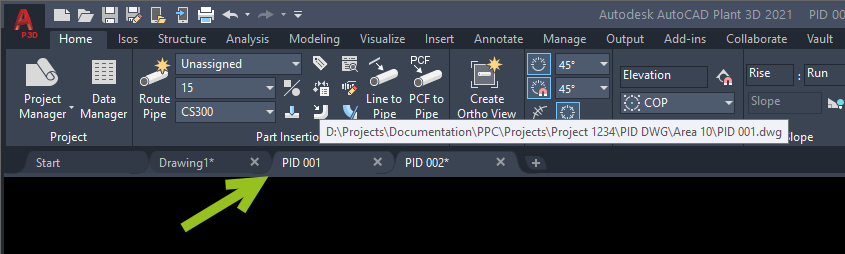
Now the function will insert the blocks for sheet 01.
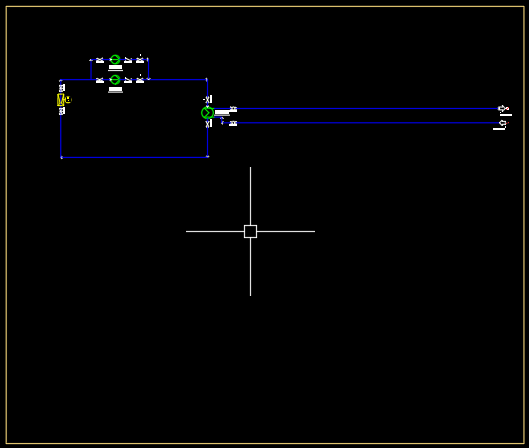
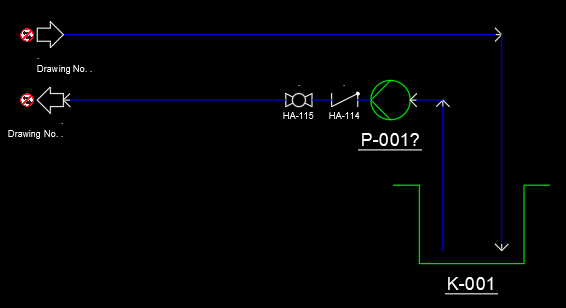
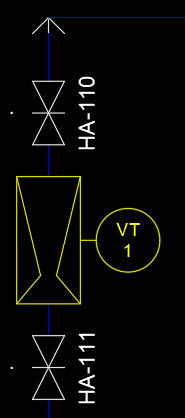
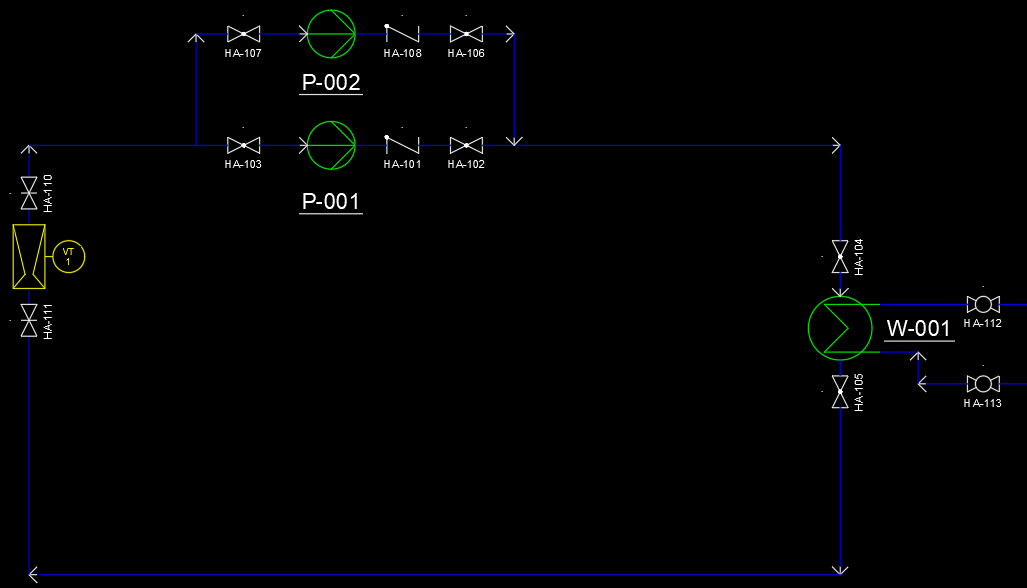
If we zoom onto the Venturi block we see that the Pipe Line Segment isn't properly "broken-up".
Typically you would have enabled explode also for the Venturi. Since it has priority 2 it would be inserted after the main block and then exploded. But it looks that sometimes Plant 3D doesn't process this properly. Therefore I didn't use explode.
However, if we now manually explode the Venturi block, the Pipe Line Segment looks as it should.
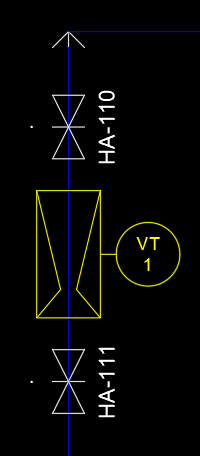
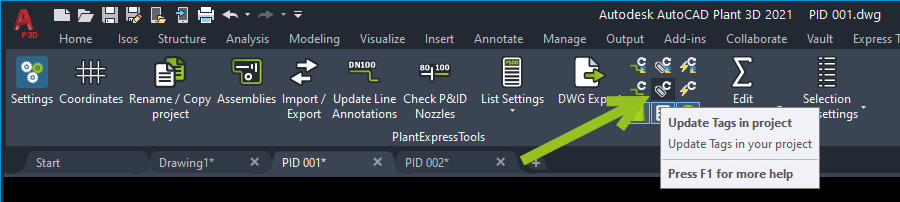
While inserting the Tags may show a ? at the end. This can often be resolved by updating the Tags with the function of PlantExpressTools. You can update Tags in drawing or project.
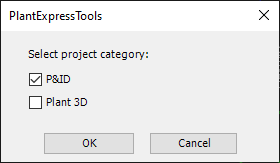
If you update Tags in drawing, you will be asked whether to update Tags in P&ID or 3D.
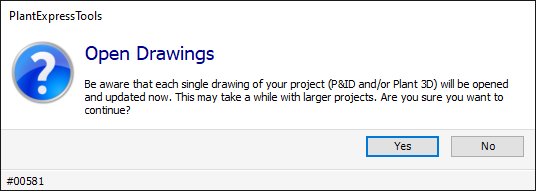
Since this may take a while in bigger projects you are shown a warning where you can cancel if you have doubts.
You get the result window which shows you the before and after values.
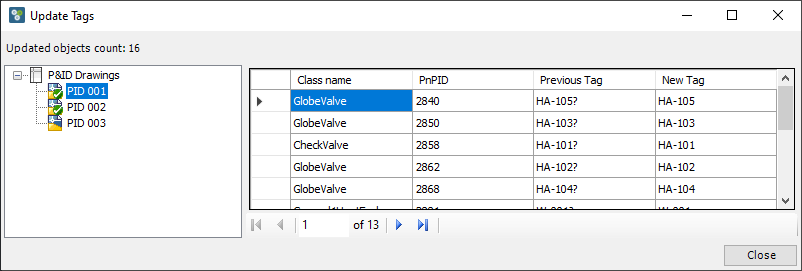
Now the Tags look correct.
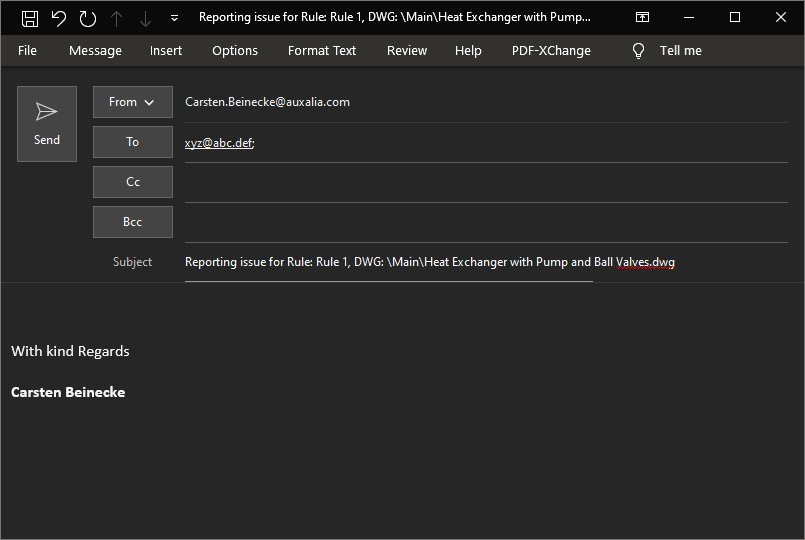
If the user who inserts the blocks is not the person who defined the rules, the user can "Report an Issue".
Make sure that the email is set in the Rules.xml.
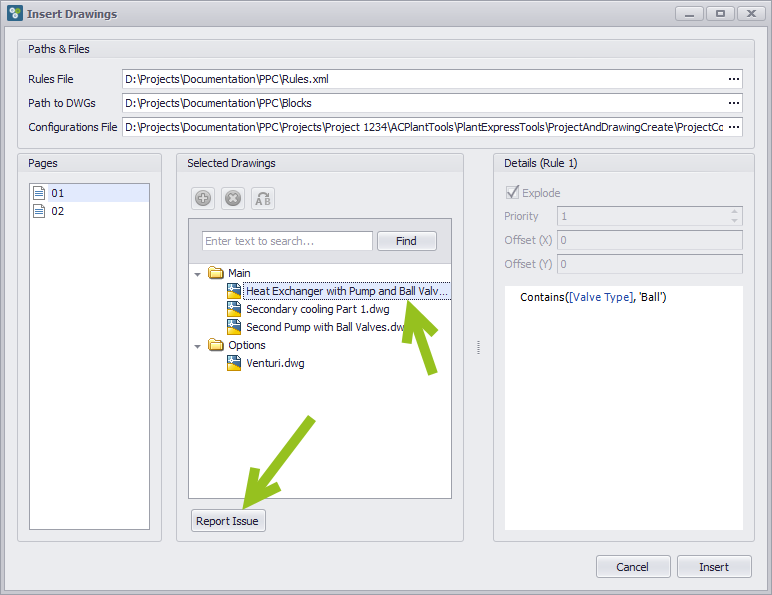
This will automatically open a new email with the email setup in the Rules.xml and the rule name and block path and name. You can then type in your message to your colleague and state your issue.