|
<< Click to Display Table of Contents >> Activation and Setup |
  
|
|
<< Click to Display Table of Contents >> Activation and Setup |
|
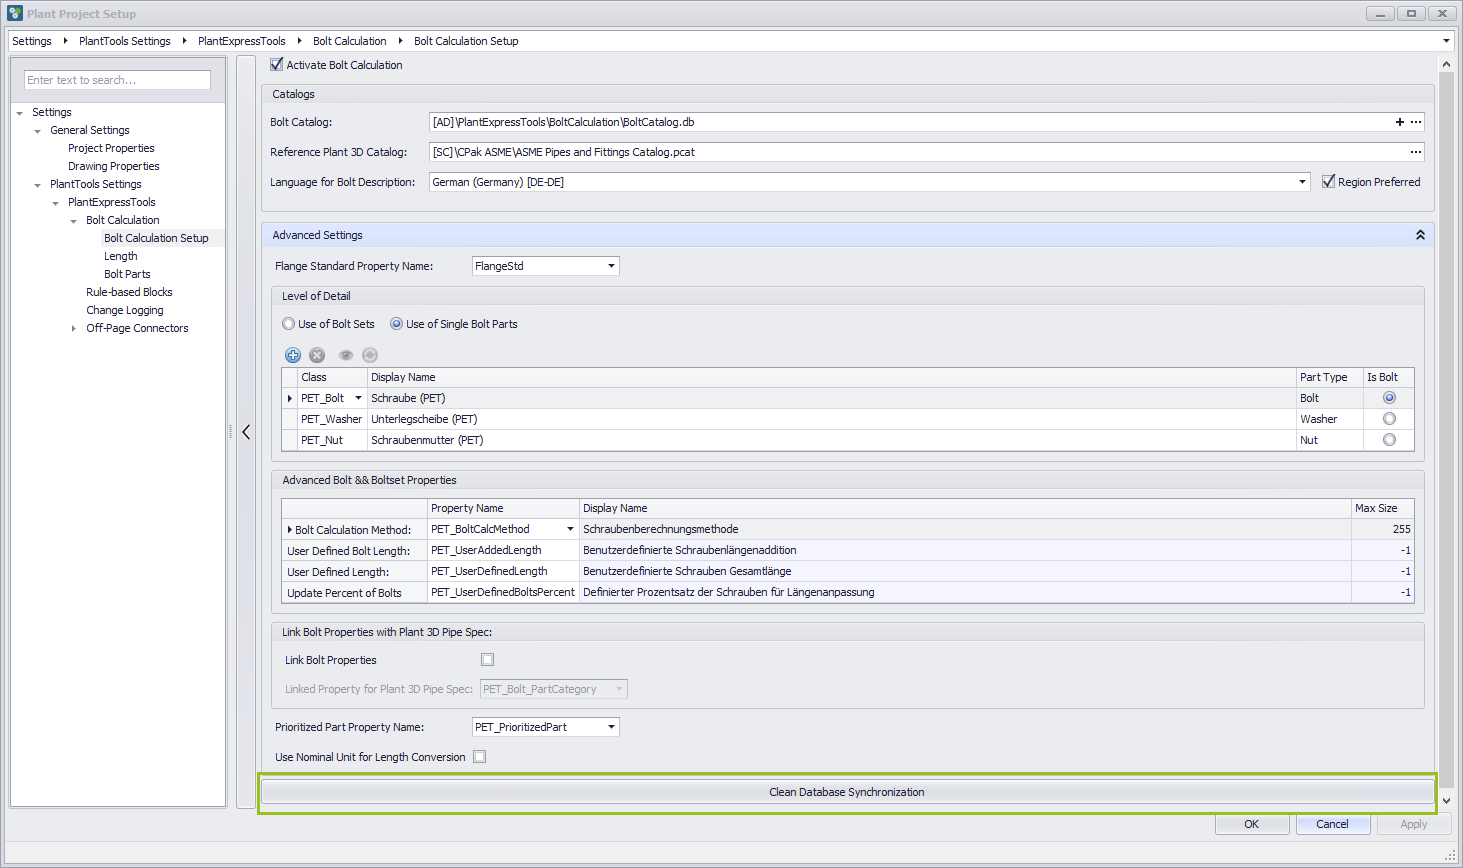
Start dialog box for the setup of the bolt calculation
In order to make necessary settings for the bolt calculation, all the fields required for further work are filled in this mask.The Activate Bolt Calculation toggle field must be checked for the fields to be available, otherwise they are greyed out.

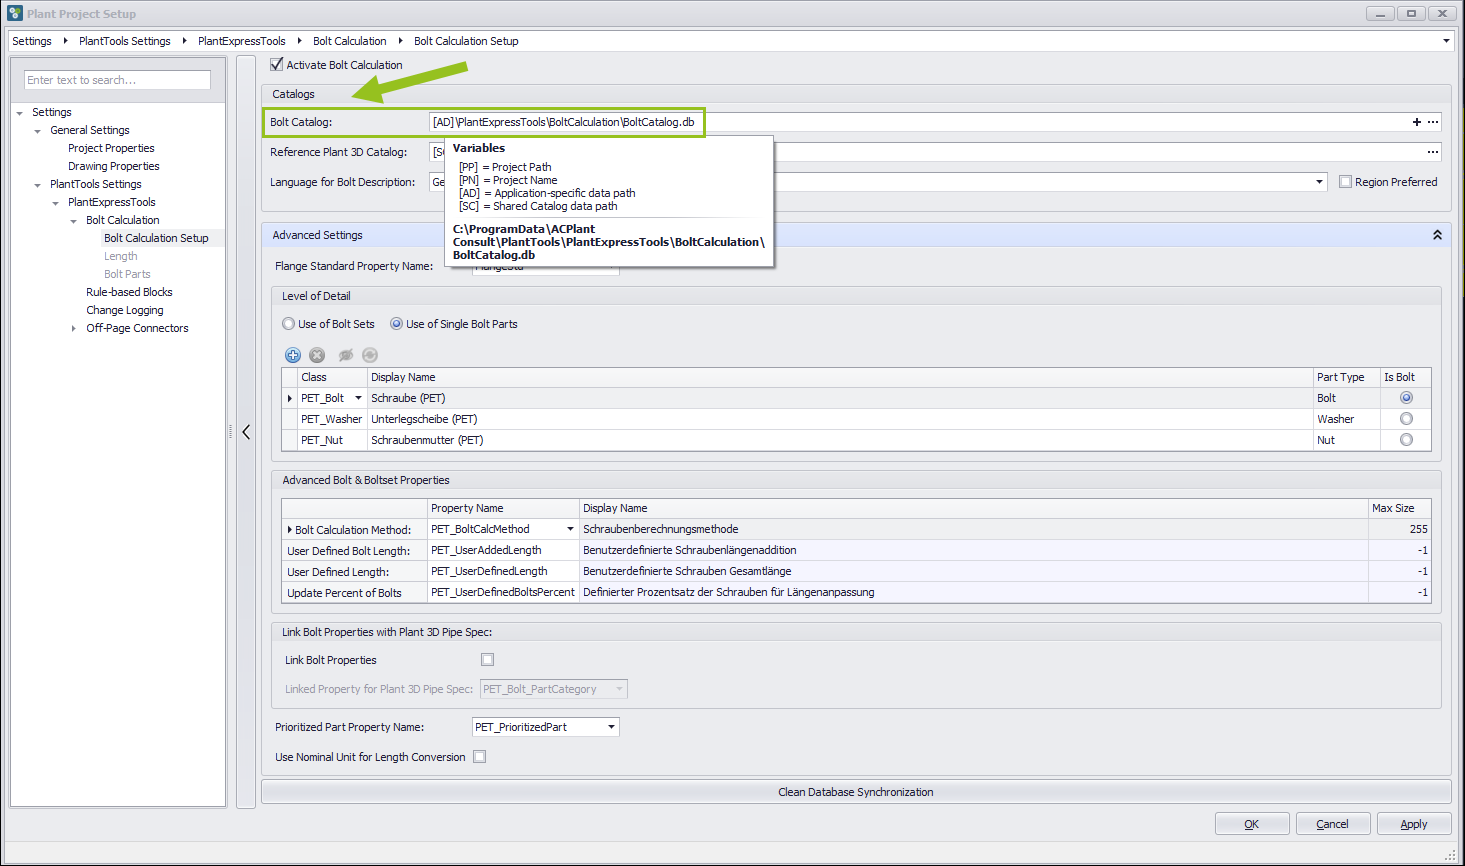
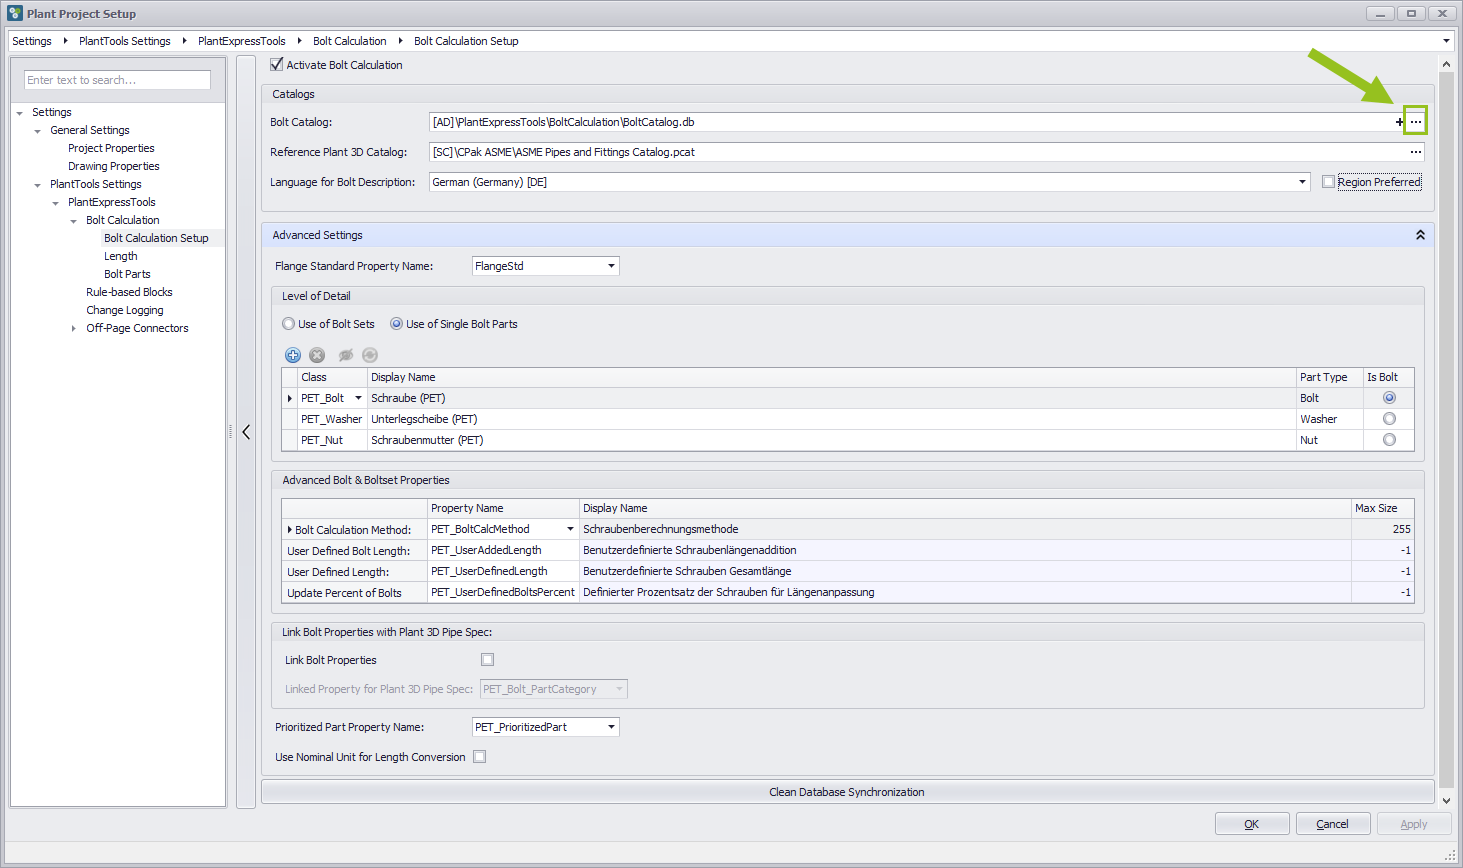
Setting path for Bolt Catalog
Location of the Bolt Catalog as application specific data path with is installed in the local folder of the plant tools installation. There are four vabiables in the tooltips: [AD] application specific data path, [PP] Project Path, [PN] Poject name and [SC] shaed catalog data path.
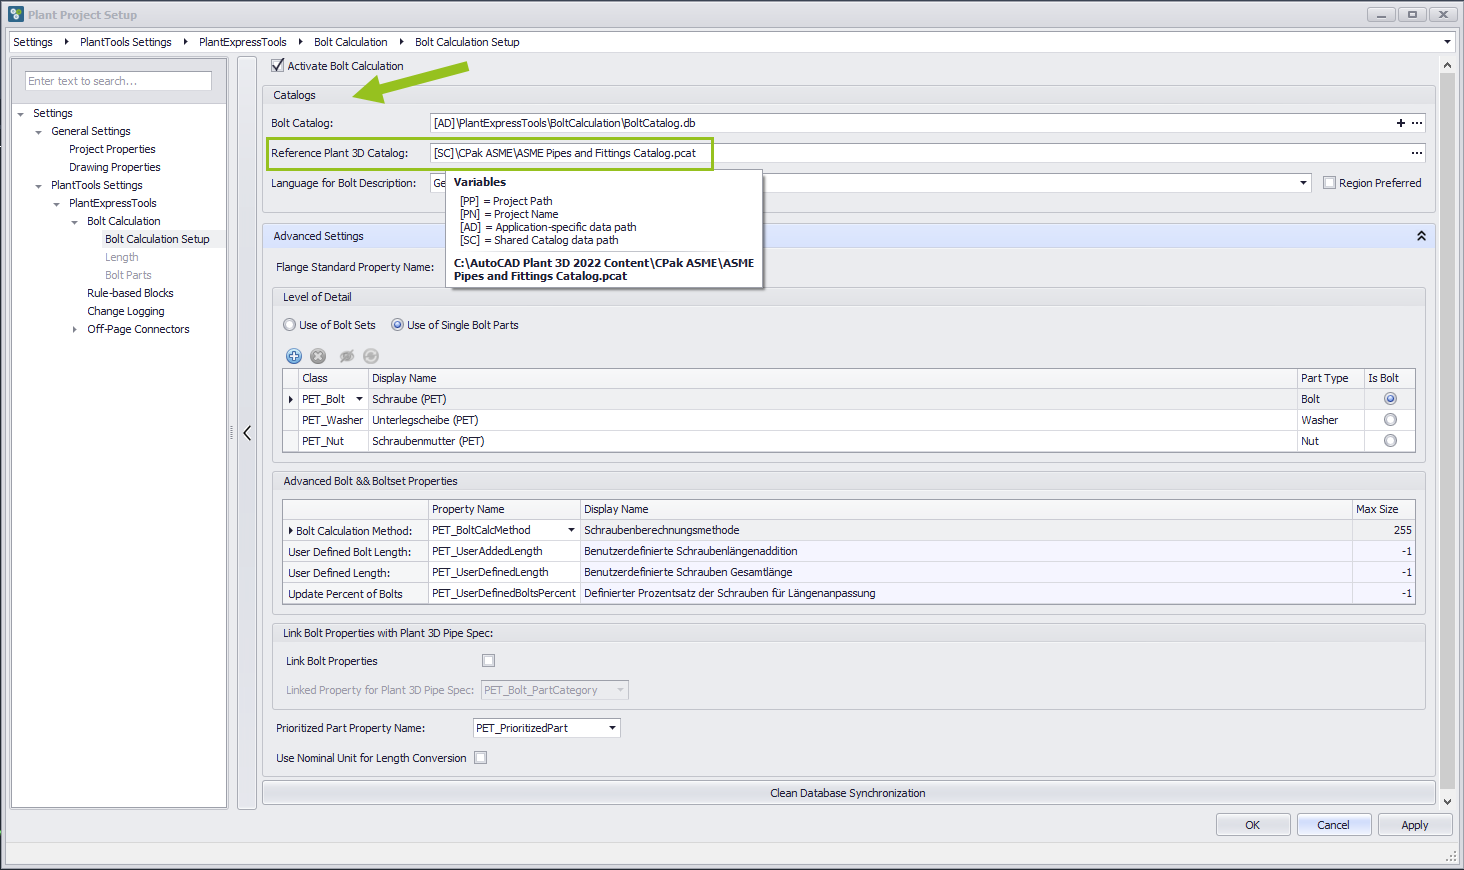
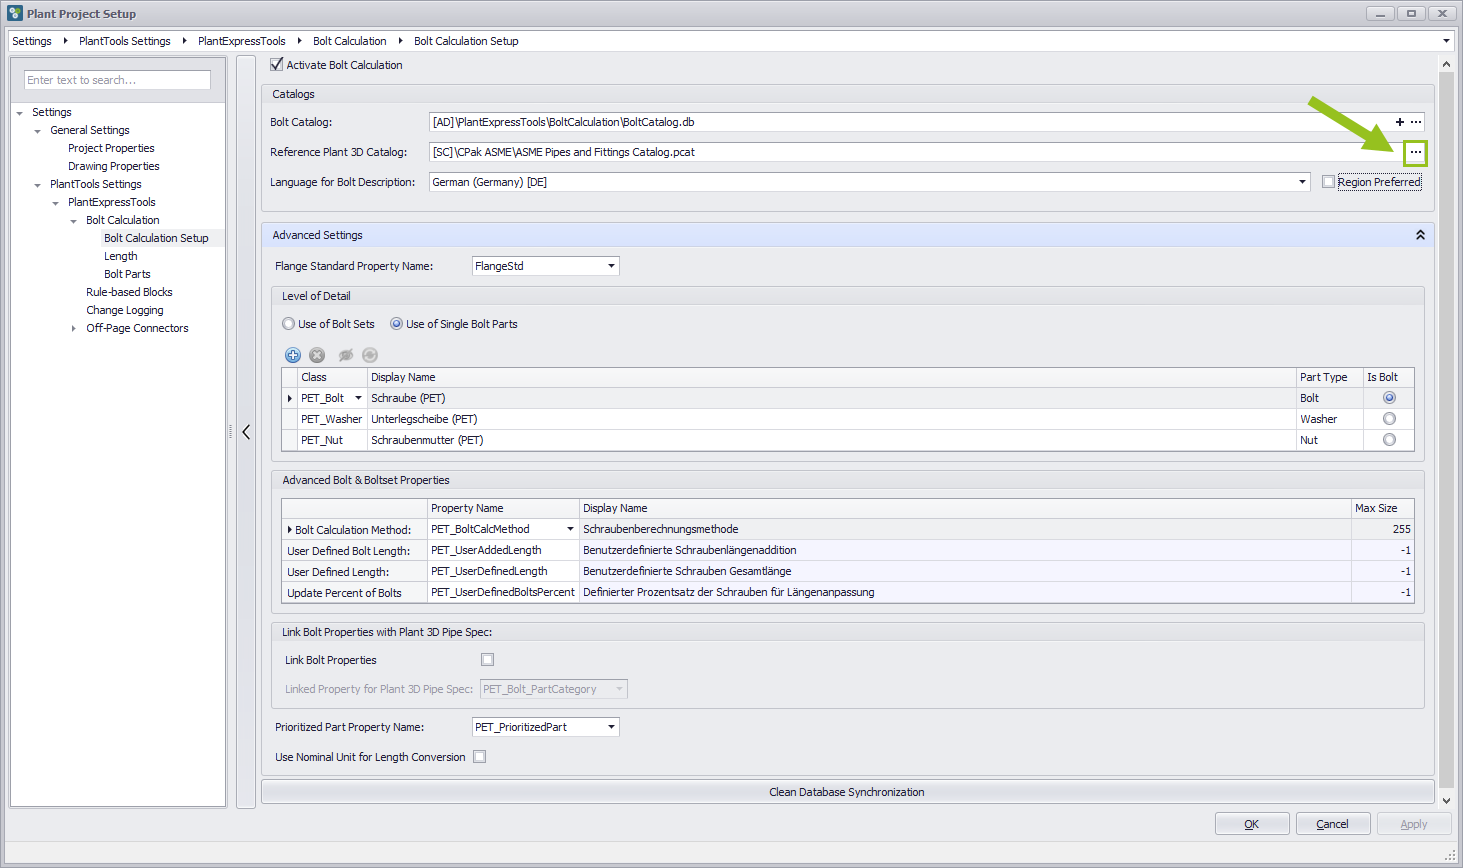
Setting path for Reference Plant 3D Catalog
Location of the Reference Catalog. Can changed by pressing the select button and choose the corresponding path.
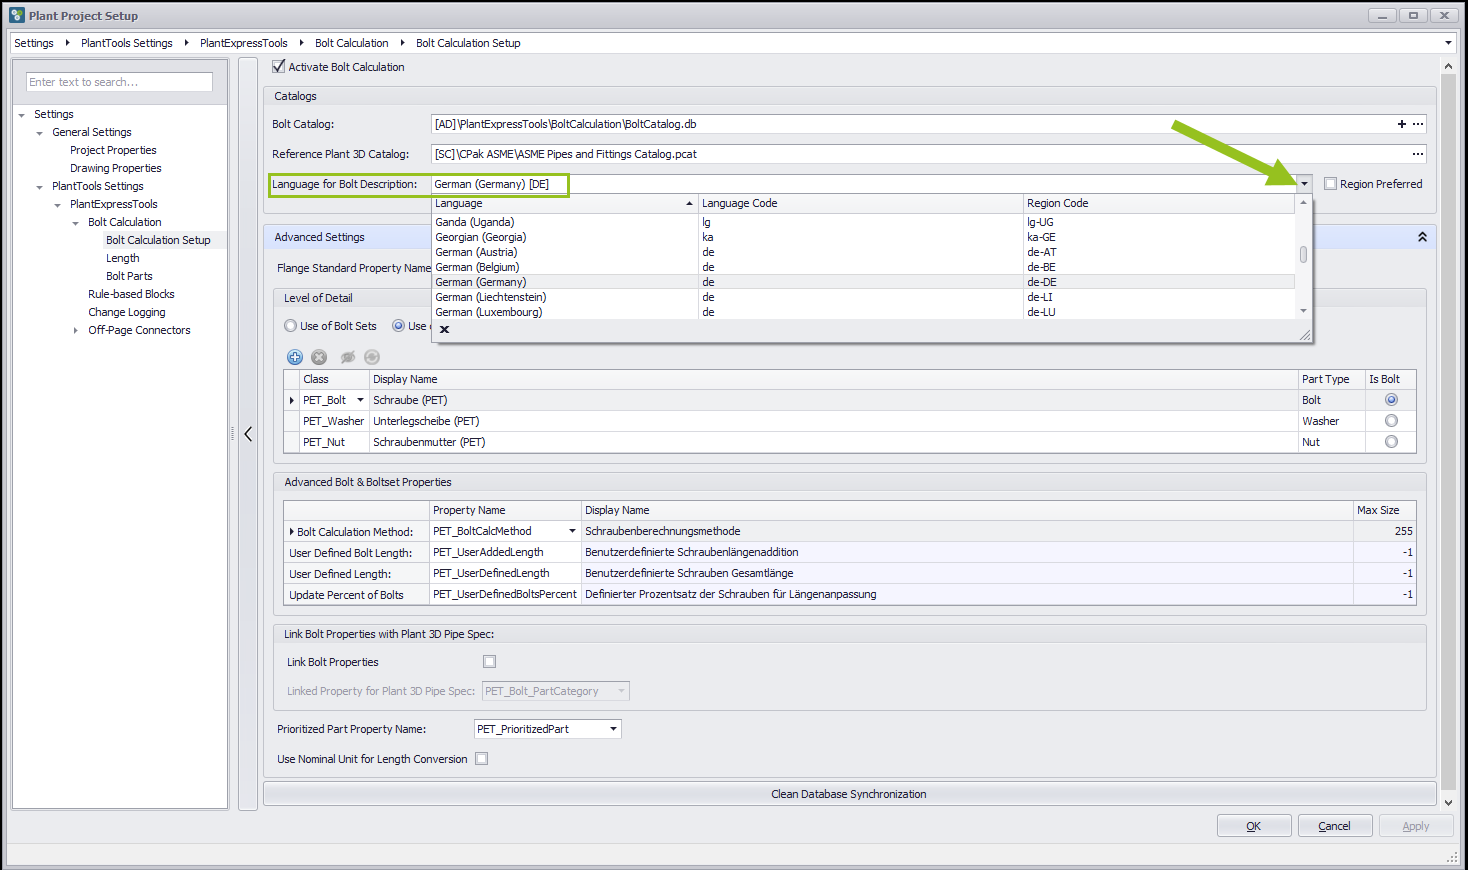
Setting Language for Bolt Calculation
In order to use the language you need, click on the arrow on the right. You can now select from the drop down menu the desired language. To filter the languages write the first letters of the desired language.
Changing current Path and Location for Bolt Catalog data source file
The location of the Reference Catalog can be changed by pressing the select button and choose the file in the corresponding path.
Changing current Path and Location Reference Plant 3D Catalog data source file
The location of the Reference Plant 3D Catalog can be changed by pressing the select button and choose the file in the corresponding path.
Copy selected bolt catalog to current active project
To copy the default Bolt Catalog to the current project press the [+] button. The status changed from [AD] to [PP].

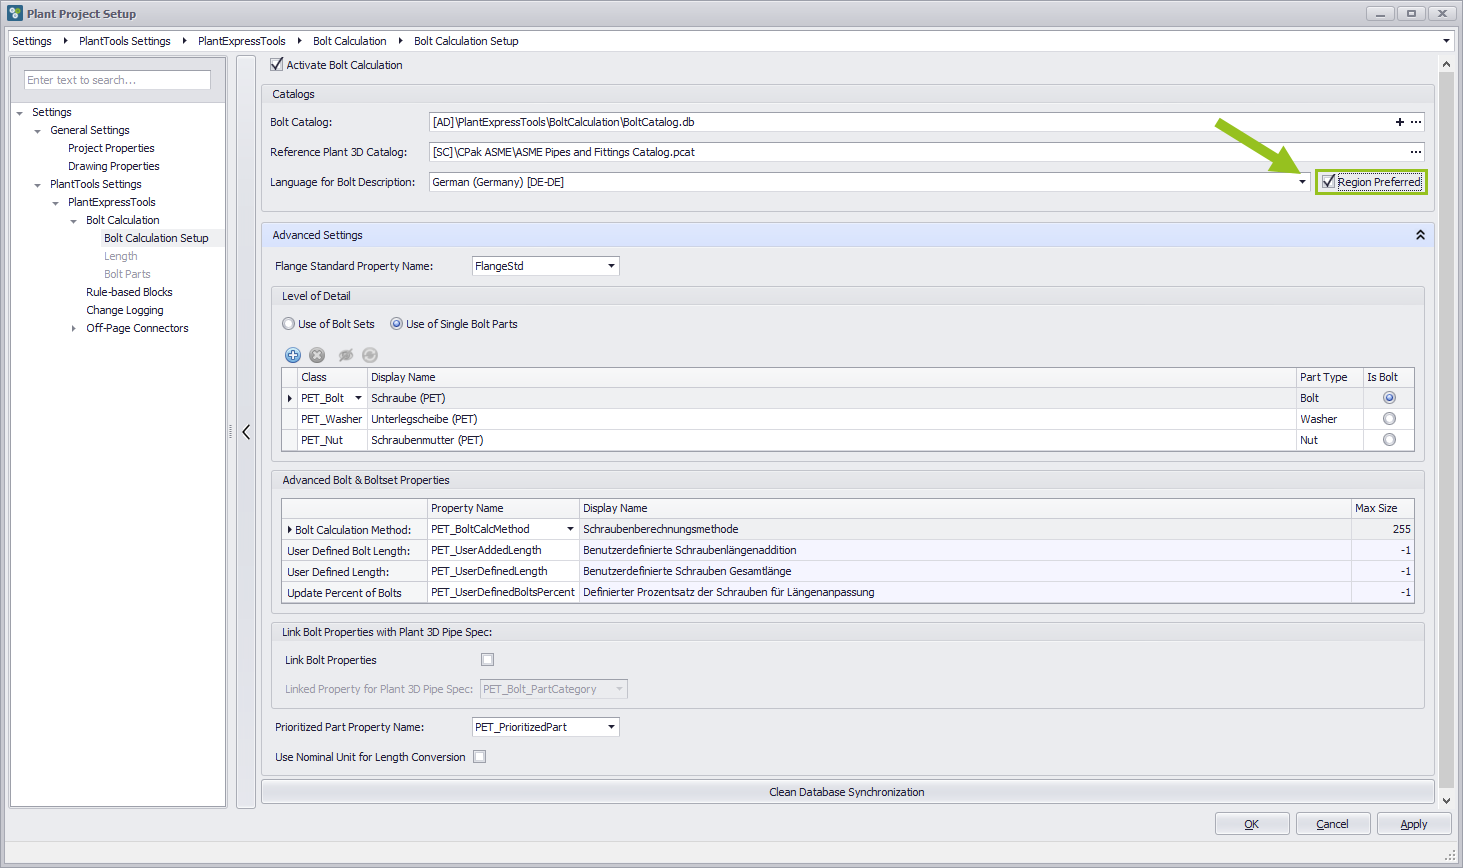
Set Region preferred for die current language
This is important for the descriptions of the Bolts to use the country and region specific language. This is necessary when there are different terms for a technical concept in different regions of a language.
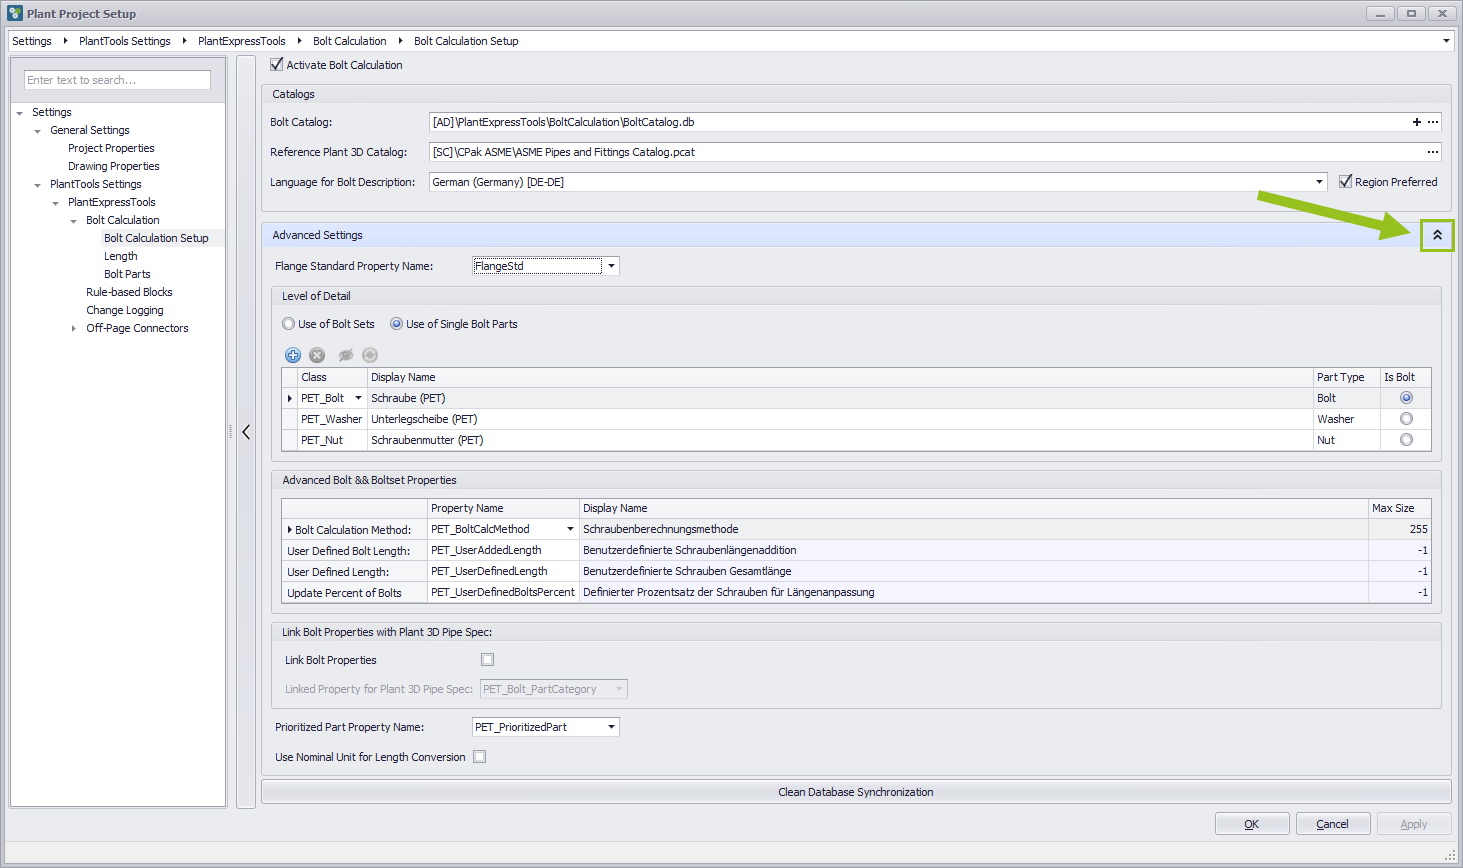
Advanced settings
Normally the advanced settings are not shown. By clicking the drop down arrow, the categories for entering the desired advanced settings will open up.
Changing flange standard property name
Normally, the set preset here is used. However, if the flange standard is already being used elsewhere, another entry can be selected via the drop-down menu.
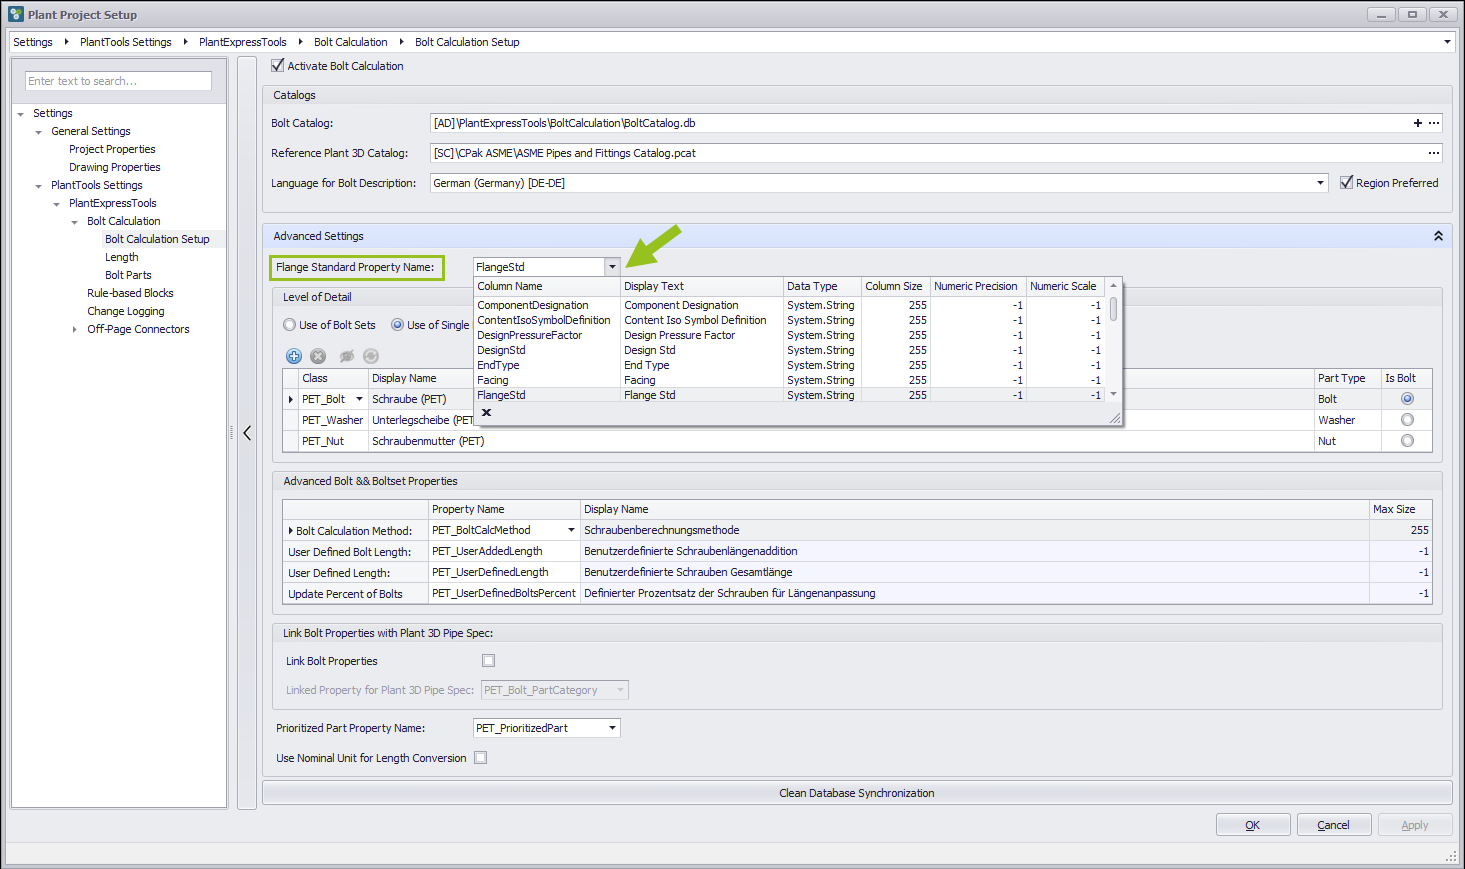
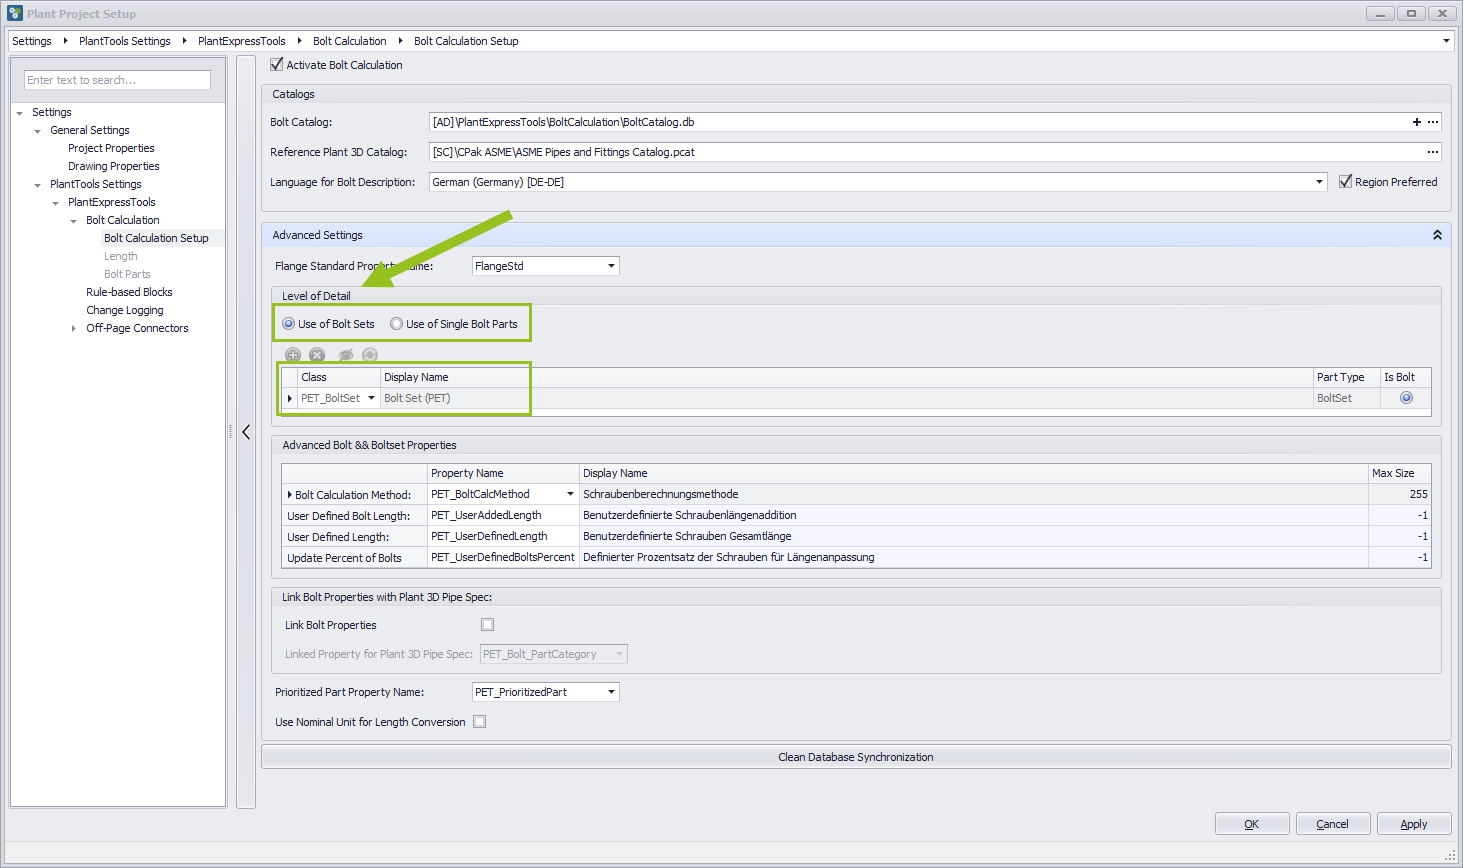
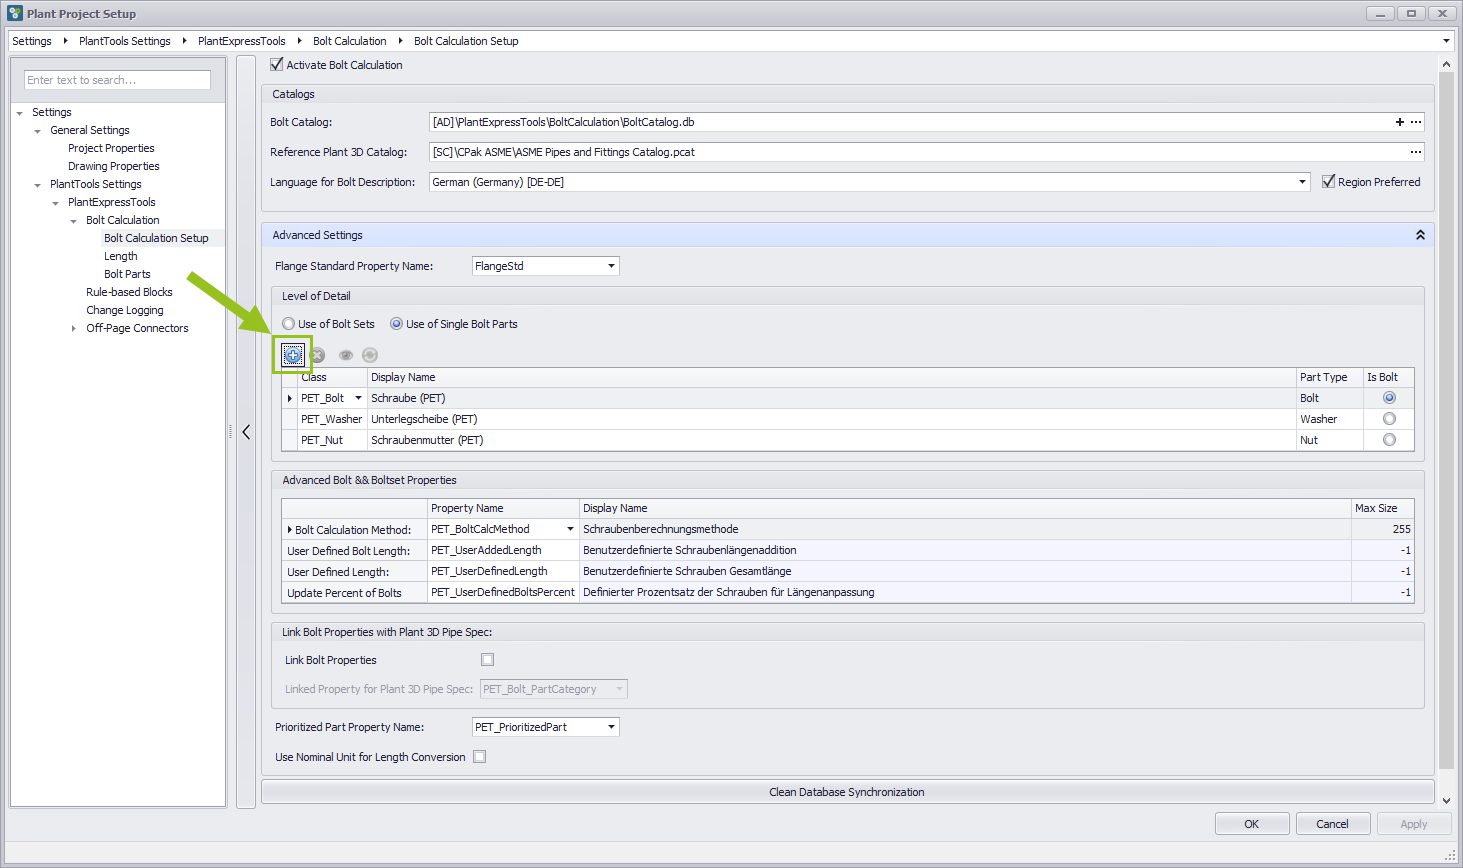
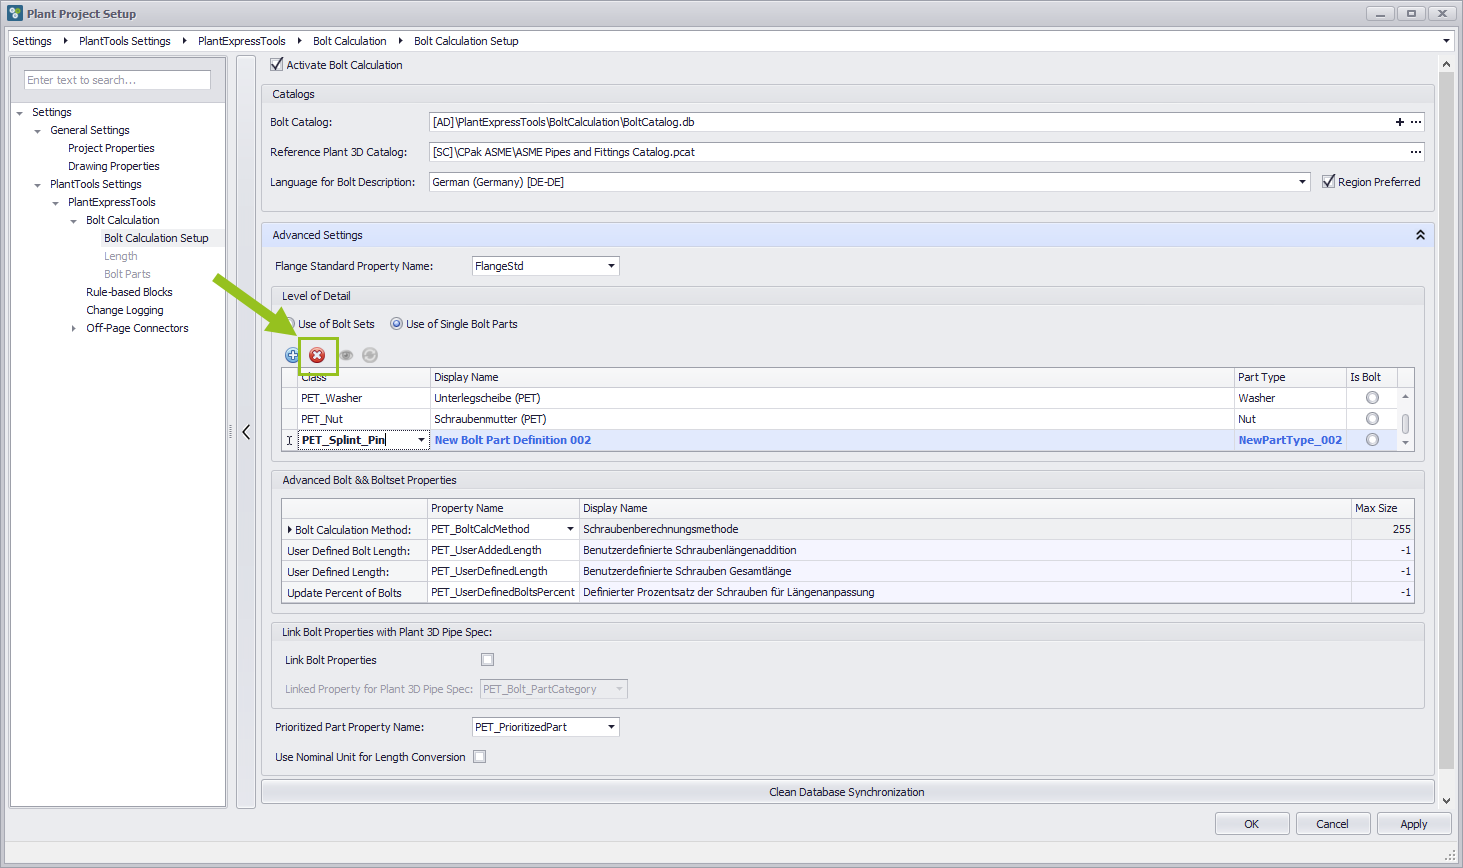
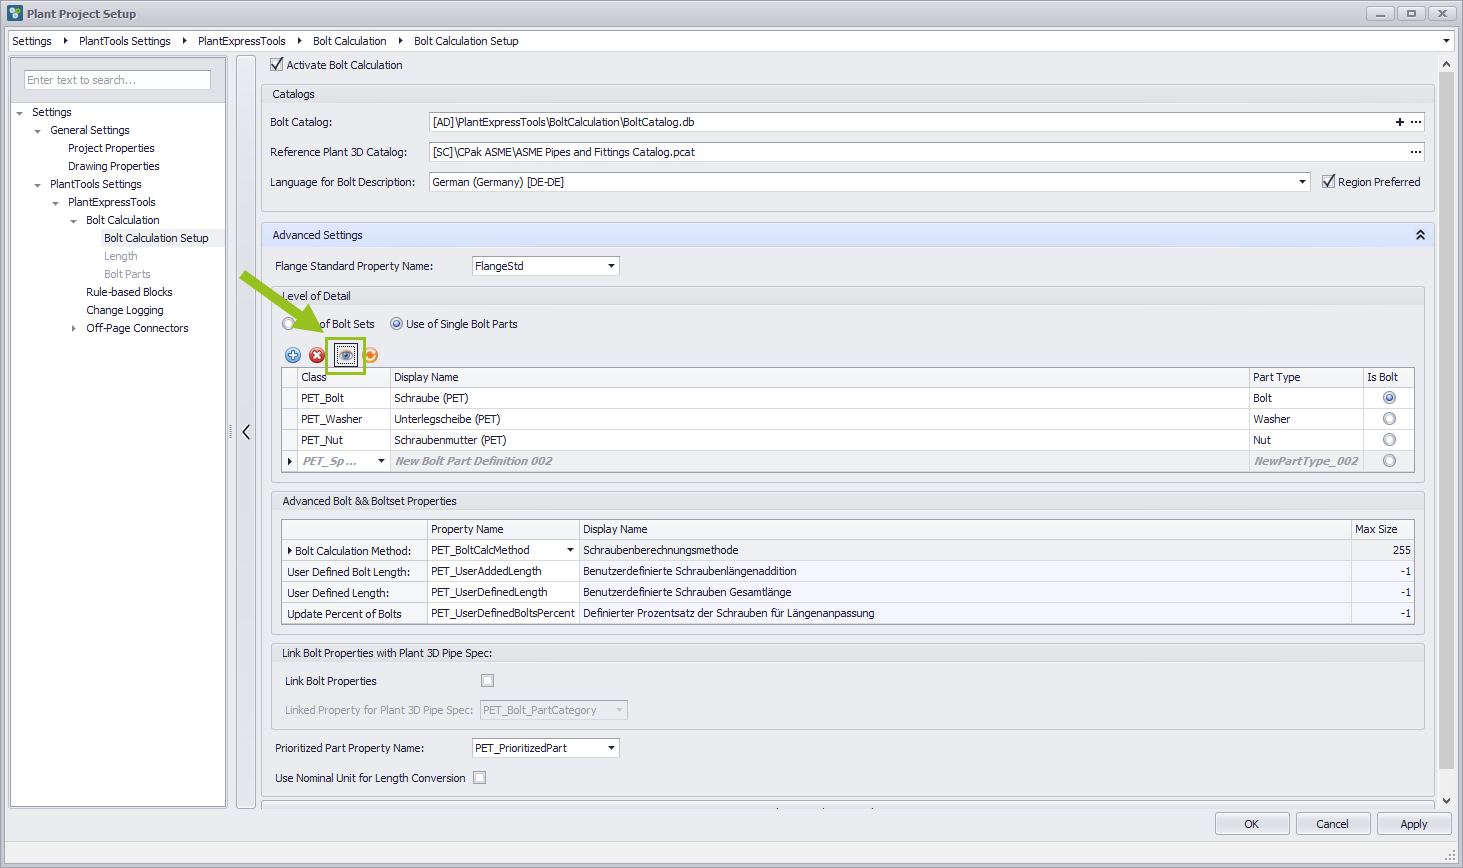
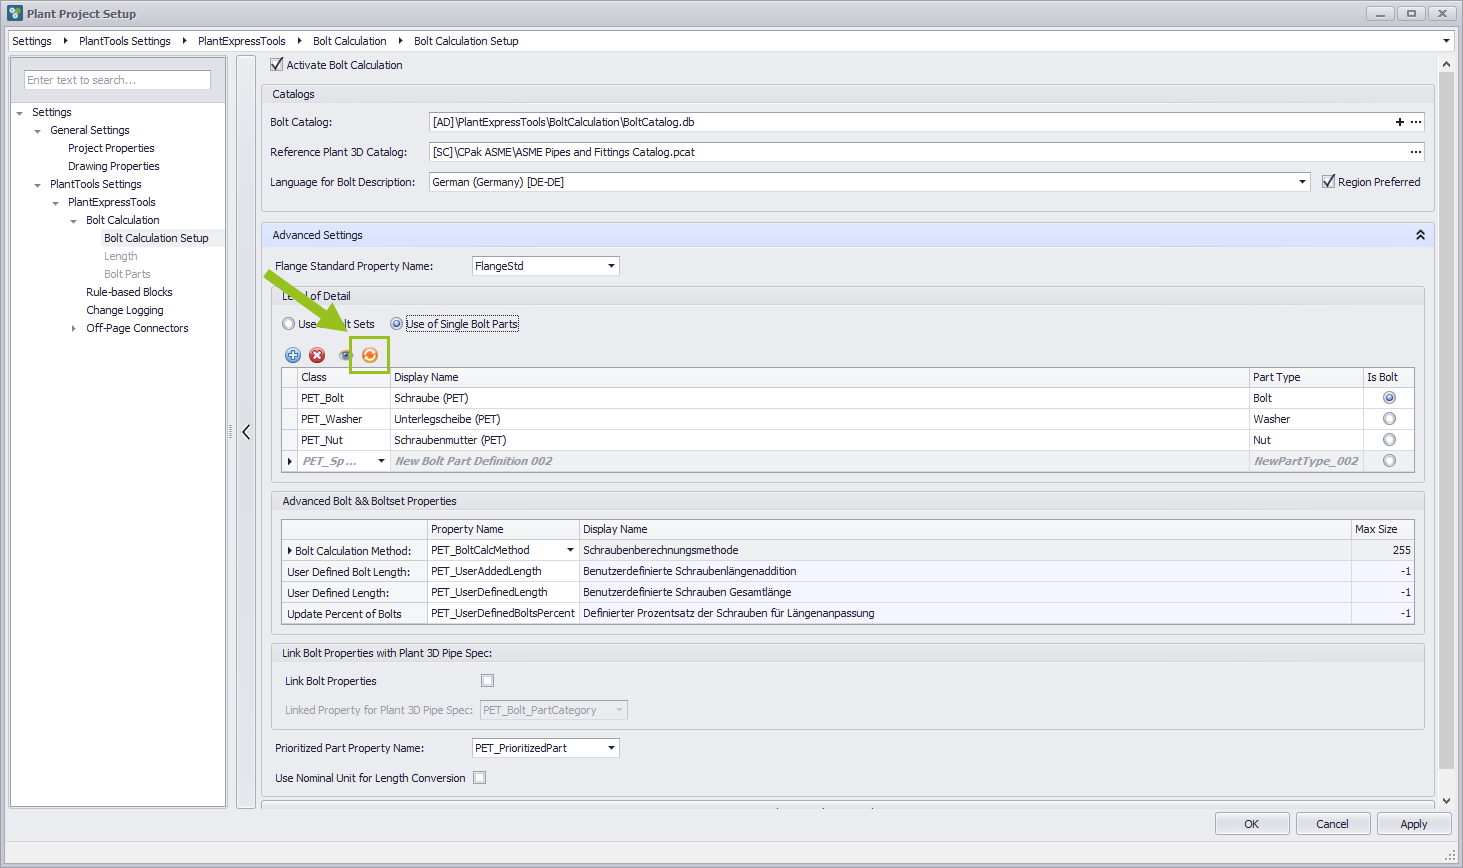
Choosing the level of detail
In the Level of Detail section you can decide whether to use bolt sets or single bolt parts. If the check box is set to "Use of Bolt Sets", only the entry PET_BoltSet is visible in the list box below. The list consists of the columns Class, Display Name, Part type and a check box that the row is Bolt. Fields in the Class column are drop-down fields in which other special component categories can be selected. The text in the field in column 2 Display Name can be overwritten and replaced by an individual text. The field in column 3 "part type" is again a drop-down field. However, if "use of bolt sets" is selected, only bolt sets can be used.The four buttons at the bottom are greyed out and are therefore not available.
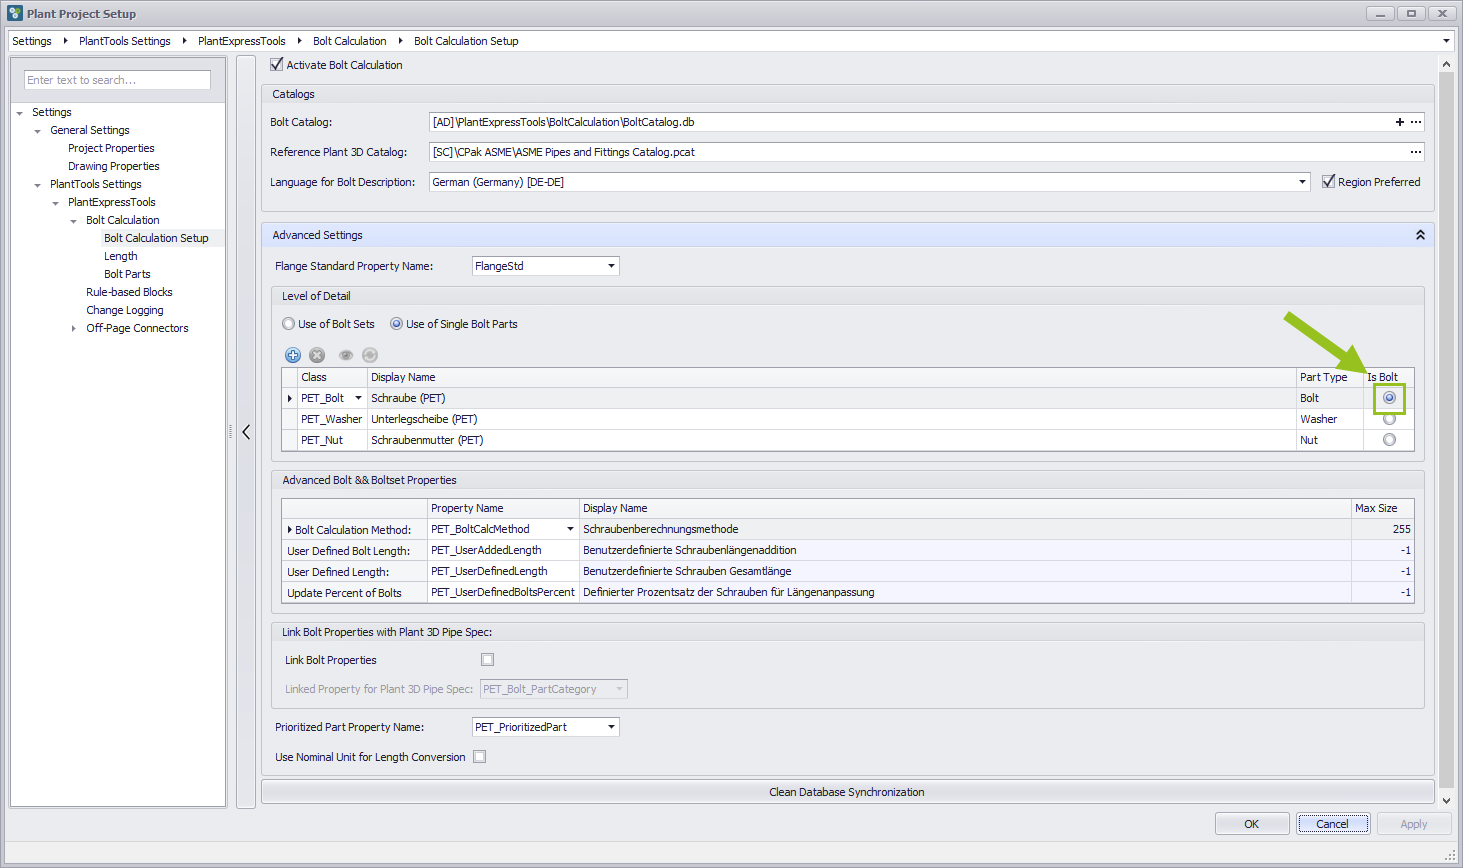
If the check box is set to "Use of single Bolt parts", three lines with PET_Bold, PET_Washer and PET_Nut parts will appear in the lower list. Fields in the Class column are drop-down fields in which other special component categories can be selected. The text in the field in column 2 Display Name can be overwritten and replaced by an individual text. The field in column 3 "part type" is again a drop-down field. In column 3 "part type" the corresponding part Bolt, Washer, Nut and AddOn can be selected via the drop down menu. The last column is used to determine what the component "Bolt" is.

Add a new part type
If you need an additional class, press the [+] button to get a line in the list below. This is done when you need another part, for example, to connect the flanges. The part type can be selected from the drop down menu. Also a new entry can be written.
Delete the selected part type
Press the delete button to delete an existing line of the section "Use of single parts". The corresponding line to be deleted must be marked. The marked entry is now temporarily deleted and will no longer be shown. The temporarily deleted entry is only permanently deleted when you press the apply button in the lower right corner.
Show/hide part type marked for deletion
Deleted lines are removed from the list and are no longer visible. However, if deleted entries are to be shown again, the Show/Hide button should be pressed. Previously deleted entries are showed grayed out.
Restore part type marked for deletion
To restore the grayed out and previously deleted entries, the restore part type button should be pressed. The entries are now available again.
Is bolt
To see to which heading the bolt parts refer, the checkbox shows the checkmark.
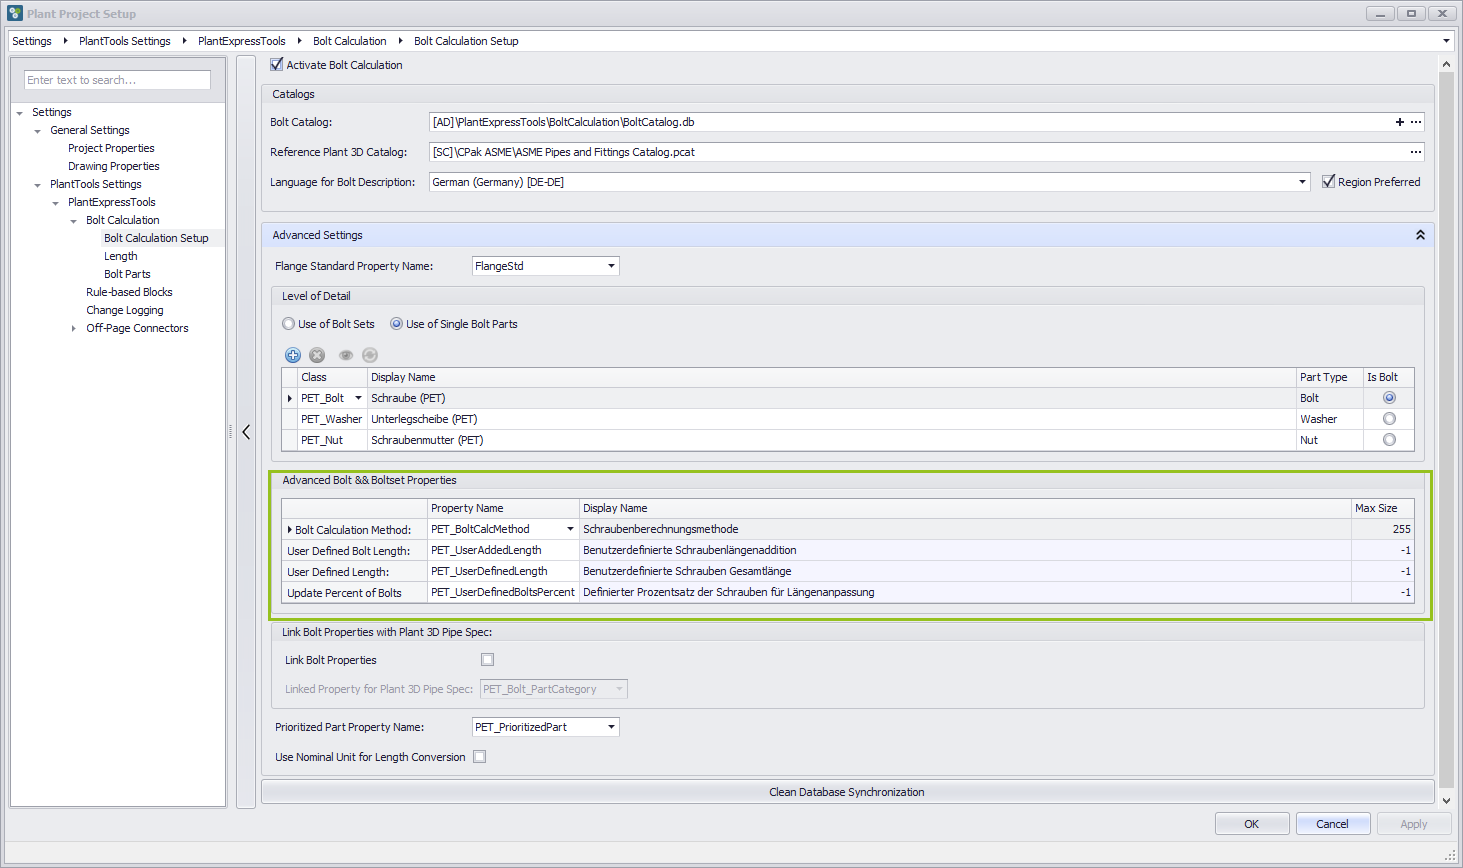
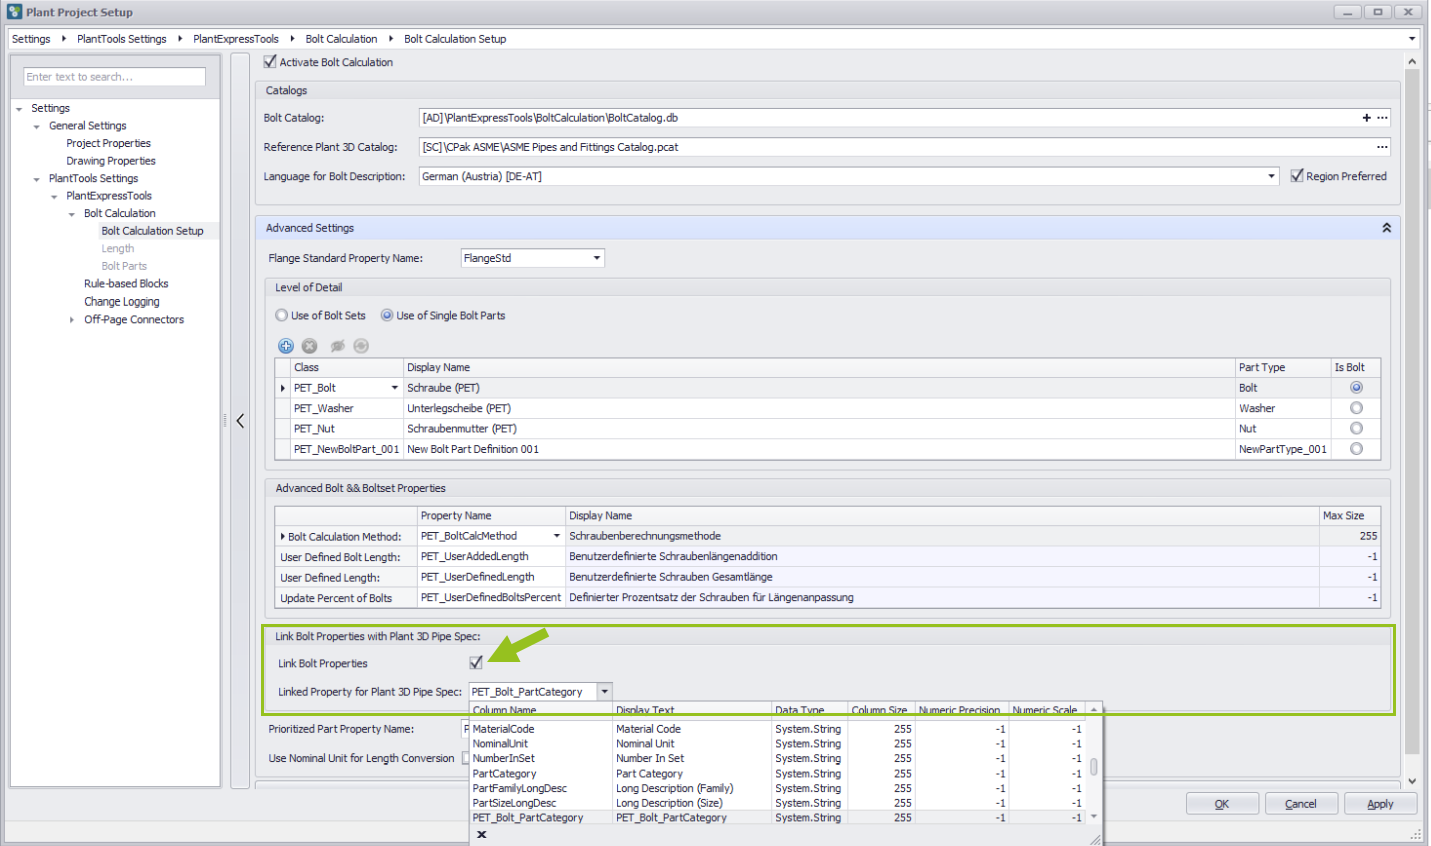
Advanced bolt & bolt set properties
In the lines below there are more properties for Bolt and Bolt Sets which are used for system internal management of information. The most important is the first line. There is stored with which method Plant3D determines the lengths of the bolts.
Link bolt properties with Plant 3D pipe spec
To be able to use the Link Bolt Properties, the toggle must be checked. Only then can the drop-down menu "Linked Properties for Plant 3D Pipe Spec be used.
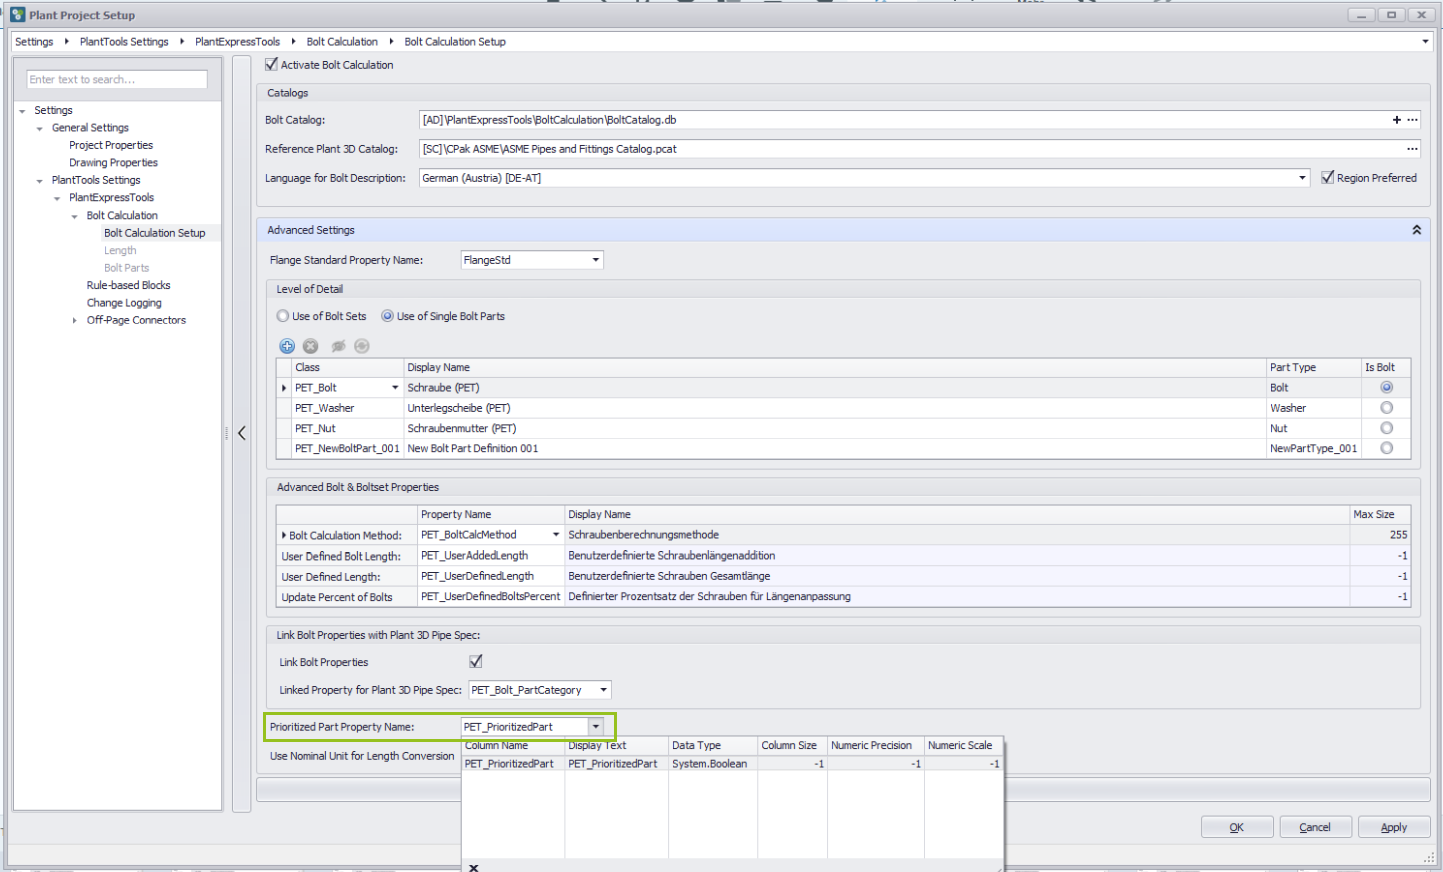
???
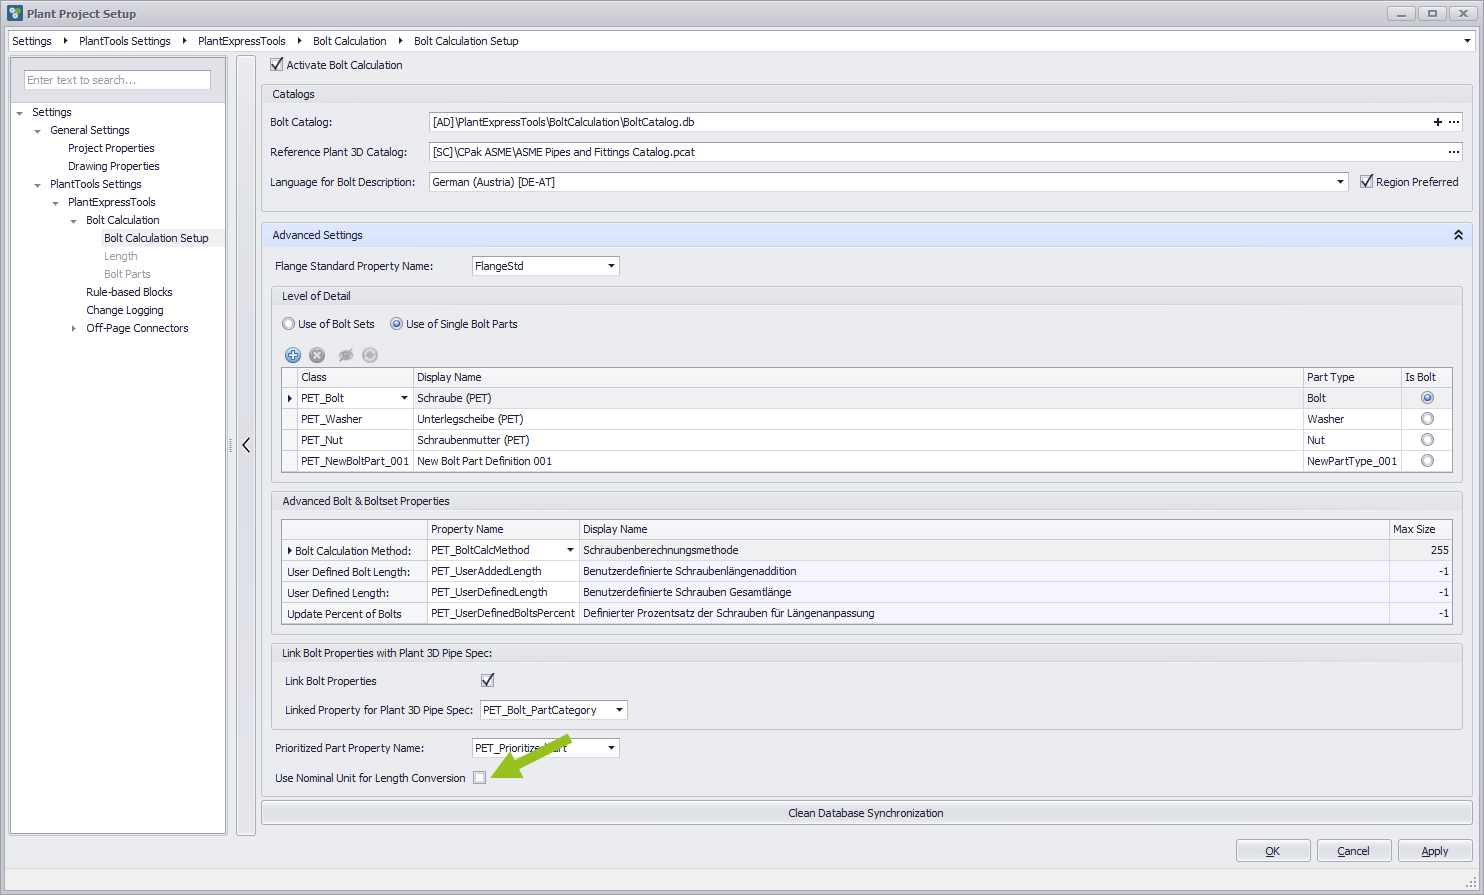
If block based content has different definitions at nominal unit an length unit use nominal unit for length value conversion to project units. Normally nominal unit an length unit are equal and length unit could only get changed editing the catalog/pipe spec database itselfs.
Clean database synchronization