|
<< Click to Display Table of Contents >> Create a Revision Table with PlantLink |
  
|
|
<< Click to Display Table of Contents >> Create a Revision Table with PlantLink |
|
This chapter describes how you can create a revision table. It is a combination of the List function, PlantProjectManager's Version/Revision function and PlantLink.
The workflow shown in this chapter is supposed to be a work around until we have a dedicated function to create the Revision Tables automatically.
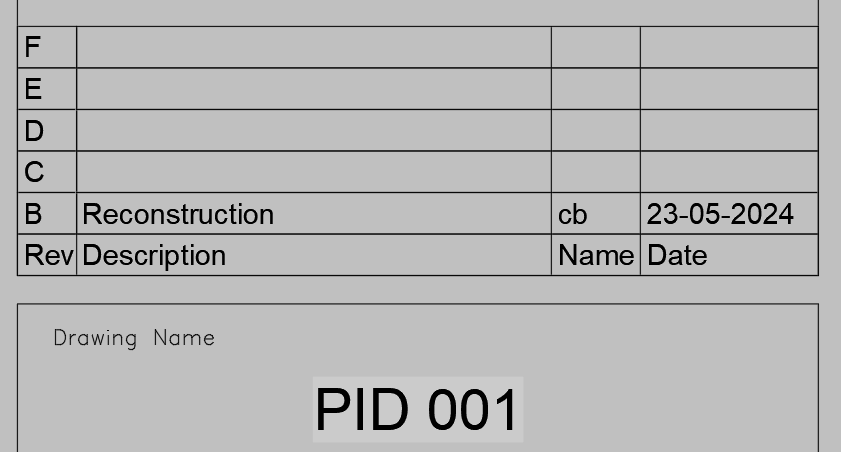
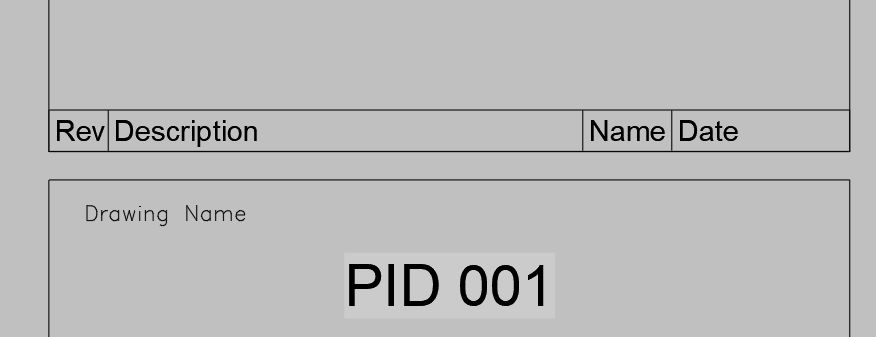
The end result we want to accomplish looks like this:
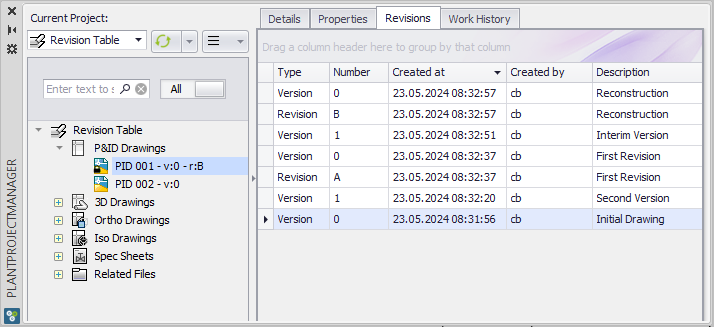
The basis for the table is the Version/Revision history managed by PlantProjectManager. For details, see: Activate Version/Revision.
The general approach is to create a symbol which will contains A, B, C and so on. This symbols will the get the revision data (date, name, description) from the table above. Finally, the List function will create the table for the revisions.
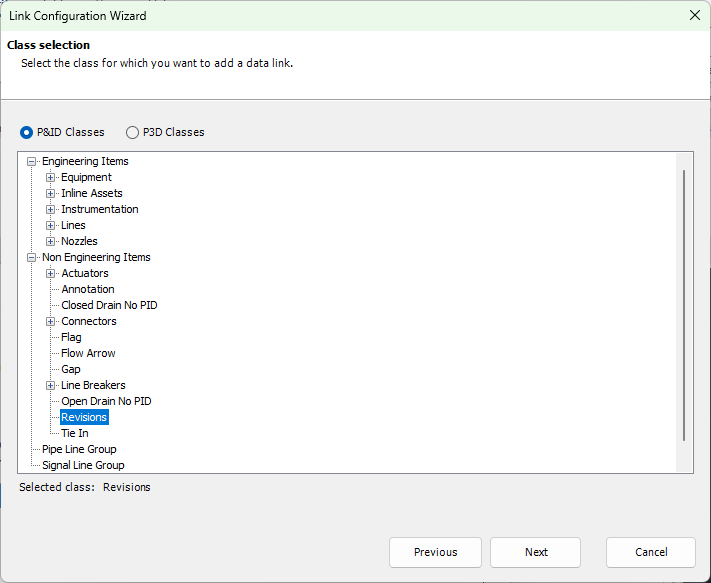
First we need to identify which class to use. It makes sense to have the class under the Non Engineering Items. If you want you can use PlantExpressTools' undocumented function AQAPETCREATECLASSES to create a class anywhere you want, because Project Setup doesn't allow to create a class under some classes.
If you use this option, you select the Non Engineering Items class and type in a Name for the class. In this case Revisions as a suggestion. If you don't type in a Display Name, the Display Name will be the Class Name. The Display Name can always be changed in Project Setup.
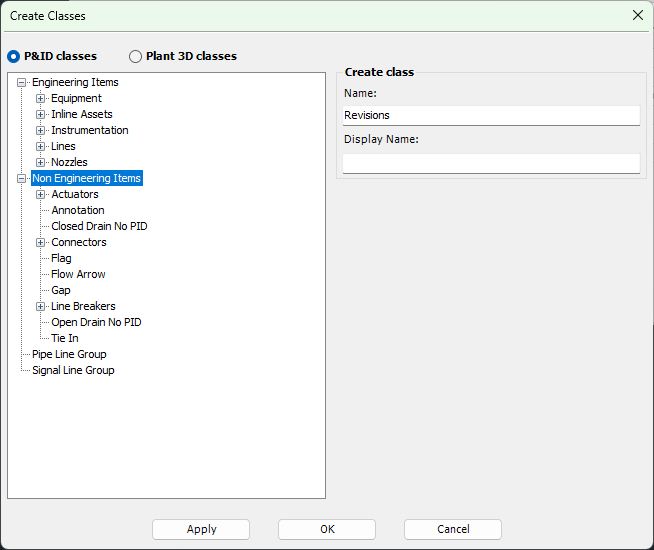
After clicking OK, the class will be created. You then create a symbol which will later be inserted as the first column in you template drawing.

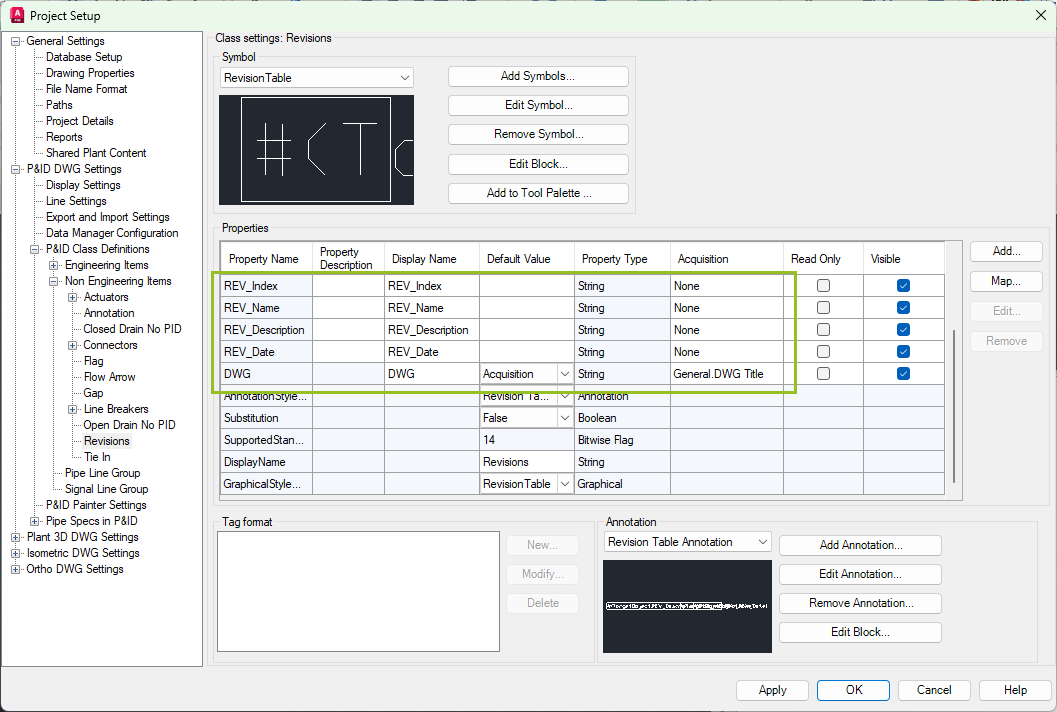
We also need 4 properties to store the data from the PlantProjectManager history database in the symbols. And one more property with an acquisition from the drawing title.
Make sure you add a Space as the Default Value for the Name, Description and Date properties. Otherwise you will later get the "." in the Annotations which you probably won't like.
The block of the symbol could look like this:
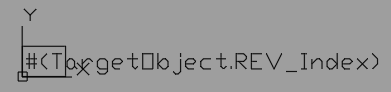
For the List function we also need an Annotation the List function will later insert.
The Revision Index will be shown by the Symbol itself and the remaining Description, Name and Date will be shown through the Annotation.

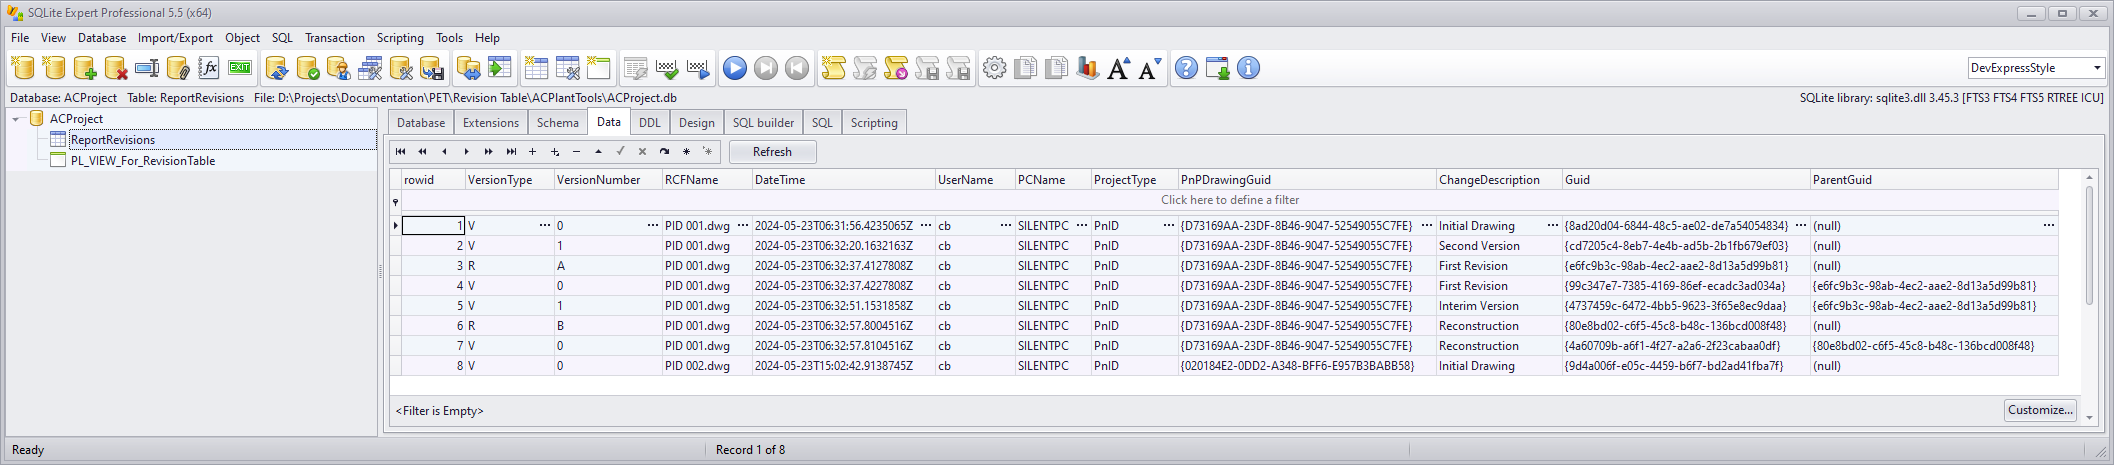
Next we need to create a database view in the ACProject.db. Use a SQLite Editor which allows the creation of views. We always recommend SQLite Expert. The free Personal version is sufficient for this purpose.
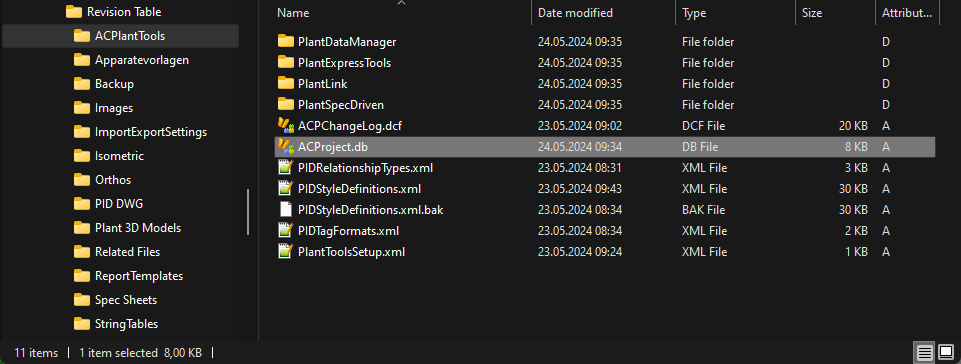
In the ACProject.db you will find the table ReportRevisions this table contains the history of all drawings, but also of reports from PlantReporter (if you have the version/revision feature enabled).
You need to create a view like this:
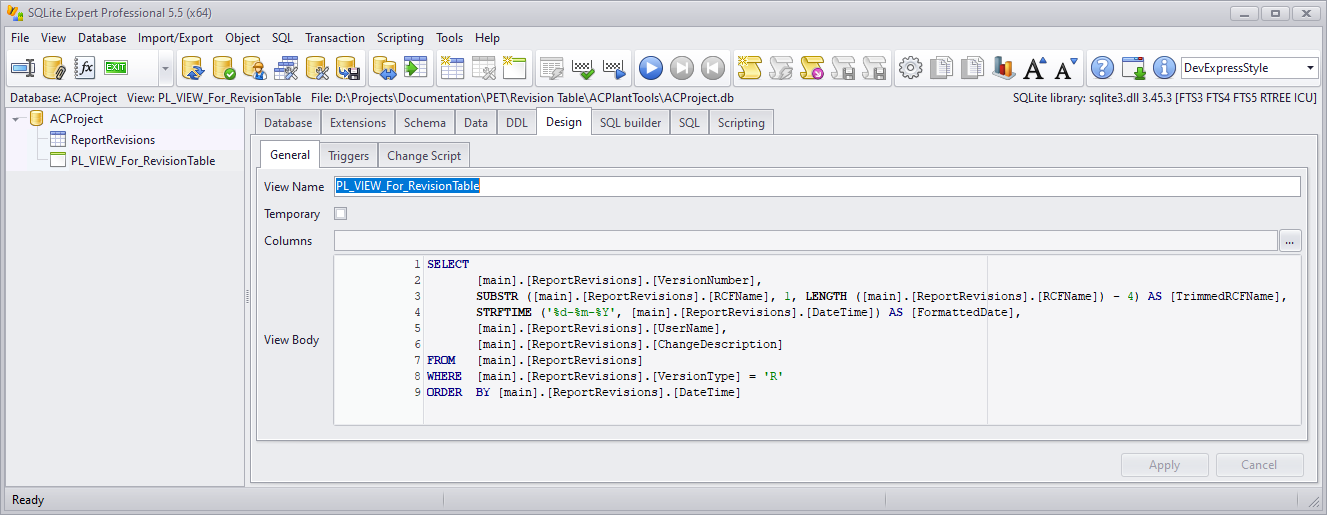
To make it easier, you can copy the SQL Statement from here:
SELECT
[main].[ReportRevisions].[VersionNumber],
SUBSTR ([main].[ReportRevisions].[RCFName], 1, LENGTH ([main].[ReportRevisions].[RCFName]) - 4) AS [TrimmedRCFName],
STRFTIME ('%d-%m-%Y', [main].[ReportRevisions].[DateTime]) AS [FormattedDate],
[main].[ReportRevisions].[UserName],
[main].[ReportRevisions].[ChangeDescription]
FROM [main].[ReportRevisions]
WHERE [main].[ReportRevisions].[VersionType] = 'R'
ORDER BY [main].[ReportRevisions].[DateTime]
When you need the US date format you use '%m/%d/%Y'.
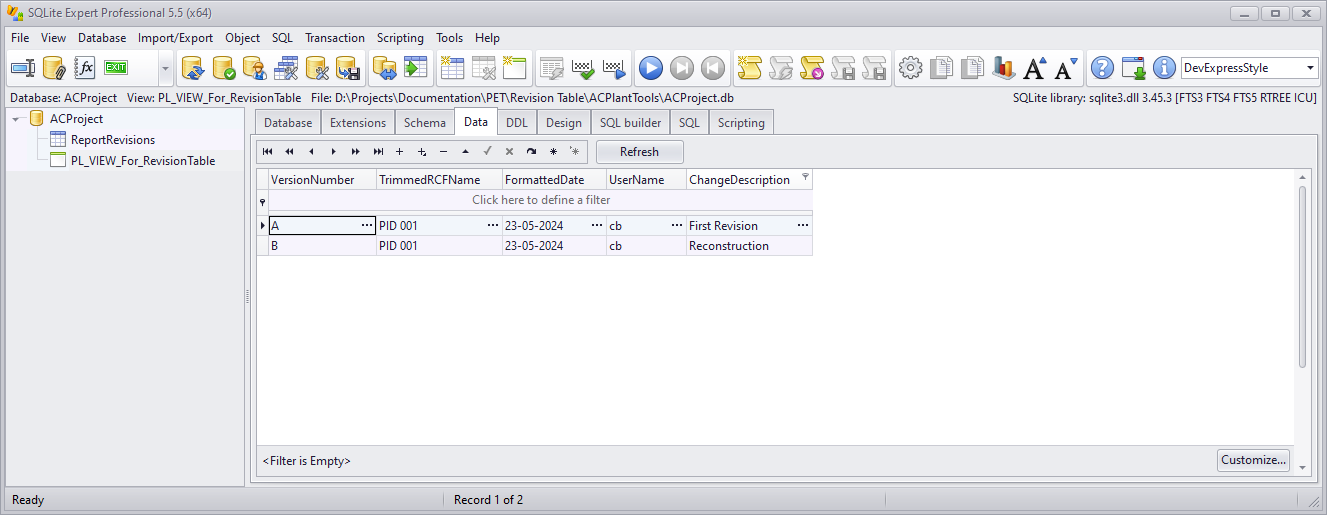
The result of the view looks like in the following image. As you can see, there are the 5 properties we defined above.
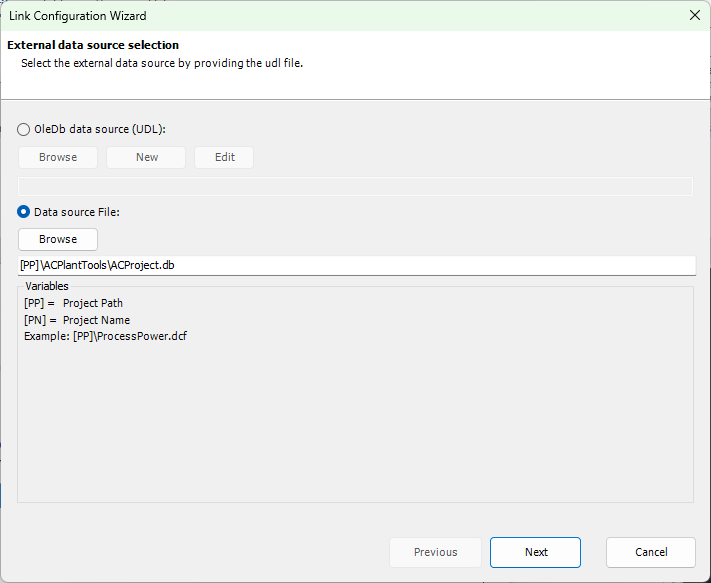
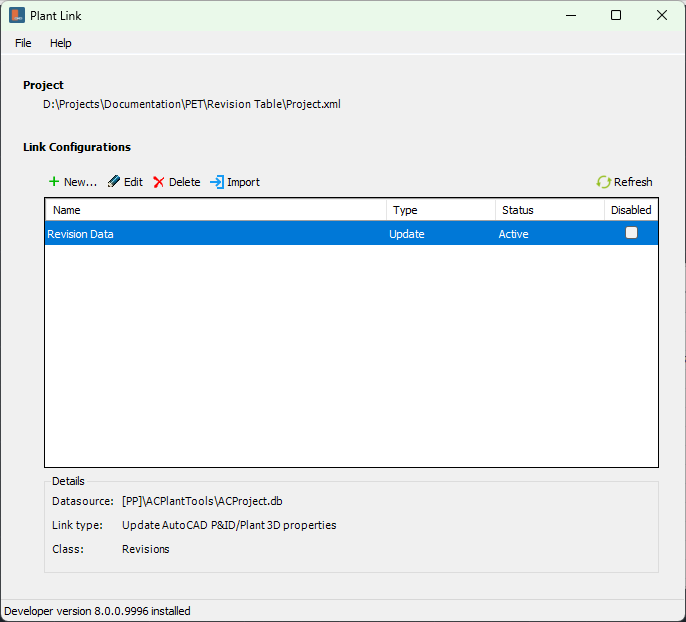
Next we create a new link configuration with PlantLink. The data source is the ACProject.db. You can select the file with the Browse button and PlantLink we adapt the path automatically.
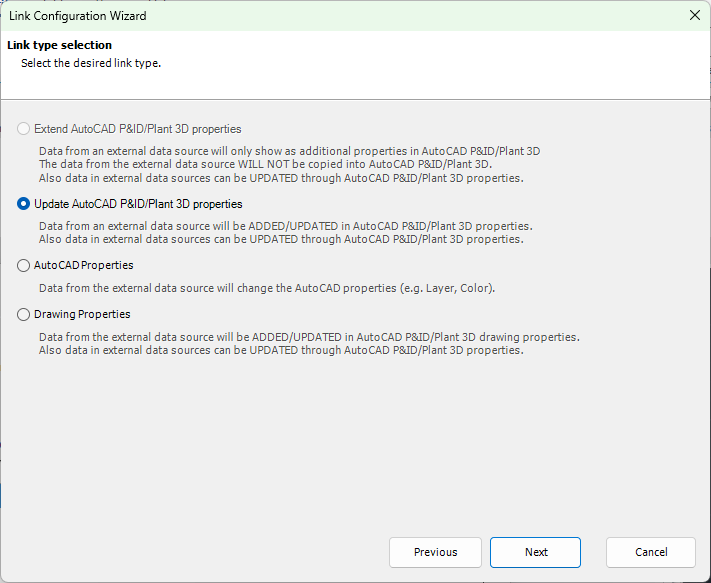
Next you select Update.
Now the class where the revision objects exist.
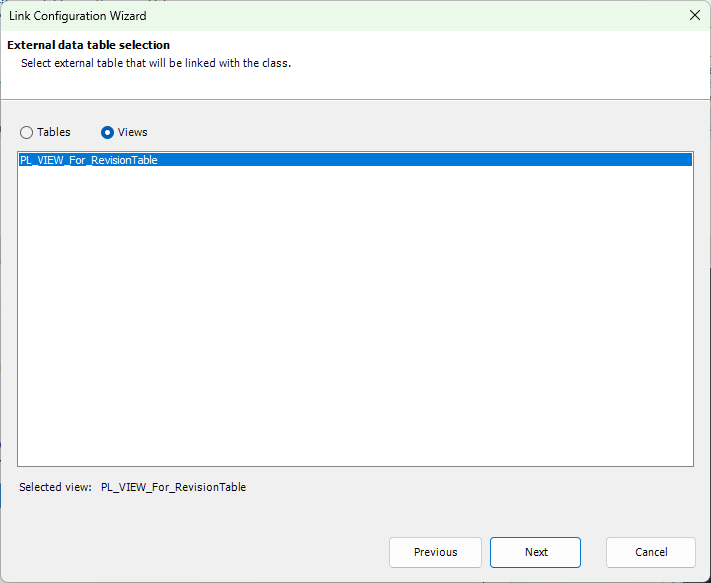
You select the view you created earlier.
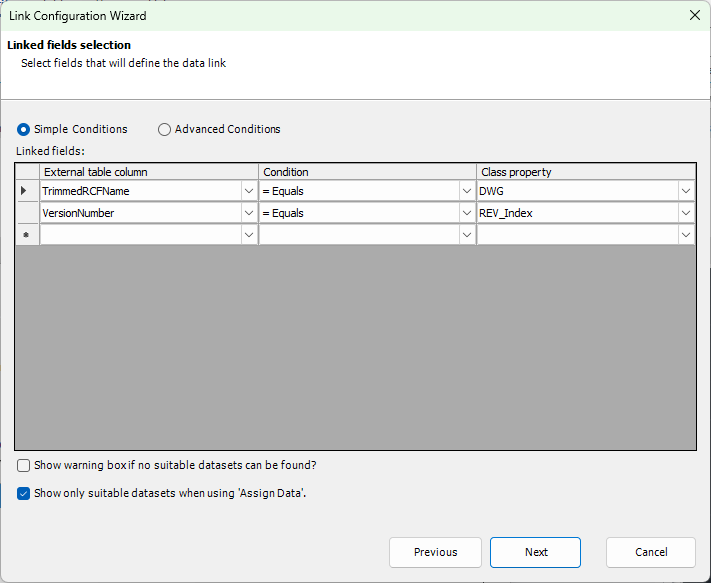
Now we need to link the drawing title and revision index properties with the columns from the view. This tells PlantLink how to find the correct row in the view.
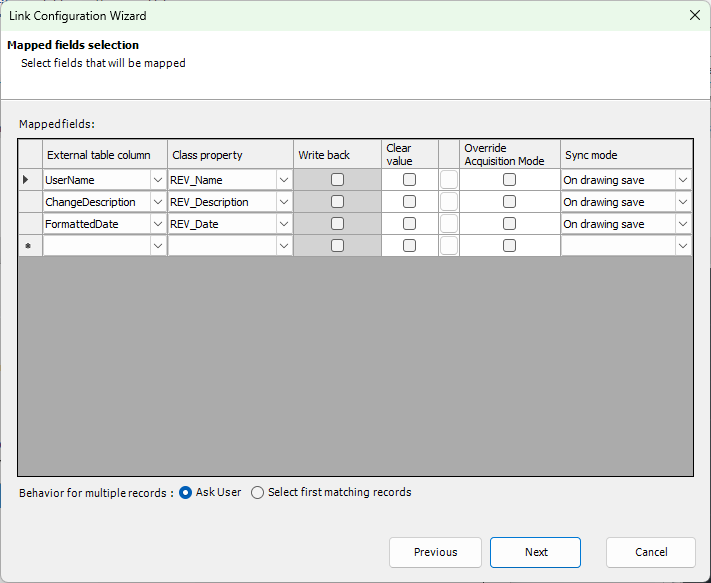
You then map the remaining columns to the other 3 properties. By default, the Clear value checkbox is checked. You should disable this to keep the Space as the Default Value as set in Project Setup.
Finally, you define a name.
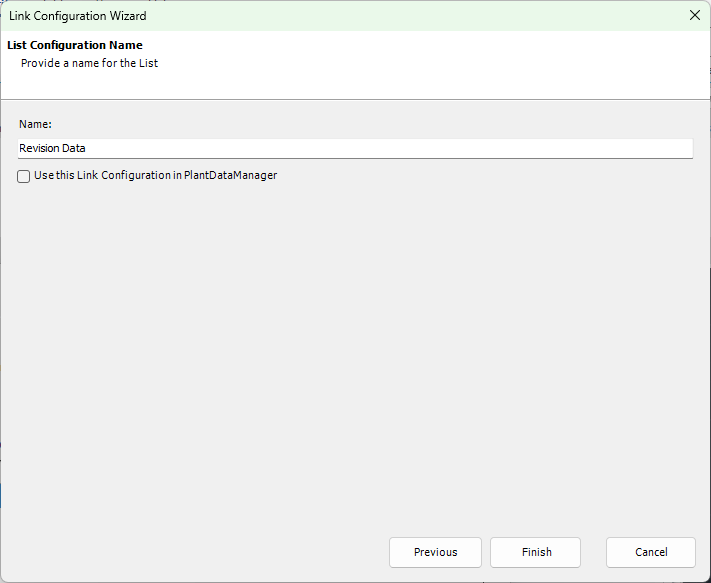
If everything has been setup correctly you should see Active as the Status.
Now we need to setup the List function with a new configuration.
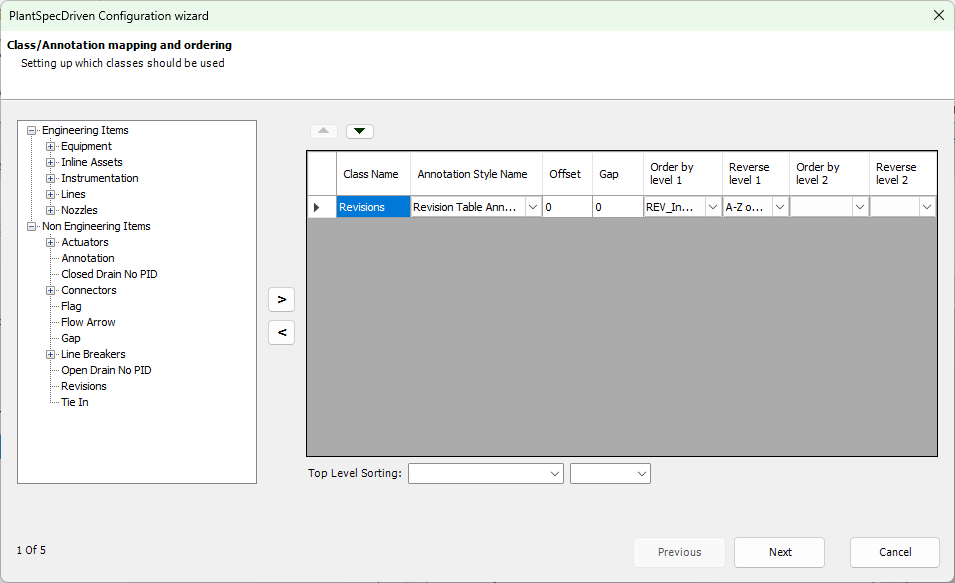
You select the class for the symbols, the Annotation you created and the property which holds the revision index, and select A-Z.
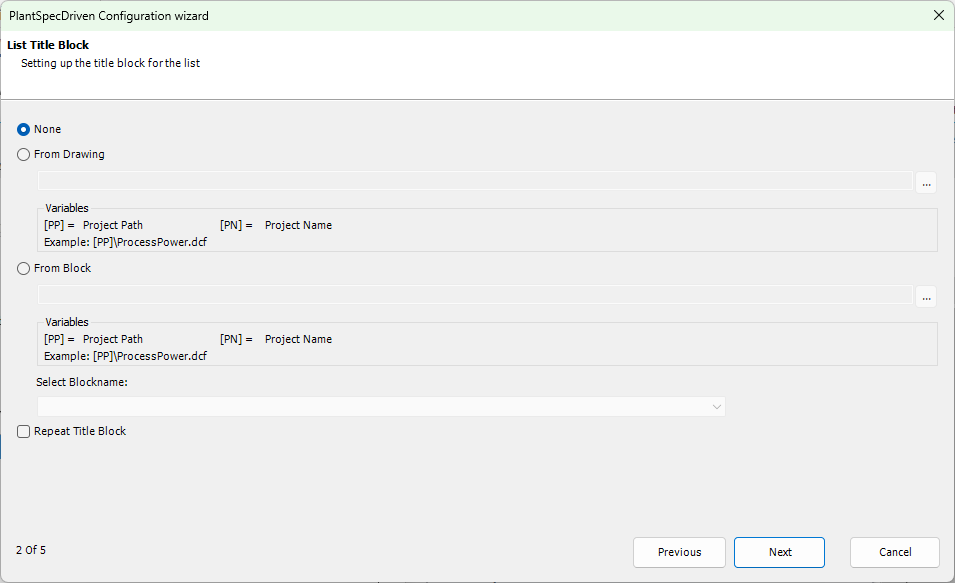
We don't need a title block in this example.
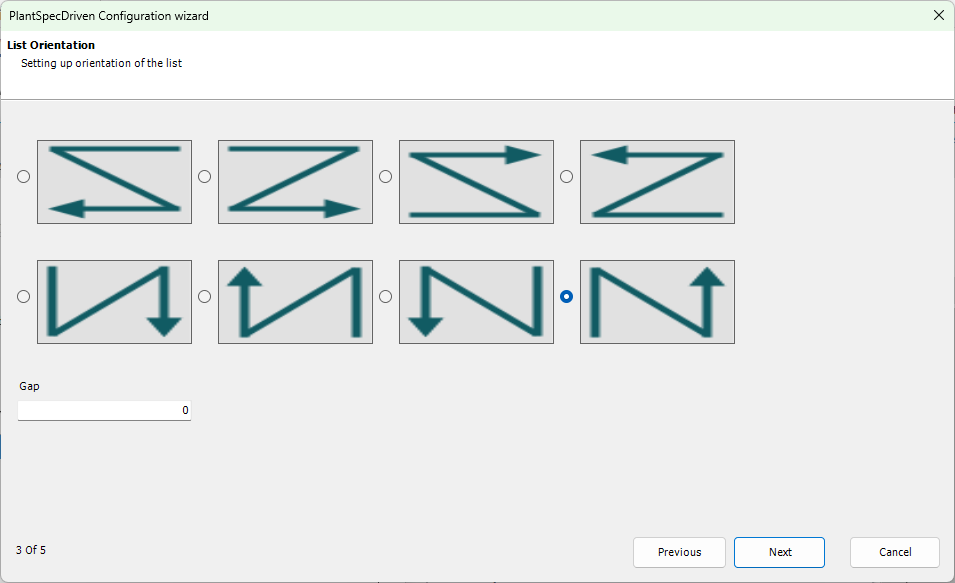
You select the orientation.
The start point where the first Annotation should be inserted and then some length and height for the table.

And finally a name.
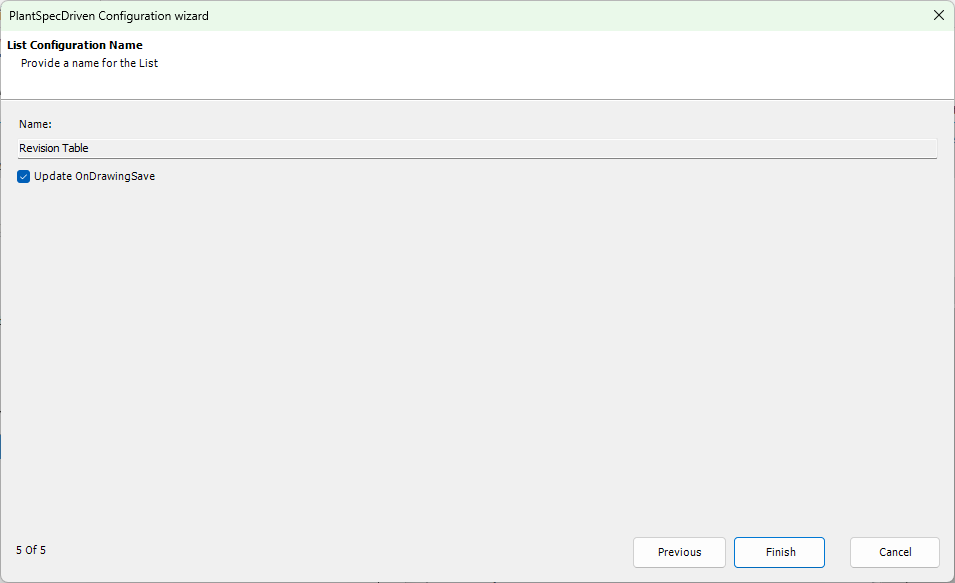
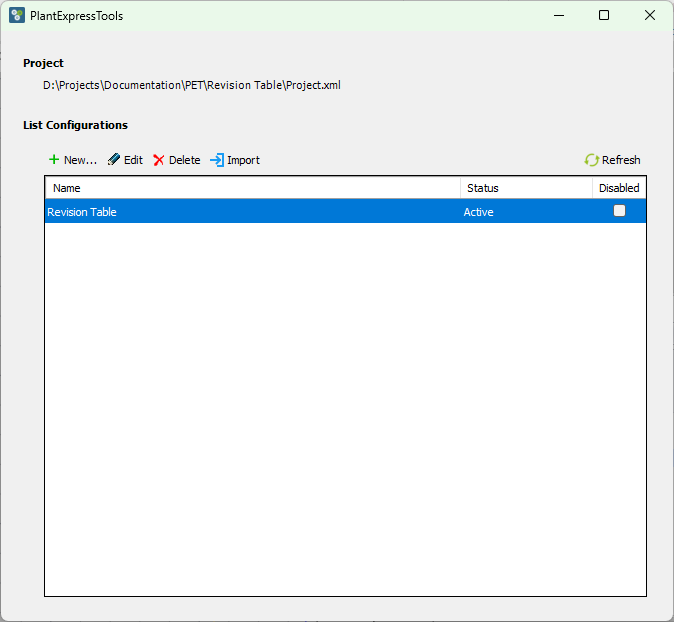
Like with the link configuration the configuration must show Active.
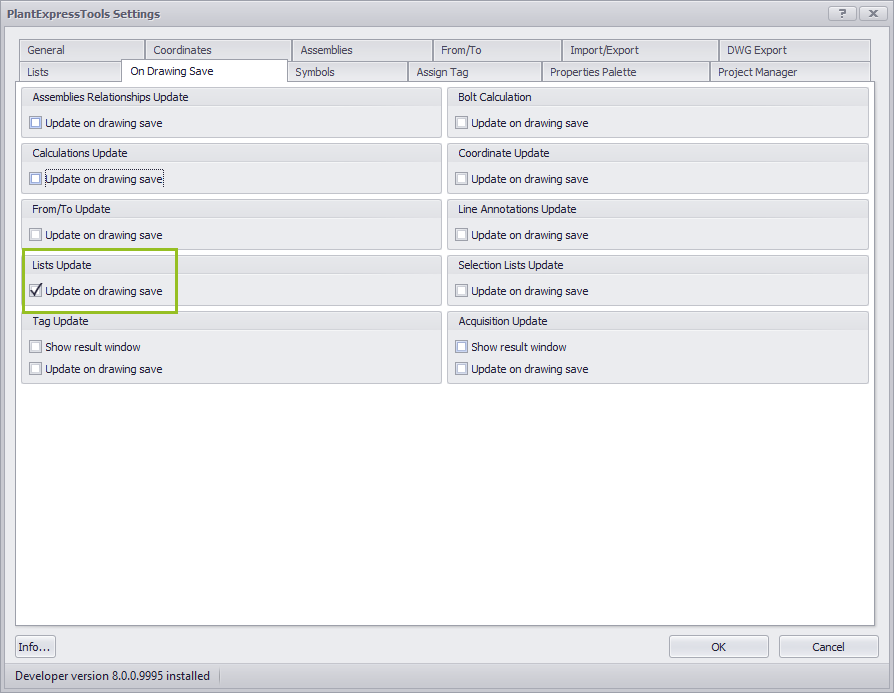
You may want to enable to updating of lists on drawing save in order to ensure, that the revision table is up-to-date when saving the drawing.
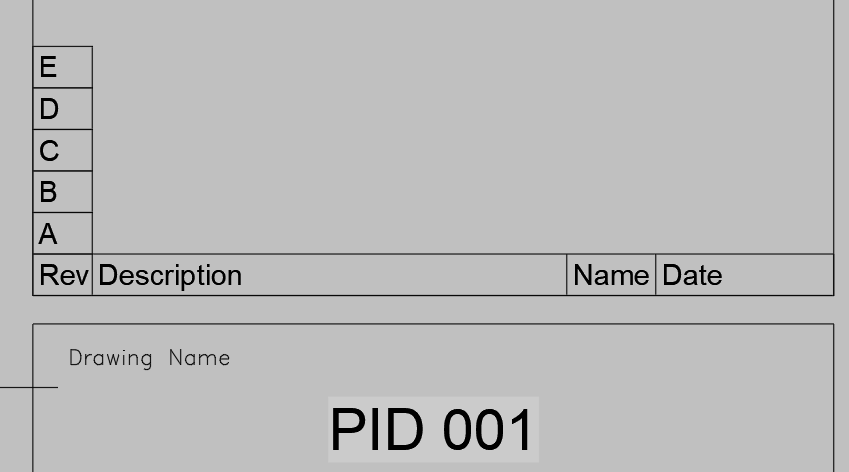
In the drawing you add the legend/title for the revision table. You will probably do this in the dwt file which you use to create new drawings.
Then you insert the symbol in the drawing and you set the Index with A to E (or whatever is the maximum you want to see).
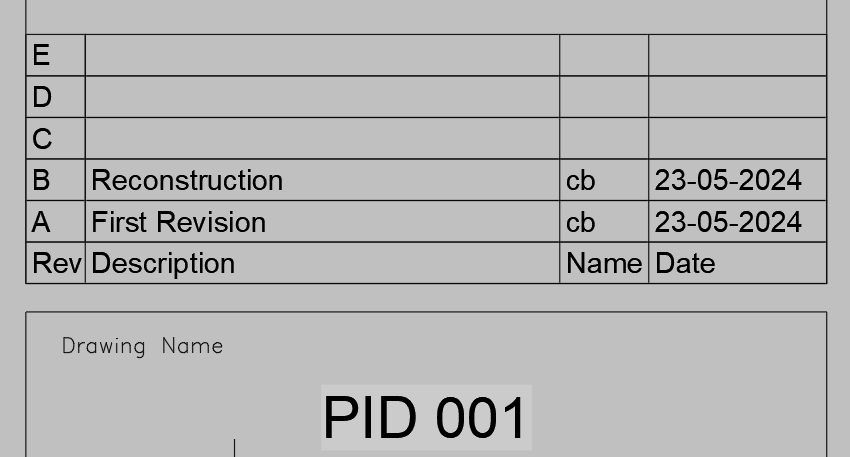
When you now save the drawing PlantLink will bring in the data from the ACProject.db database and the List function will then insert the Annotations.
If you have a revision table which should only show a certain number of rows (e.g., 5), but you are now at revision 6, you simply delete the row with A and move every thing down. The you either insert another revision symbol and use F for the index, or you copy the top row and change the E to F.