|
<< Click to Display Table of Contents >> Modify/Delete/Add Classes |
  
|
|
<< Click to Display Table of Contents >> Modify/Delete/Add Classes |
|
In this chapter we describe the content of the Excel file and various columns. Then we explain how you can modify the content, delete and add classes.
The export exports the classes and the following marked properties.
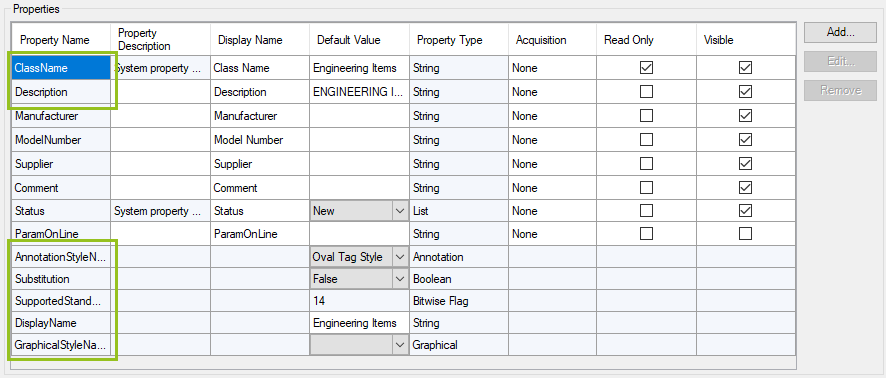
When we open the Excel file we first see the name of the worksheet which is "Classes". This is important when we later want to import the Excel file. If the worksheet name isn't "Classes" we will not be able to import.
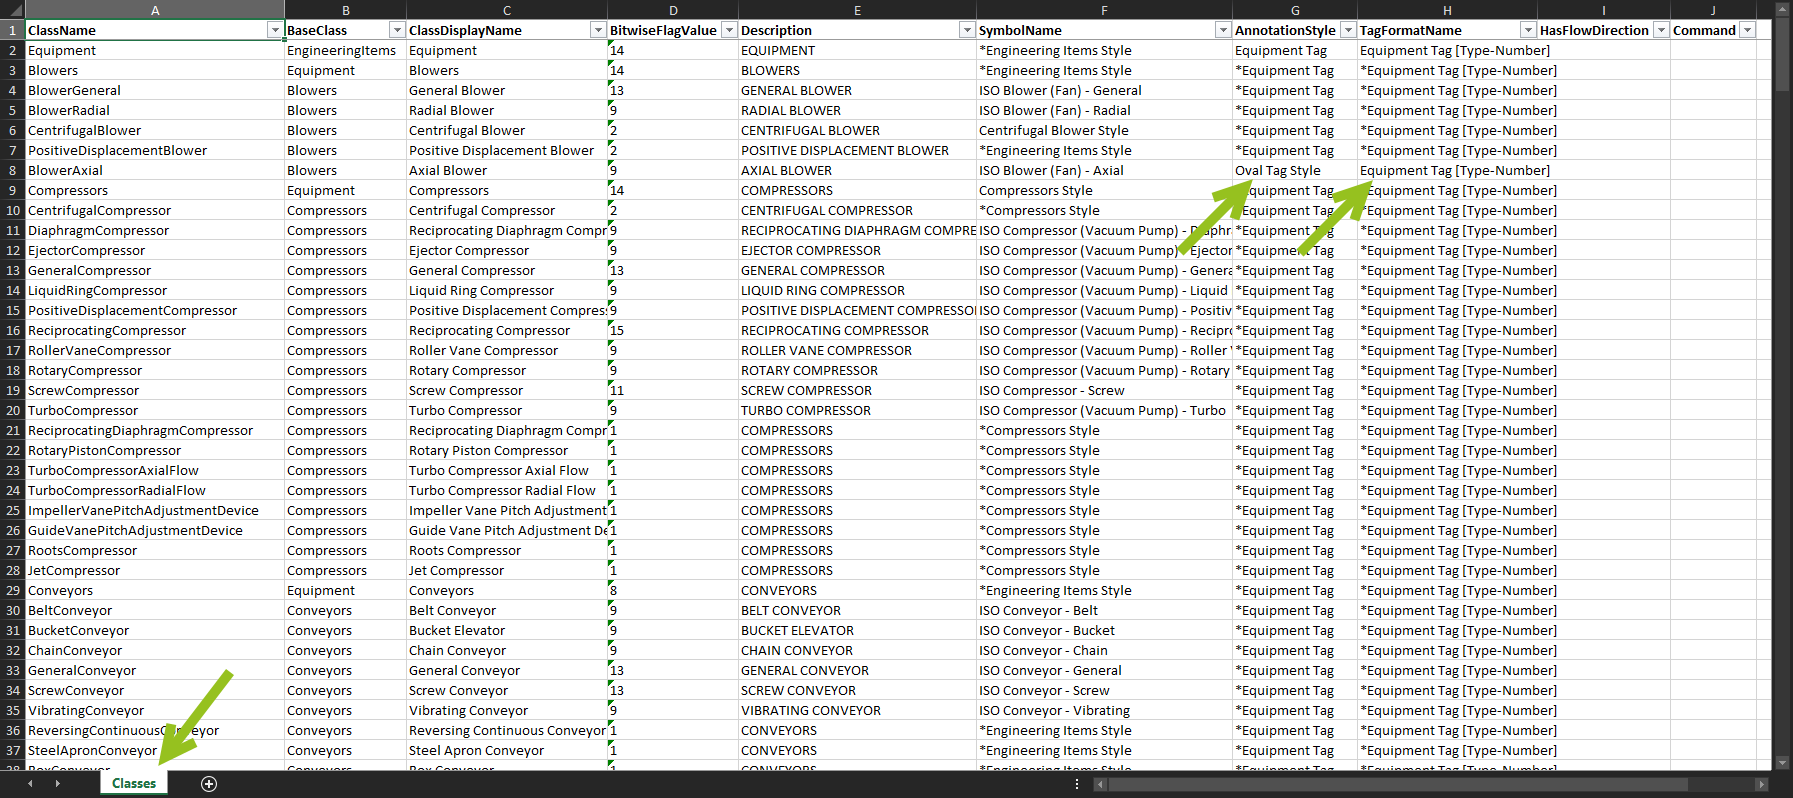
Let's have a closer look at the individual columns:
•ClassName
This is the name of the class which was given when the class was first created. This name CANNOT be modified anymore. You would need to delete it and add it under a different name.
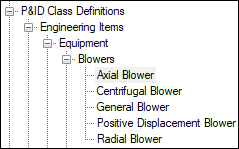
•BaseClass
This is the parent class name of the class. In A2 you see that "Equipment" class belongs to the "EngineeringItems" class. And "Blowers" belongs to "Equipment" and the 5 Blower classes belong to the "Blowers" class. This is what you see in Project Setup.
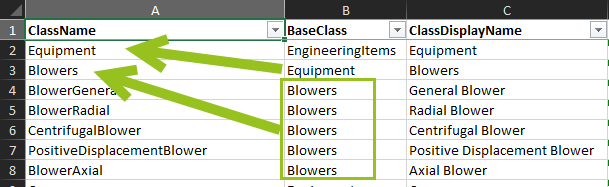
This allows you to potentially move classes in the class tree. You could for example move the 5 blowers to the "Compressors" class by typing in "Compressors" in B4-B8.
However, different classes have different class properties. If you want to move classes around it is recommended to do this only with a brand new project where no objects have been inserted yet, because at that time there will be no tables and views for the objects.
•ClassDisplayName
This is the Display Name of the class which will later be shown in the class tree and anywhere else.
•BitwiseFlowValue
You will see this value under "SupportedStandards" in Project Setup. The value is actually a combination of the Supported Standards and the state of the Substitution.
In the picture you see, that each standard has a value. If multiple standards are selected you add the values together (e.g. ISO and DIN would be 24). If Substitution is True you add 1. So, ISO and Substitution True equals to 8 + 1 = 9.

•Description
This value is the Default Value of the Description property for the class.
•SymbolName
This is the the name under the "GraphicalStyleName". If you modify this, make sure that the symbol does exist in your project.
There are some default symbols which cannot be reviewed Project Setup. For example "Engineering Items Style".
An * in front of a name (e.g. F2) means, that this value is inherited from the parent class (or the parent's parent).
•AnnotationStyle
This is the Name of the AnnotationStyleName. If you modify this, make sure that the annotation style does exist for this class.
Autodesk also build-in a little bug in Project Setup where they set a different annotation style for the Axial Blower in the ISO standard (G8). If you have a situation like this, the annotation style of this Axial Blower won't change in case you change the annotation style for the parent class (e.g.Blowers or Equipment). We will later see how to fix this.
An * in front of a name (e.g. G3) means, that this value is inherited from the parent class (or the parent's parent).
•TagFormatName
This is the Name of the TagFormatName. If you modify this, make sure that the tag format does exist for this class.
Autodesk also build-in a little bug in Project Setup where they set the tag format name directly for the Axial Blower in the ISO standard (H8). If you have a situation like this, the tag format name of this Axial Blower won't change in case you change the annotation style for the parent class (e.g.Blowers or Equipment). We will later see how to fix this.
An * in front of a name (e.g. G3) means, that this value is inherited from the parent class (or the parent's parent).
•HasFlowDirection
This column is filled out only for class where the HasFlowDirection property exists. Those are the InlineAssets and InlineInstrument classes. In earlier versions of AutoCAD P&ID and Plant 3D not all classes under InlineAssets had this property.
This value can be FALSE or TRUE.
In this picture I9 shows "*TRUE" which should actually be TRUE.
An * in front of a name (e.g. I2) means, that this value is inherited from the parent class (or the parent's parent).

•Command
This columns is important for the import. Currently there is only the DELETE command available. An example will appear further down in this chapter.
The rows of classes you do not need, because you don't want to modify them, can be deleted. That doesn't mean, that they will be deleted.
Let's start with a simple example.
These are the default values of an ISO project for the blowers.

We change the ClassDisplayName, the BitWiseFlagValue and Description.

In cells G8 and H8 we have two values which are set for this class. So any change to its parent class for those two columns will have no effect. To change this, we can use the expression [EMPTY]. When we later import this, the two properties will later be inherited again from their parents.

Finally, we change the AnnotationStyleName and TagFormatName for the Equipment class. So all Equipment classes will then use this annotation style and tag format.

The result can be seen under Import Classes.
Be aware that certain classes MUST NOT be deleted. For example Control Valve or Relief Valve. There are also some Non EngineeringItems classes. Those classes have special features. Even though you could restore those classes again with the Ex-/Import function it won't work as before anymore.
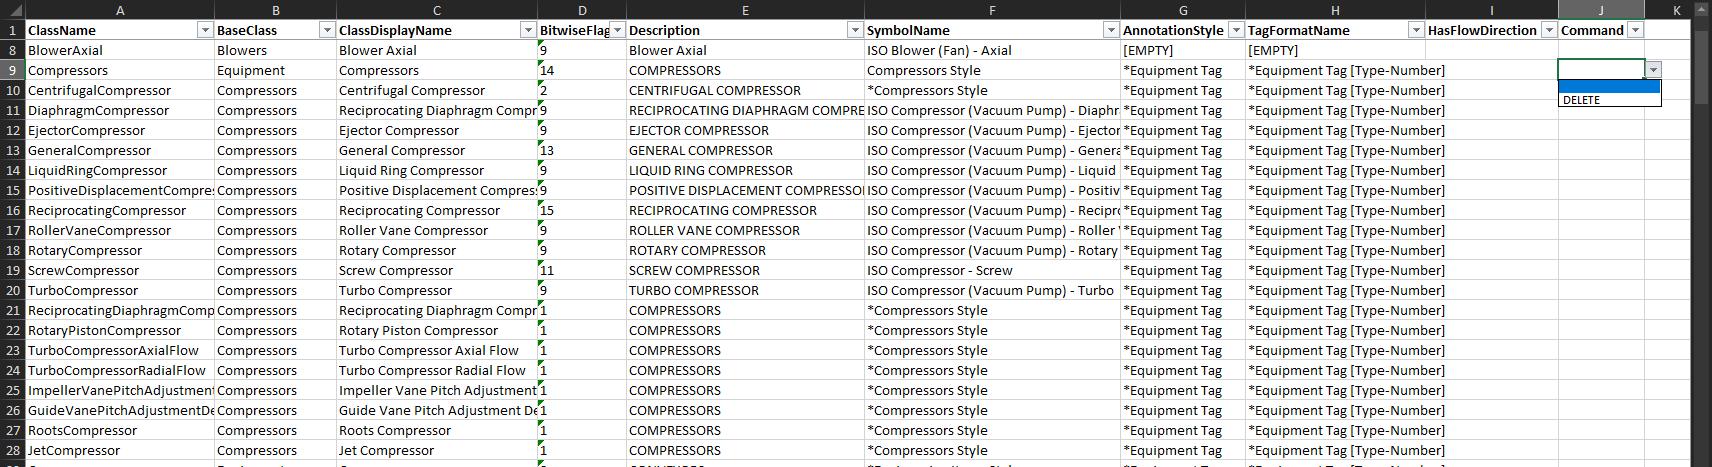
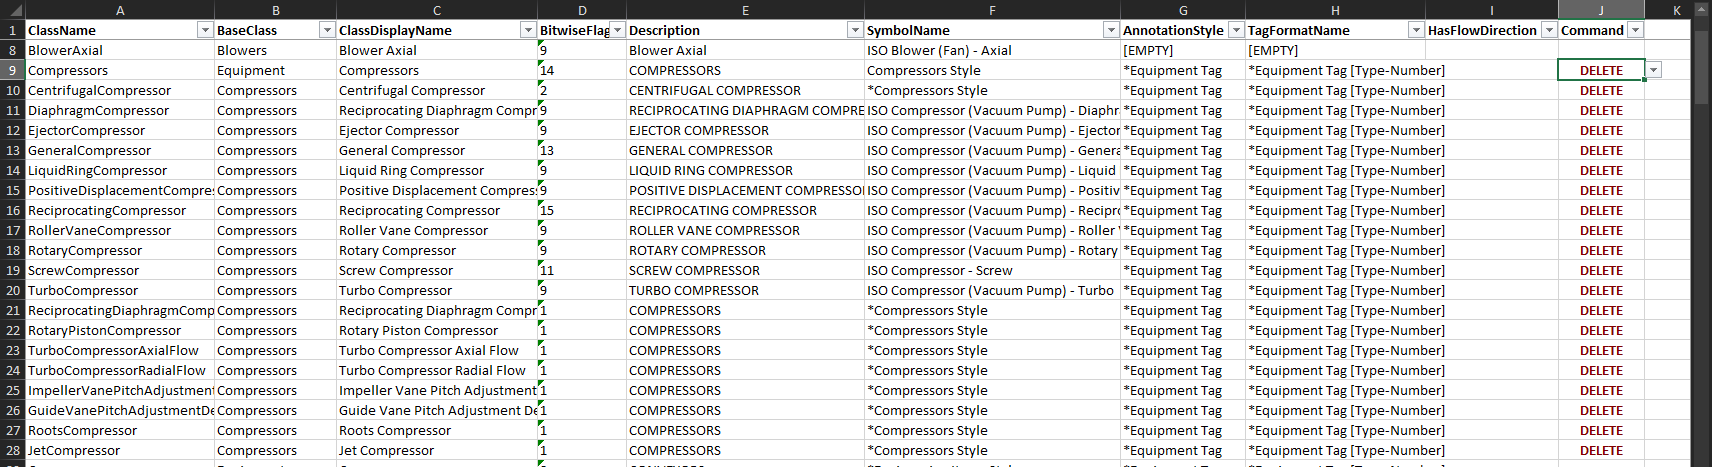
If you want to delete a class, you can either type in "DELETE" or select it from the cell.
If you set DELETE for a class which has sub classes, then automatically all those classes will be marked as being deleted. Deleting a parent class, but not its child class is not possible.
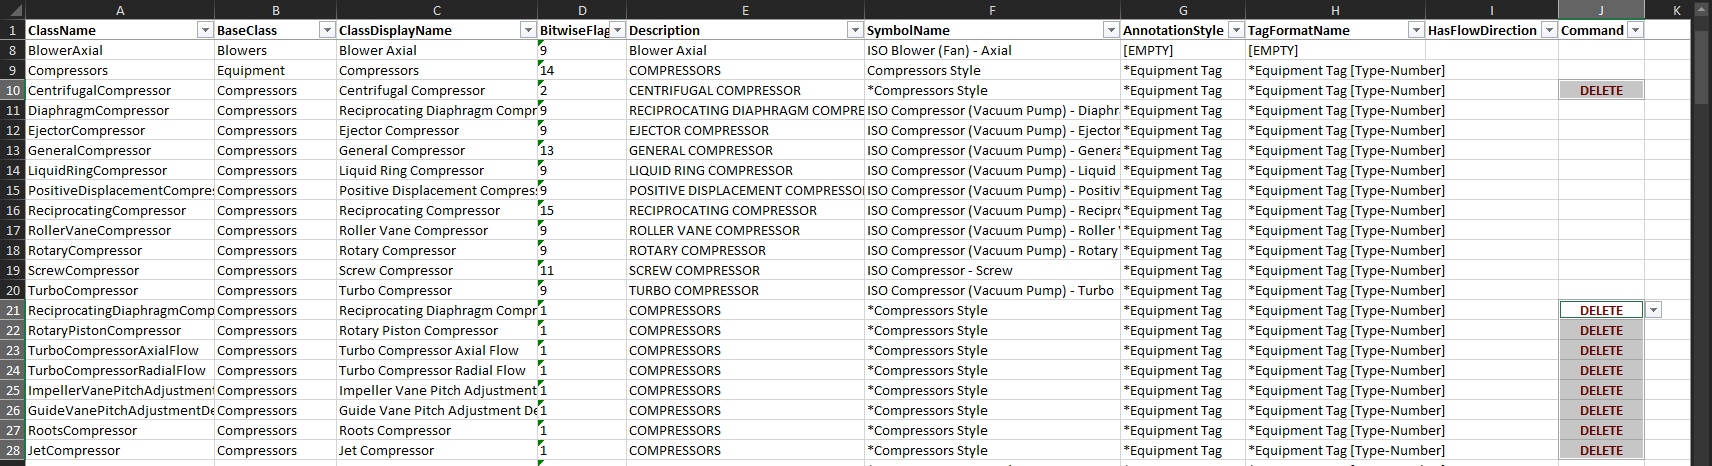
If you only want to delete some sub classes you can mark them individually.
In this example I mark all compressors which have no symbol (they just show "*Compressors Style") with DELETED.
The result can be seen under Import Classes.
If you want to add a class, you just add another line. You can also delete all other lines in the Excel file (with the exception of the header row). It is a good practice to export one class so you have the Excel file with all the required columns.
You must add at least valid values for columns A to E. If you already have a symbol name in your Project Setup you can add this as well. If you leave AnnotationStyle and TagFormatName blank the settings from its parent class will be used.

The result can be seen under Import Classes.
Next Chapter: Import Classes