|
<< Click to Display Table of Contents >> Setup |
  
|
|
<< Click to Display Table of Contents >> Setup |
  
|
This chapter explains how PlantProjectCreate is setup before you can use it to create a project and drawings.
Setting up PlantProjectCreate is mandatory before you can get started.
The following image shows you what you need (1, 2, 3) which then results in a configuration file (4).
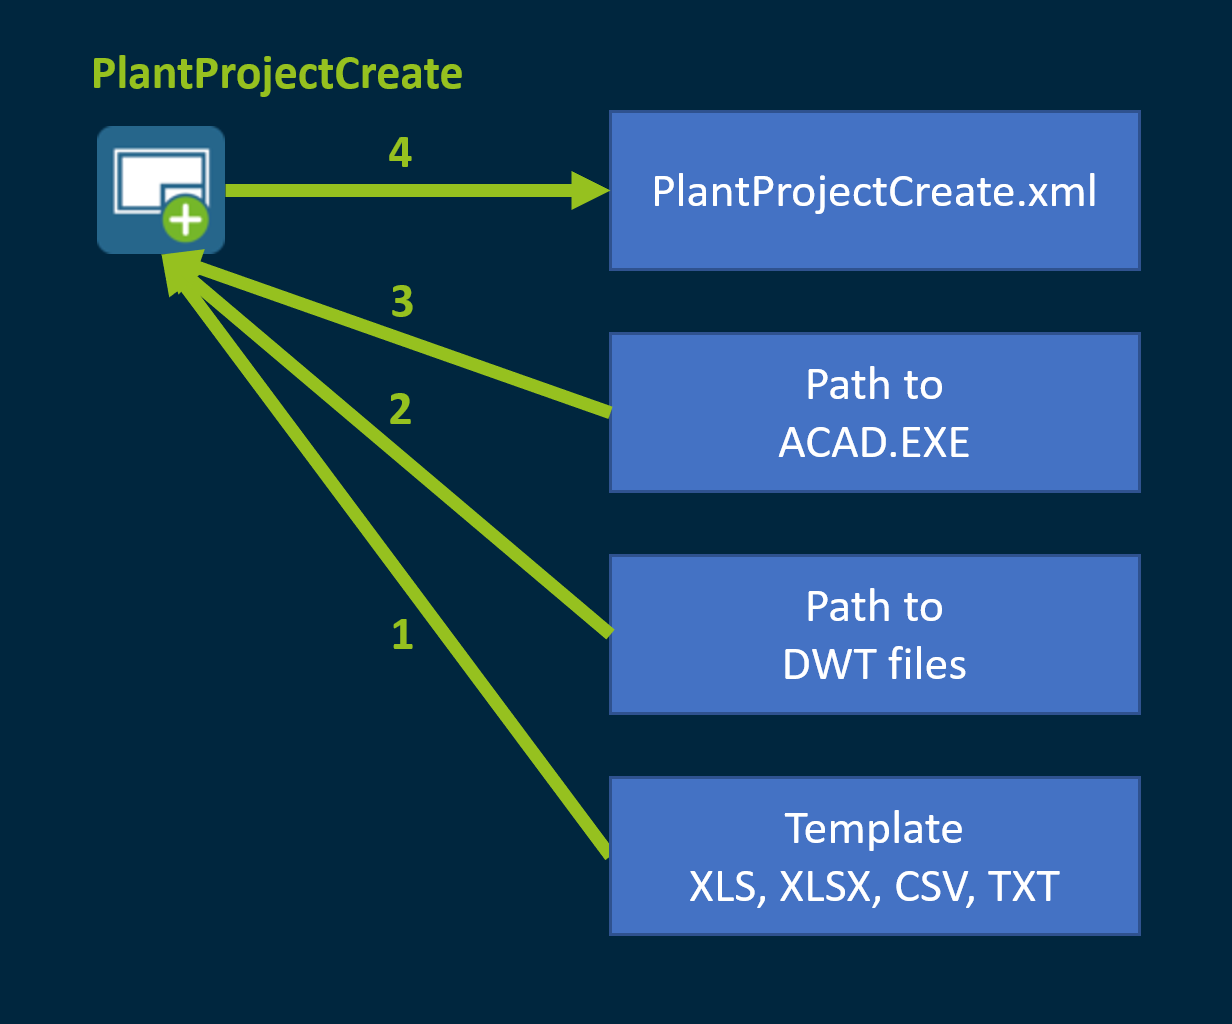
Typically you have a project template you want to use for your new project. In this documentation I created an additional drawing category with the additional properties. Everything else is default setup.

The first thing you must create is a simple Excel or text file. You can use XLSX, XLS, CSV Or TXT.

The following green columns are mandatory in order to PlantProjectCreate work at all. The file is typically empty with the exception of the header row. The order of the columns is not important.
![]()
To make it easier to understand we show the image below so you can get an idea about the content.
•Project Path
This is the path under which the new project will be created. In the example image below the "Project 1234" will be created under "D:\Projects\Documentation\PPC\Projects".
The project path can contain UNC paths.
•Project Name
That's the name of the project.
•Project Number
This is a project property.
•Project Description
This is a project property.
•Customer
This is a project property.
•Country
This is a project property.
•Sheet No
This is one of the two additional drawing properties.
•Total Sheets
And this is the other drawing property.
•Sheet Size
This defines the size of the sheet. This will later be used for mapping the appropriate DWT file to the Sheet Size.
•DWG Title
This is a drawing property.
•Author
This is a drawing property.
•DWG FileName
This is the actual file name of the drawing. You can also include folder names so PlantProjectCreate creates a folder structure in project manager.
•Category
This defines if a drawing will be created under "P&ID Drawings" or "3D Drawings". Use PID or 3D.
•Drawing Number
This is a drawing property.
•Drawing Description
This is a drawing property.
•Area
This is a drawing property.

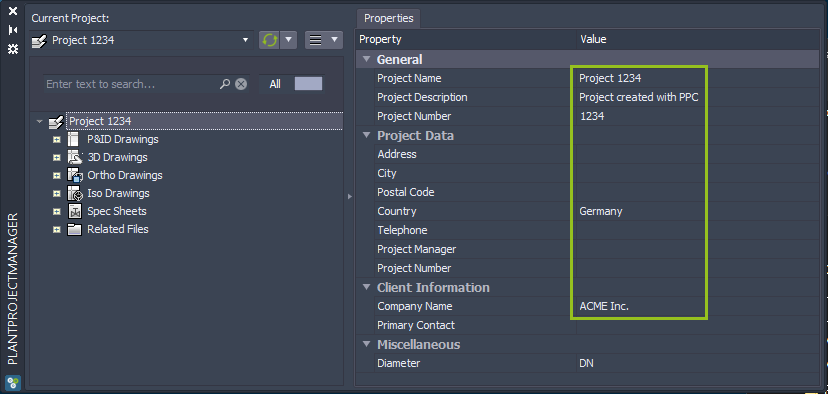
This picture show how it will later look like for the project properties.
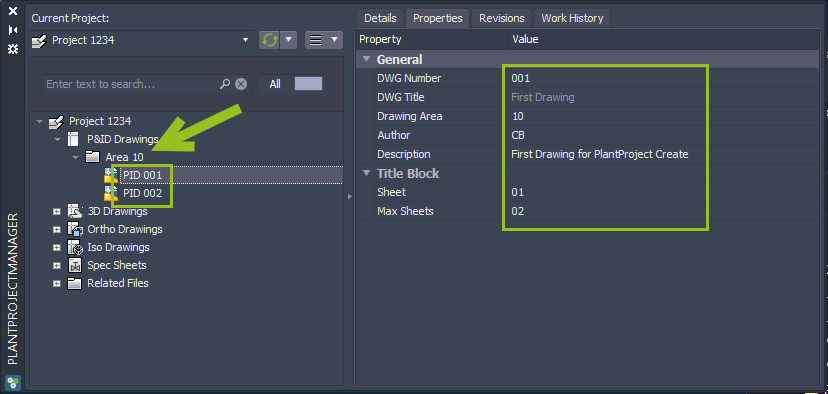
And this is how the drawing properties will look like.
You later need to define which AutoCAD Version you want to use. In this example I use the following path:
C:\Program Files\Autodesk\AutoCAD 2021\acad.exe
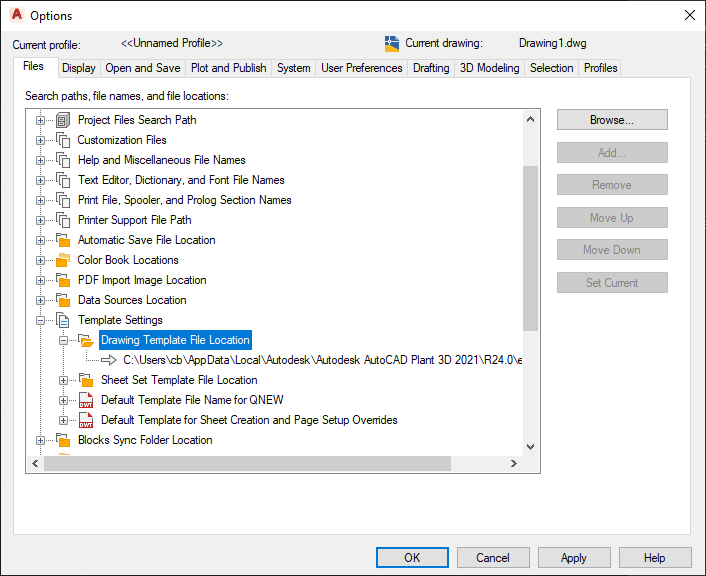
The path to your DWT files is set in AutoCAD profile. However, this is not important for PlantProjectCreate.
For this example the DWT files are under:
D:\Projects\Documentation\PPC\DWTs
Now we have all the prerequisite work has been done, we can start with the configuration.
For the following steps I have all necessary files under one folder. This is not necessary, but easier for this documentation.
•DWTs
This contains the DWT files for the drawing creation.
•PPC Template
This is the template project.
•Template XLS Files
This contains the template XLSX file with the columns we want to use to create the project and drawings and properties.

By default, there is no PlantProjectCreate icon on your desktop. If you are planing to use PlantProjectCreate it makes sense to have this app on your desktop.
You can search for PlantProjectCreate under Windows.
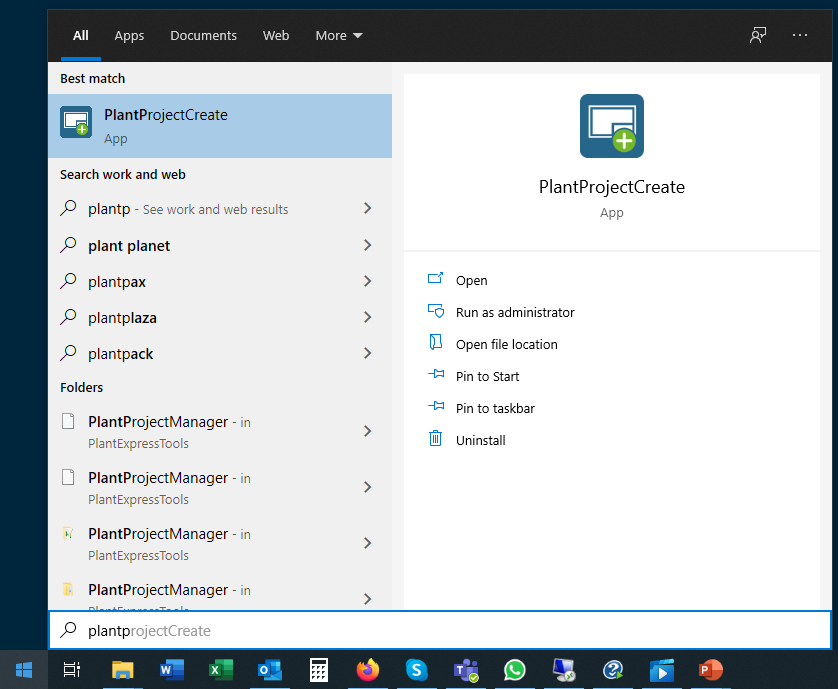
You will find PlantProjectCreate under:
"C:\Program Files\CADSTUDIO\PlantToolsUtilities\PlantProjectCreate\PlantProjectCreate.exe"
This is who it looks when you create a link on your desktop.

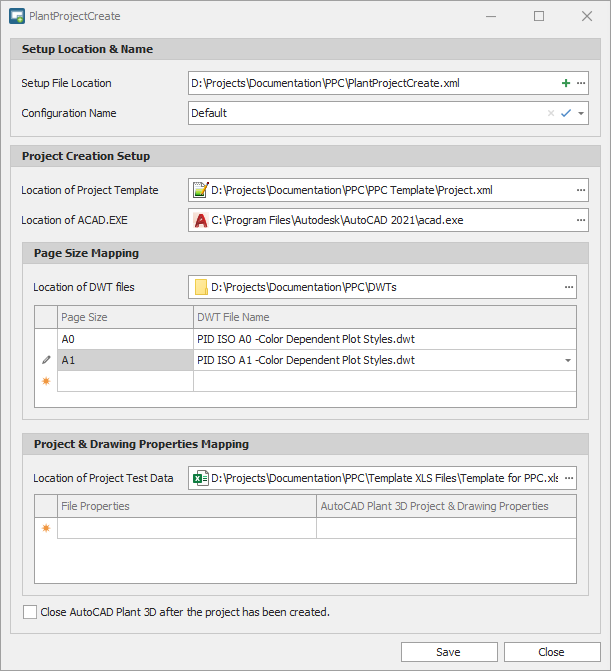
After the start you get a blank dialog.
Remark: All paths mentioned blow can use UNC paths.
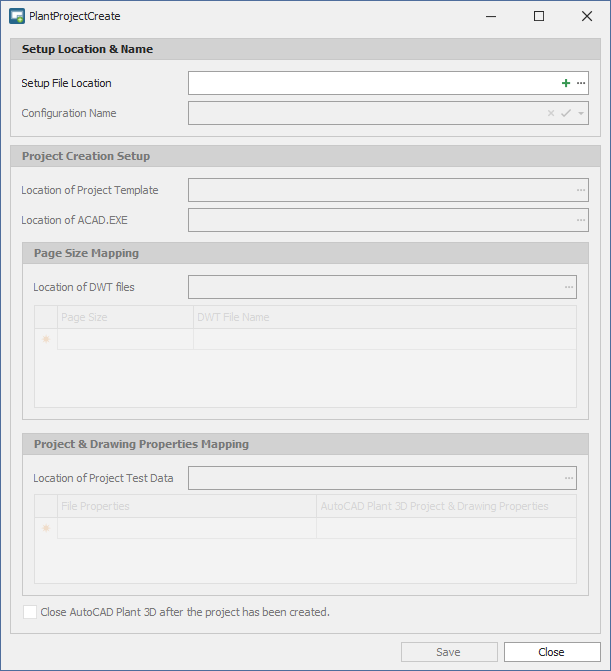
If you don't already have a Setup File you click on the + sign.

You can now select any location and file name. It makes sense to put the file somewhere on your network to make sure you are not the only one who can use PlantProjectCreate.
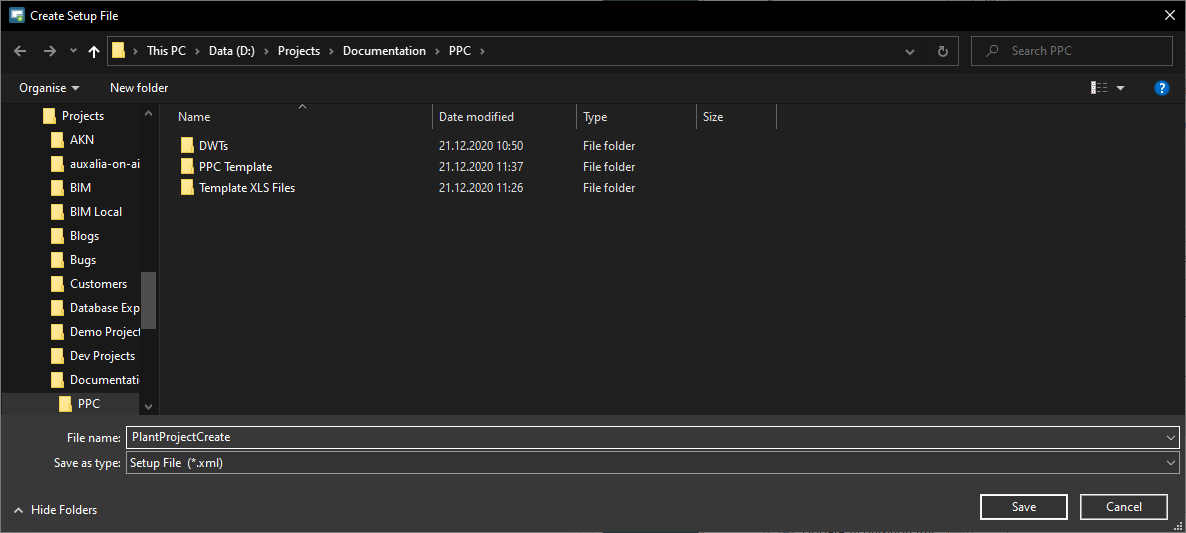
After you selected a folder and typed in a file name, a default configuration name will be created.
You can have multiple configurations in one Setup File in case you have for example different project temples or different DWT files or different properties.

You can just override the configuration name.

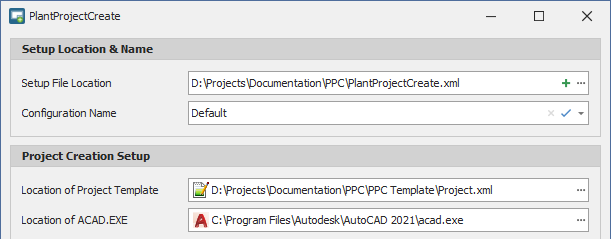
Next you select the Project.xml from your template project.
You can either use the ![]() button or use drag & drop and drop the Project.xml in the text box.
button or use drag & drop and drop the Project.xml in the text box.
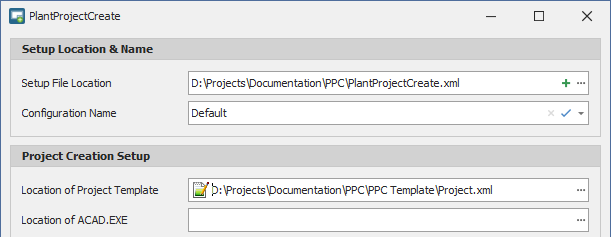
You do the same with the acad.exe from the AutoCAD version you want to you.
Then you select the folder where your DWT files are located. You can use drag and drop again.
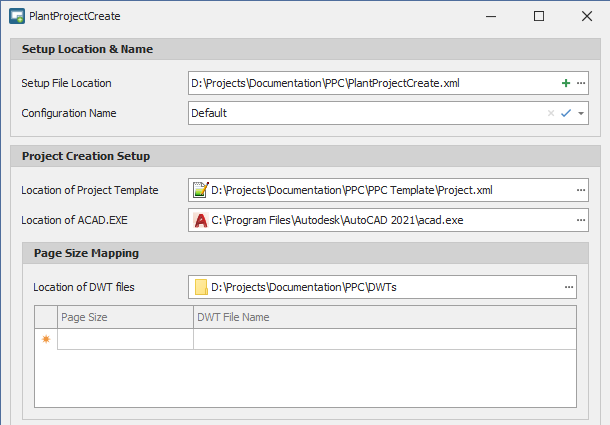
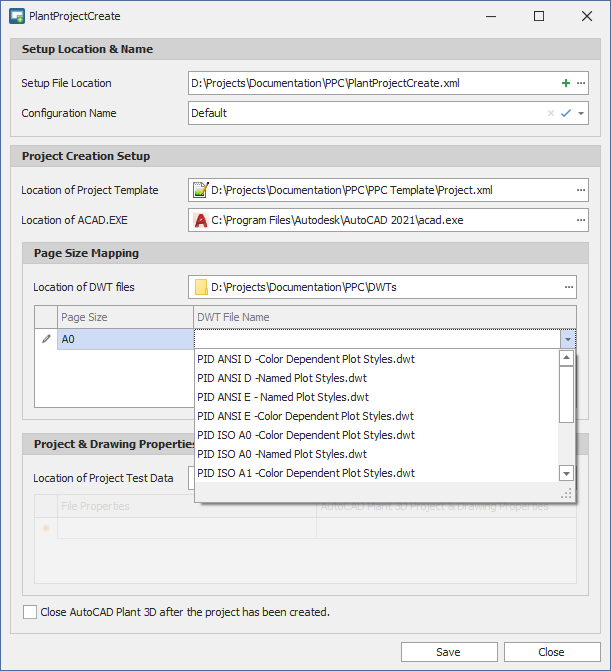
Next we have to do the mapping between "Page Size" and the "DWT File Name".
We will later use A0 and A1. So we type in A0 and select an appropriate file name.
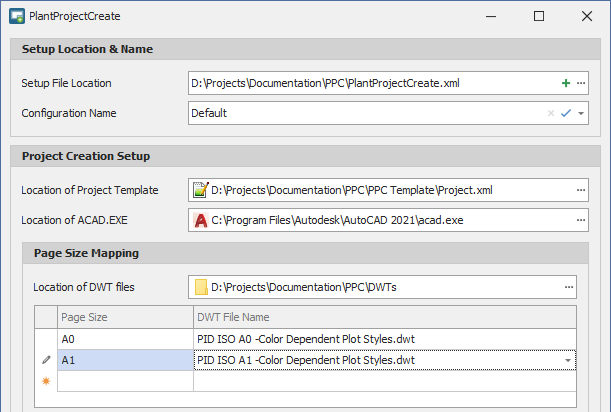
We repeat this for A1.
Now we select the template project file.
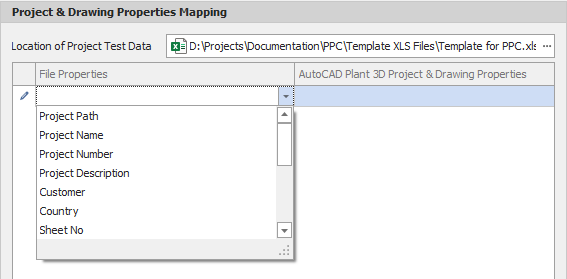
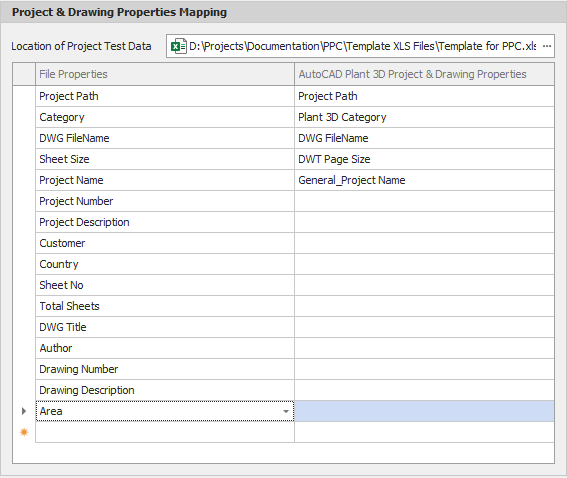
Now we have to map the columns from the template project file...
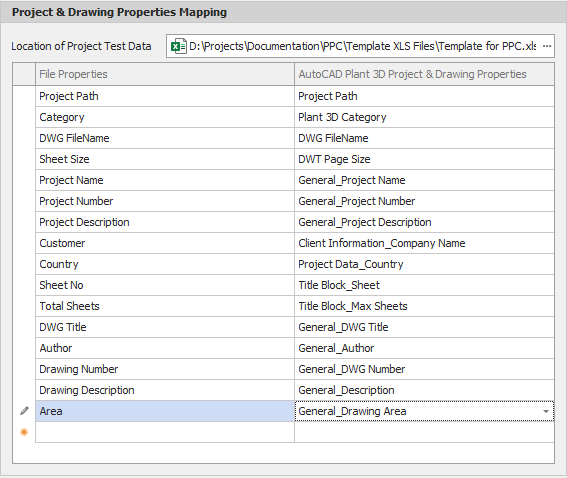
... to the Plant 3D properties.
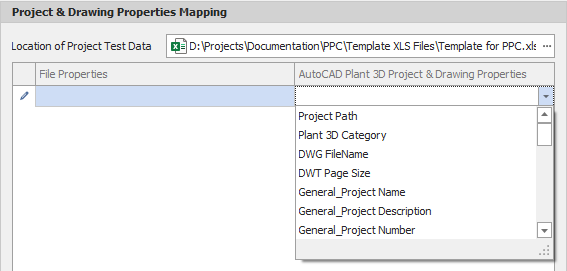
The order of the mapping is not important. Also, it doesn't matter if you select the left or right side first.

As mentioned earlier, the following 5 settings are mandatory.
You can also see, that it isn't required, that the column name and the property name are the same.
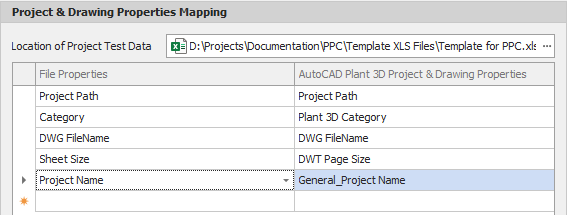
Sometimes it is easier to first select all columns from your template project file...
... and then select the Plant 3D properties.
Last you can use the checkbox at the bottom to have Plant 3D closed after the project and drawing will have been created or updated. For testing purposes it makes sense to keep Plant 3D open.
Finally you click on "Save".

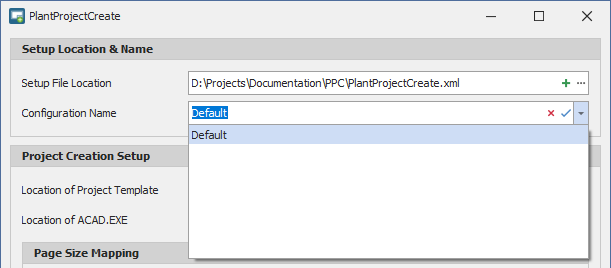
Since we renamed the configuration name, clicking on "Save" will show now a red cross in case you want to delete this configuration.

If you have multiple configurations you can select them from the drop down list.
 =
=
Next Chapter: Usage