|
<< Click to Display Table of Contents >> Define Target |
  
|
|
<< Click to Display Table of Contents >> Define Target |
|
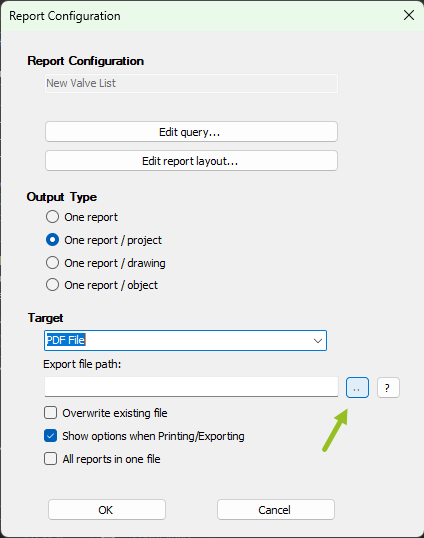
Last is the Target meaning the file name format, path and file name.
By default target is set to Printer which then would open the Windows Printer dialog when you later want to print the report.
However, typically a report is printed/exported into a file. The most common file types are PDF, XLS, XLSX or CSV (for data exchange).
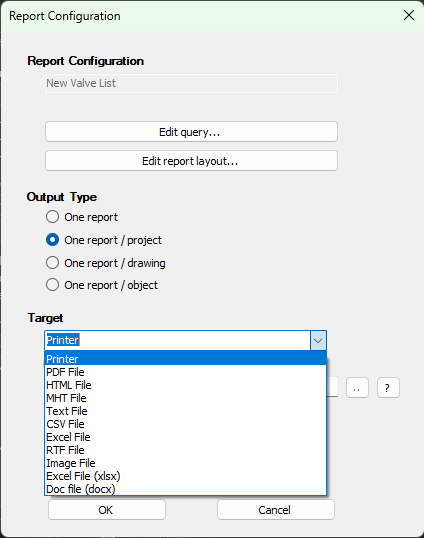
Lets select PDF.
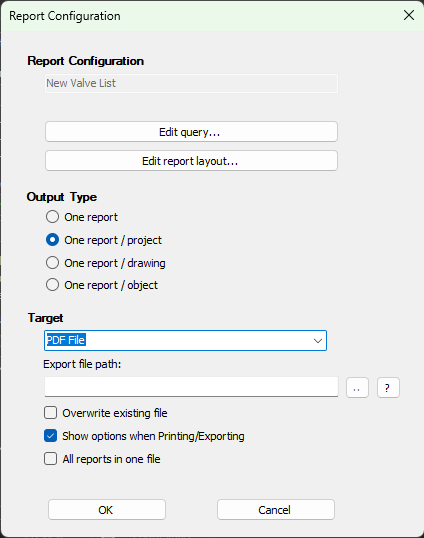
Before we select the Export file path we click on the ? button.
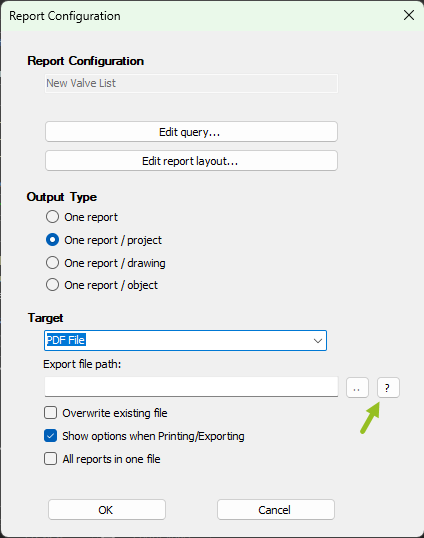
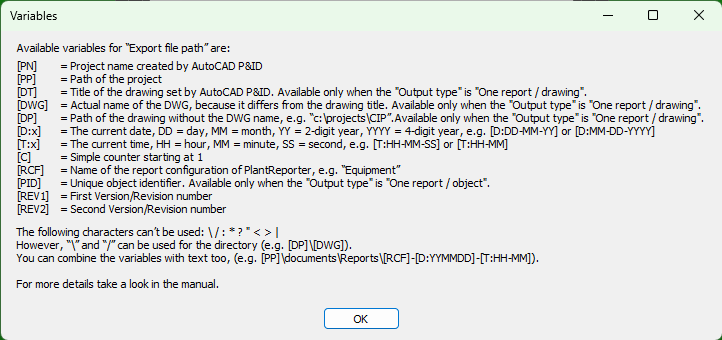
This gives you an overview of the available variables you can use in the path and file name.
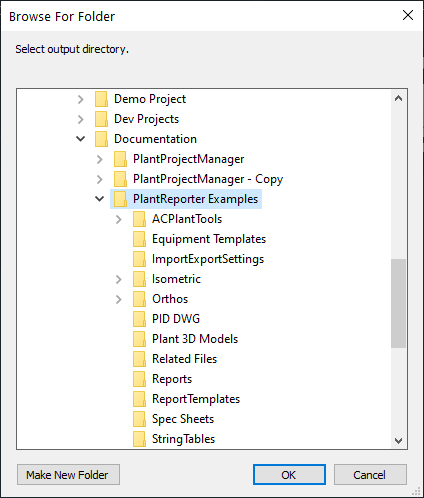
You can now select the folder by clicking on the ... icon.
Lets select the project folder.
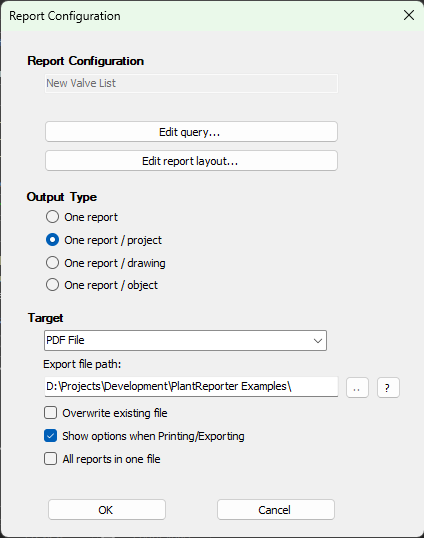
We see the folder in the text box.
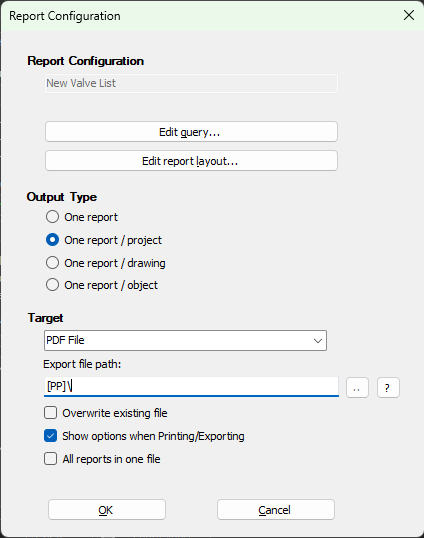
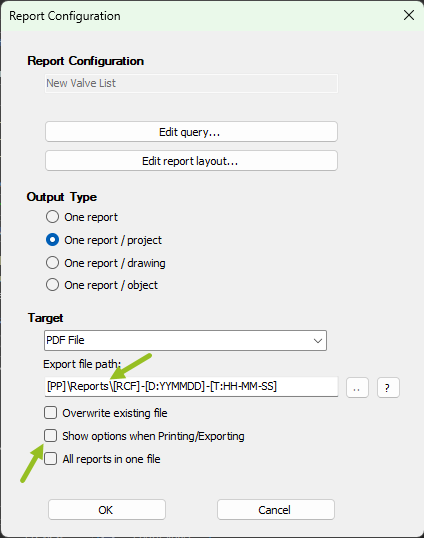
Instead of using an absolute path we can use variables. The expression [PP]\ (PP = Project Path) delivers the same result as before. Of course, there is no need to first select the folder and then replace the folder with variables. You can just type in the variable.
We continue to extend the path with Reports\. This means that the report will be created under the project in the folder reports.
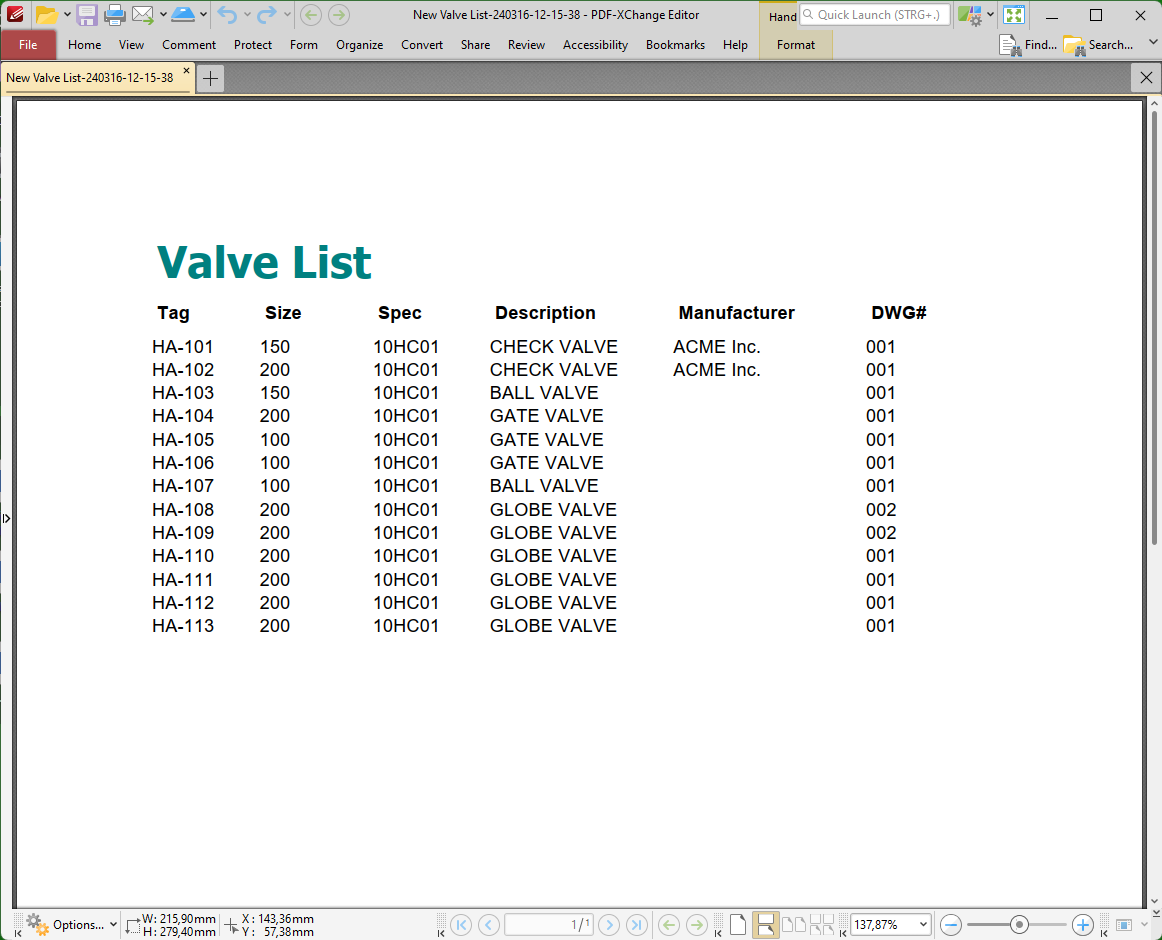
Now we only need a file name. Here we can also use a fixed name "e.g. "Valve List" or we use variables again.
[RCF] This is the name of the report configuration ("New Valve List")
[D:YYMMDD] Date (YY=Year, MM=Month, DD=Day)
[T:HH-MM-SS] Time (HH=Hour, MM=Minute, SS=Second)
The "-" are delimiters. You are completely free in the folder and file name selection.
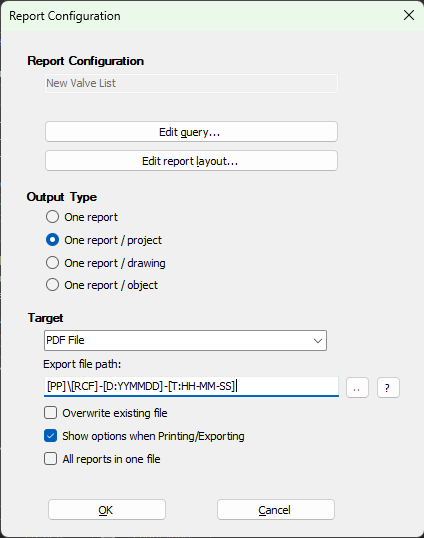
Last we have three checkboxes.
Overwrite existing file This is useful when the file name is always the same. If the checkbox is enabled, the file would be overwritten without question. Otherwise a dialog will show up and asks you how to handle the situation.
Show option when Printing/Exporting A dialog will show up when printing the report. The options in the dialog depend on the file type.
All reports into one file If you have selected One report / drawing or One report / object you may want to get all the individual files combined into one file.
In our case we don't want the option dialog to show up.
By clicking on the OK button, the report configuration is complete and save. It will appear in the selection list now.
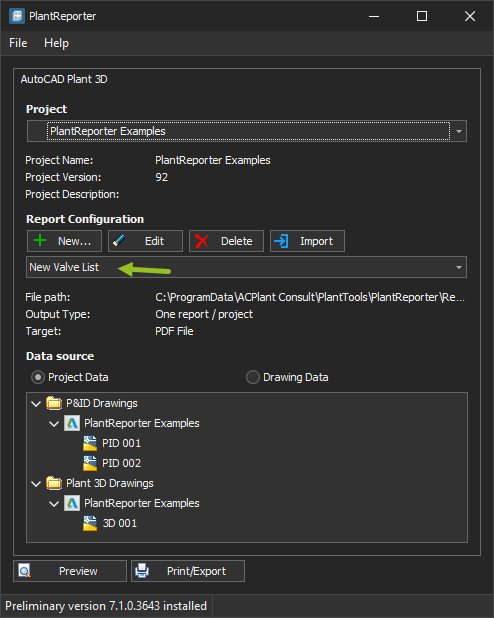
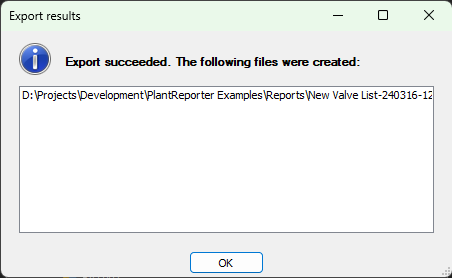
When you click on Print/Export you get the result dialog with the file name and path.
And the result looks like the preview while doing the layout of course.
Next Chapter: Create Version/Revision