|
<< Click to Display Table of Contents >> Setup |
  
|
|
<< Click to Display Table of Contents >> Setup |
|
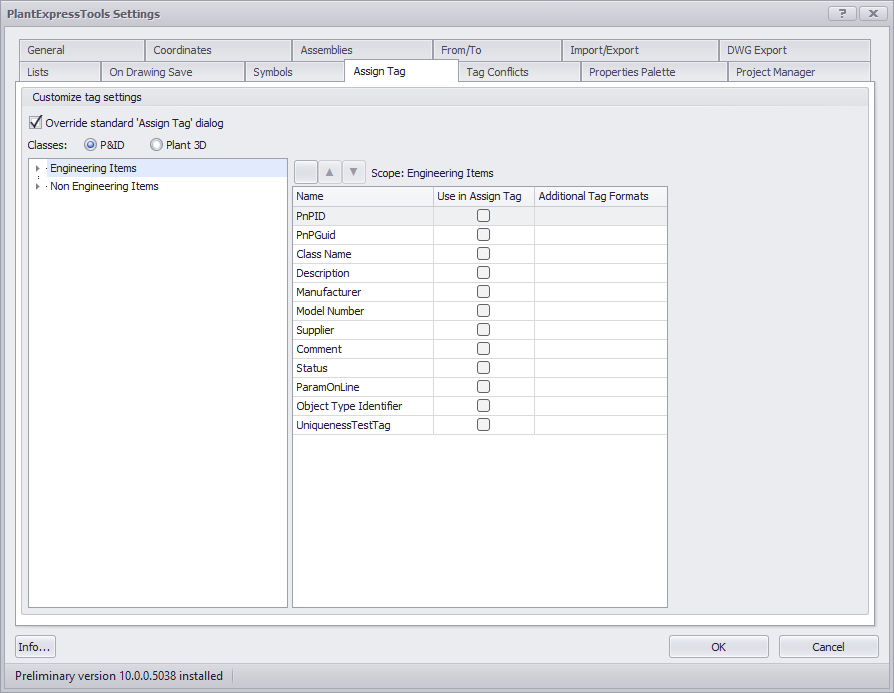
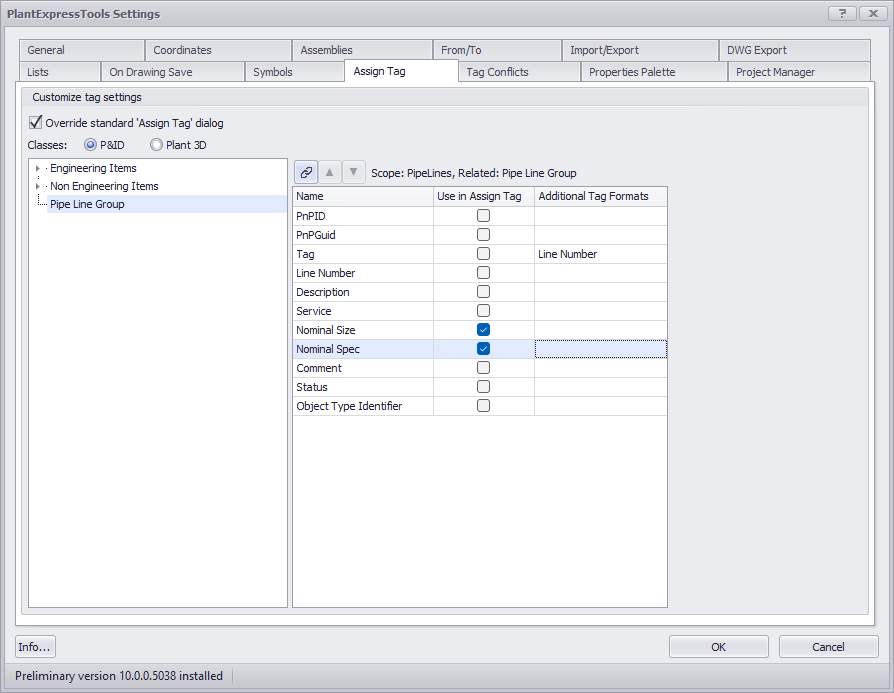
This chapter describes how to setup the Assign Tag dialog.
The main components of the settings are described under Assign Tag.
The main part of the settings is the table in the middle where you can select the properties you want to add to the Assign Tag dialog as well as select additional Tag Format. How this all is shown in the Assign Tag dialog can be seen under Usage.
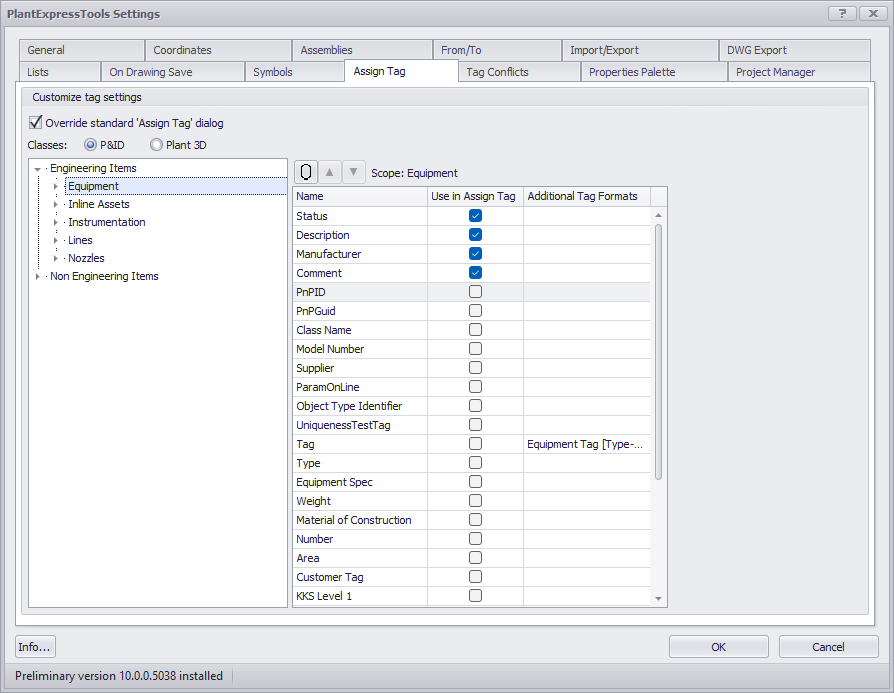
Selecting Additional Properties
When you select a class you can select additional properties. The order can be changed with the arrow up/down buttons.
The checkboxes are so called tri-state boxes. Meaning, if you now select a sub-class like Blowers you can then unselect one of the selected properties. This will then only apply to the Blowers class, but not the other sub-classes under Equipment.
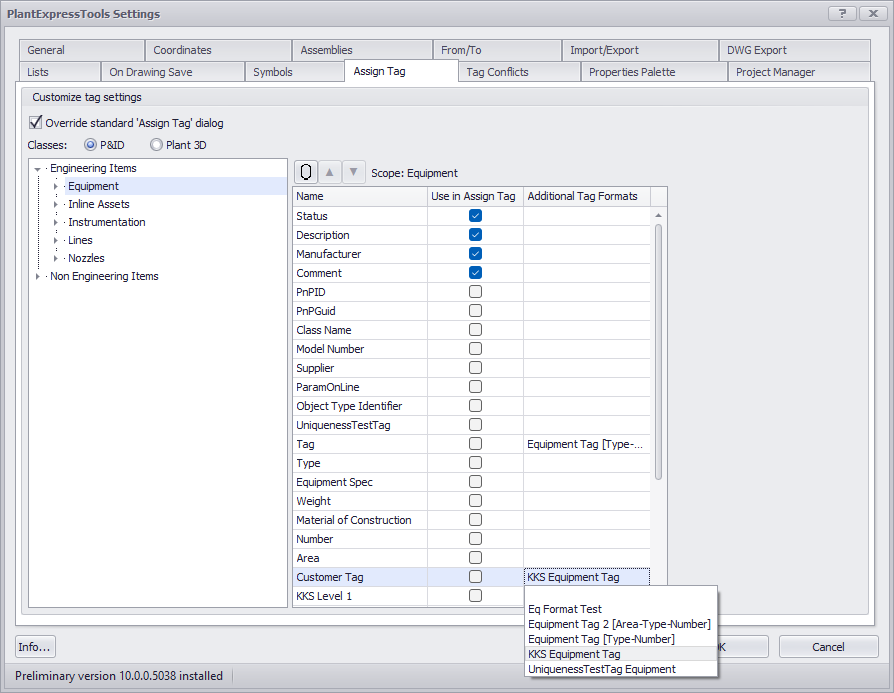
Selecting Additional Tag Formats
The primary Tag Format gets shown automatically and cannot be changed, because this setting comes from Plant 3D's Project Setup.
If you have defined additional Tag Formats in Project Setup, you can then select these formats for other properties.
You can select more then just one additional Tag Format.
Selecting Related Properties
Plant 3D classes often have relationships with other classes. For example between Pipe Line Segments and Pipe Line Groups.
If you select a class you can switch to the related classes with the toggle button left of the arrow up/down buttons. There is also a tooltip.
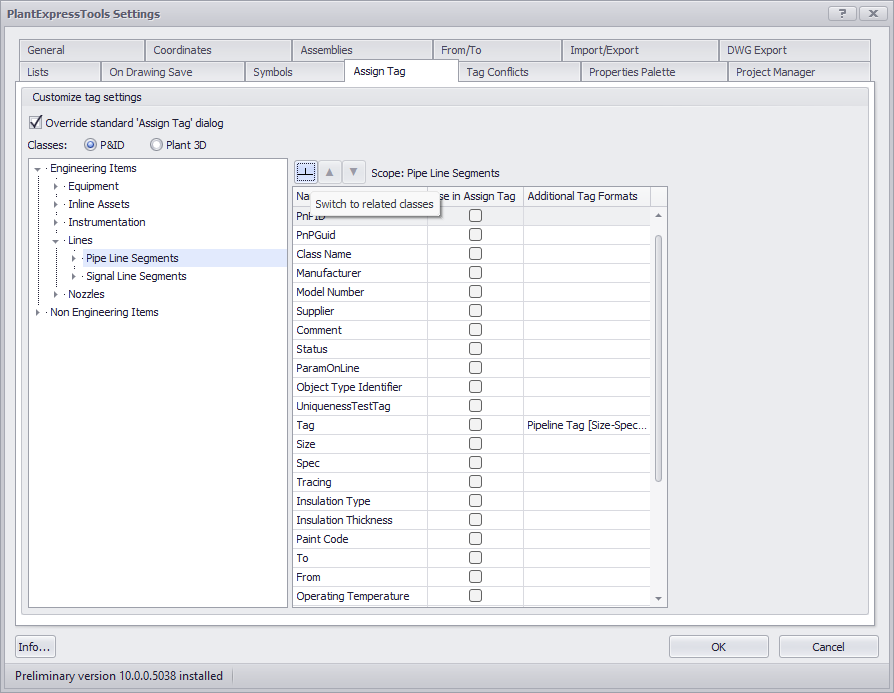
You are then shown the available related classes. You can select additional properties from those as well.
This will later allow you to not only edit the additional properties of the Pipe Line Segment, but also of the Pipe Line Group.
Next Chapter: Usage