|
<< Click to Display Table of Contents >> Usage |
  
|
|
<< Click to Display Table of Contents >> Usage |
|
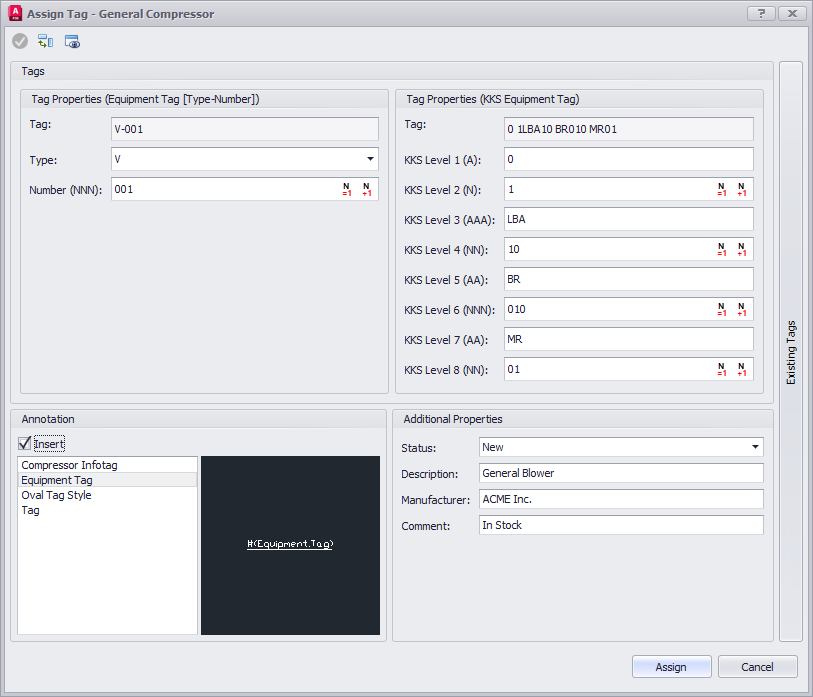
This chapter describes how to use the Assign Tag dialog.
The dialog is a replacement for the original Plant 3D dialog. The dialog appears when you use Assign Tag from the context menu of an object, or when inserting a symbol, or when clicking on the Tag icon in the Properties Palette or Data Manager.
User Interface
If you use additional Tag Formats they are presented side-by-side. With the orientation toggle button (![]() ) you can flip the orientation between vertical (default) or vertical.
) you can flip the orientation between vertical (default) or vertical.
In the lower left hand corner you see the available Annotations. With the viewer button (![]() ) you can enable the Viewer to see how the Annotation looks. You can also zoom and pan i the Viewer.
) you can enable the Viewer to see how the Annotation looks. You can also zoom and pan i the Viewer.
Remark: Plant 3D's Assign Tag dialog only shows Annotations which use the Tag property in one of the Annotation's attributes. PlantTools Assign Tag dialog shows all available Annotations.
In the lower right hand corner you see the additional properties you selected in the settings.
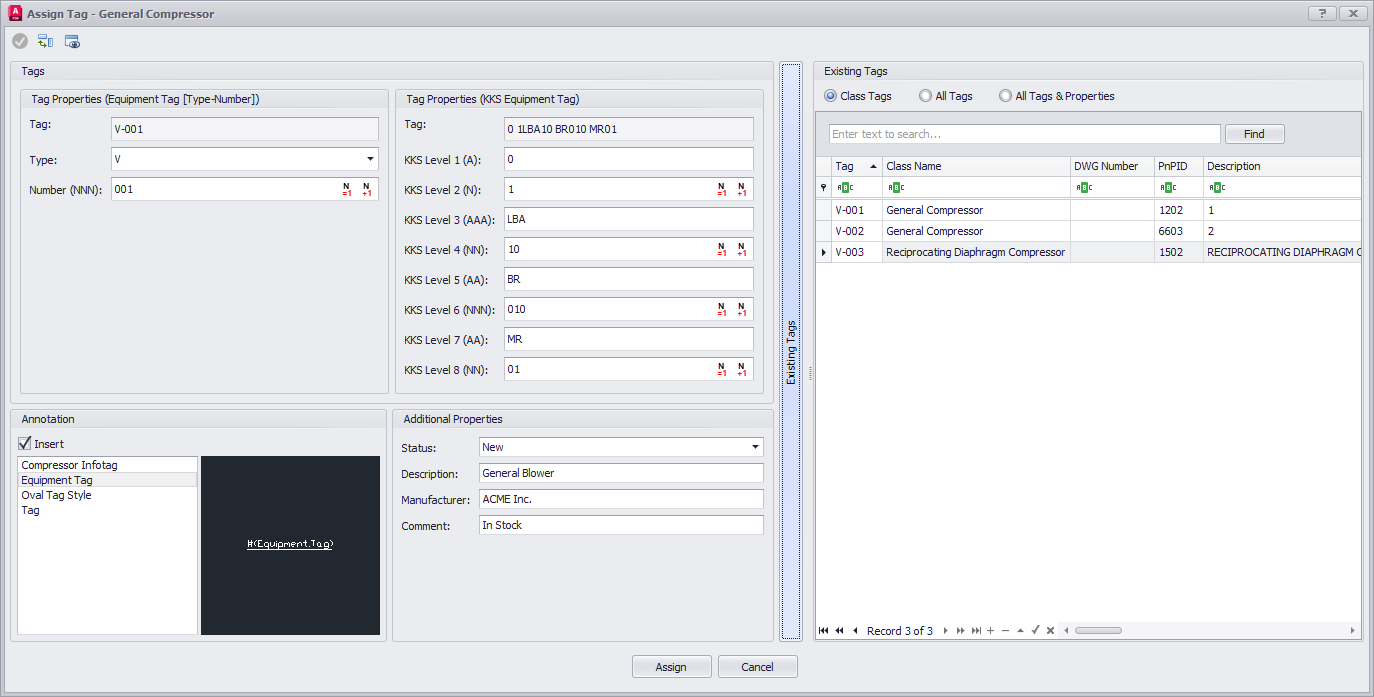
Existing Tags Panel
If you click on the vertical Existing Tags button, the right panel expands which shows you the existing Tags of the parent class (e.g., Compressors) and all their properties.
If you click on All Tags then all Tags of the project are shown with their common properties.
If you click on All Tags & Properties then all Tags of the project are shown with all their properties. This is very convenient in case you are searching for some value and you don't know in which property it is stored.
Numeric Buttons
For properties with a numeric format (N) you will now see two buttons.
The first one works like the Plant 3D button in the original Assign Tag dialog. Meaning the button starts searching from 1 and checks if this number will create a unique Tag. If not it increases the value by 1 and checks again until a unique Tag can be found.
![]()
If you have a Tag format with multiple numeric properties you can use the button even if not all properties are filled out. For example when using the button for the KKS Level 4 (NN) property the button finds the lowest value which leads to a unique part Tag (e.g., 0 1LBA01)
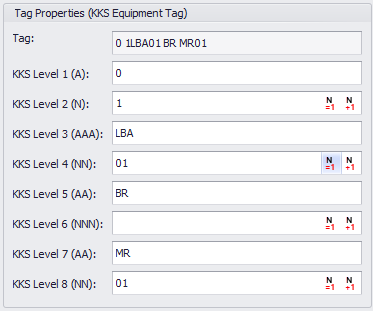
The second button searches for the currently highest used number and adds 1. This is very useful if you do not want to fill gaps in your numbering. If you already have V-001, V-003, V-004, then this button delivers V-005.
Edit Mode
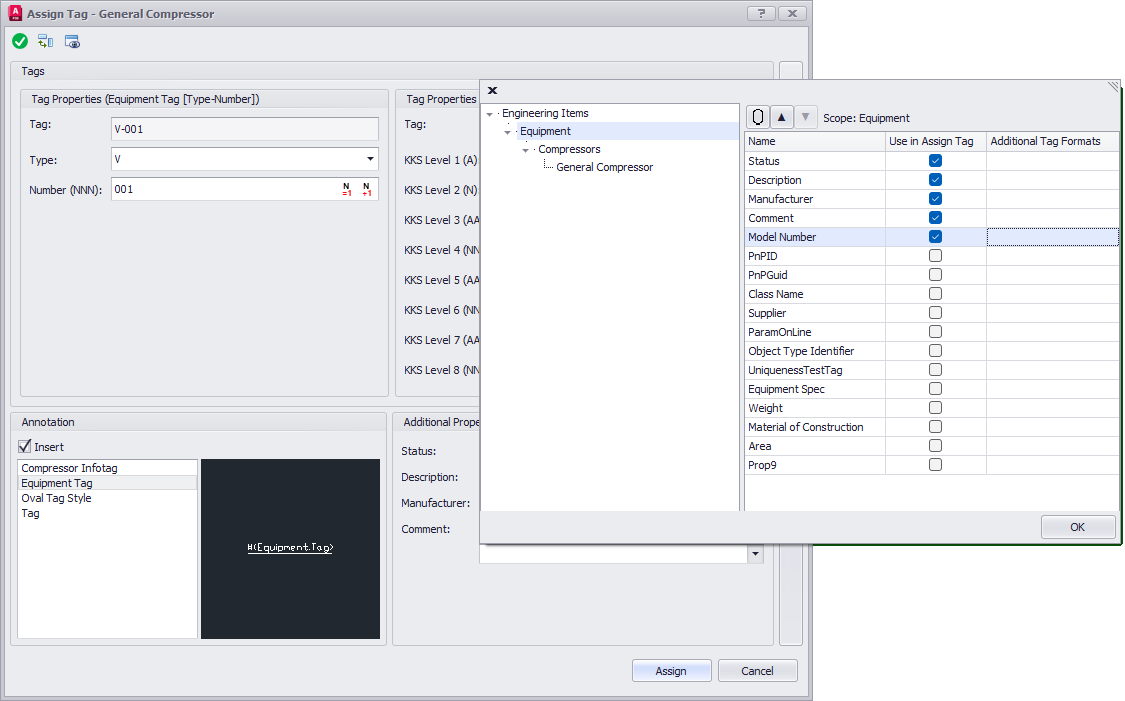
The Edit Mode (![]() ) allows you to add additional properties without leaving the dialog and go to the settings first.
) allows you to add additional properties without leaving the dialog and go to the settings first.
After clicking the button it changes to green and in the Additional Properties section you can choose additional properties.

You get the same "picker" as in the Assign Tag Settings. When selecting properties make sure you select the correct class. Otherwise the checkboxes will be used only for the specific class of the object you currently use in the Assign Tag dialog.
You can also select from the related classed. You can also unselect properties.
You can use the Tag property from related classes to, but they will be read-only.
When you close the picker with OK you will see the selected property.
You can end the Edit Mode by either clicking on the green button (![]() ) or by closing the Assign Tag dialog.
) or by closing the Assign Tag dialog.

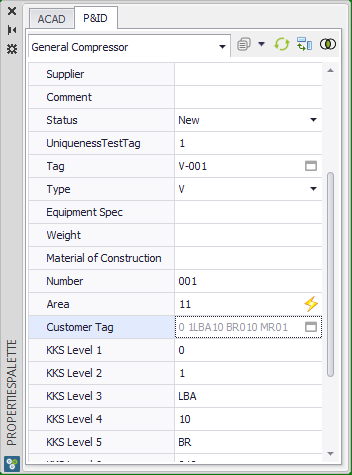
PlantTools Properties Palette
In the PlantTools Properties Palette you will see the Tag Edit icon (![]() ) for each of the Tags. You can click on any of them to open the Assign Tag dialogs.
) for each of the Tags. You can click on any of them to open the Assign Tag dialogs.