|
<< Click to Display Table of Contents >> Multiple Assembly Classes |
  
|
|
<< Click to Display Table of Contents >> Multiple Assembly Classes |
|
This chapter covers the case when you have multiple Assembly classes for different purposes. In this example we create another Assembly class for Buildings. But you can create more than two assembly classes. We also use acquisition rules again. But this example would also work with mapping.
Simply add another class and some properties.
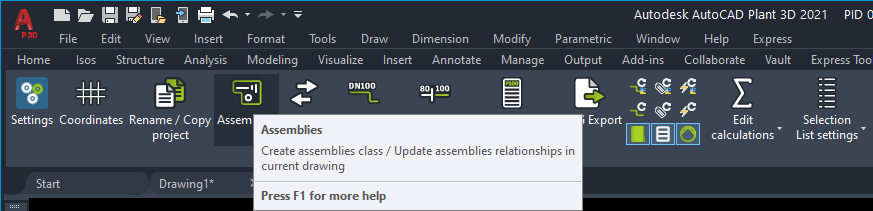
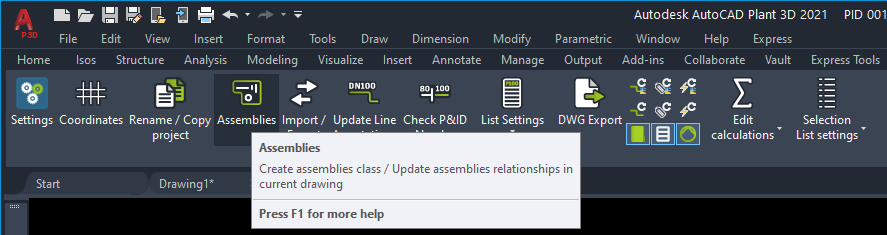
We click on the Assembly button to create the class and default symbol.
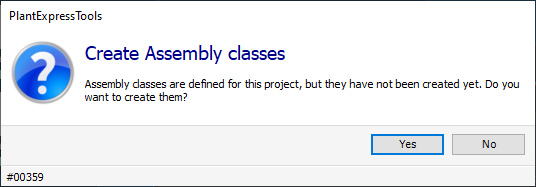
We will be asked if we want to create the class.
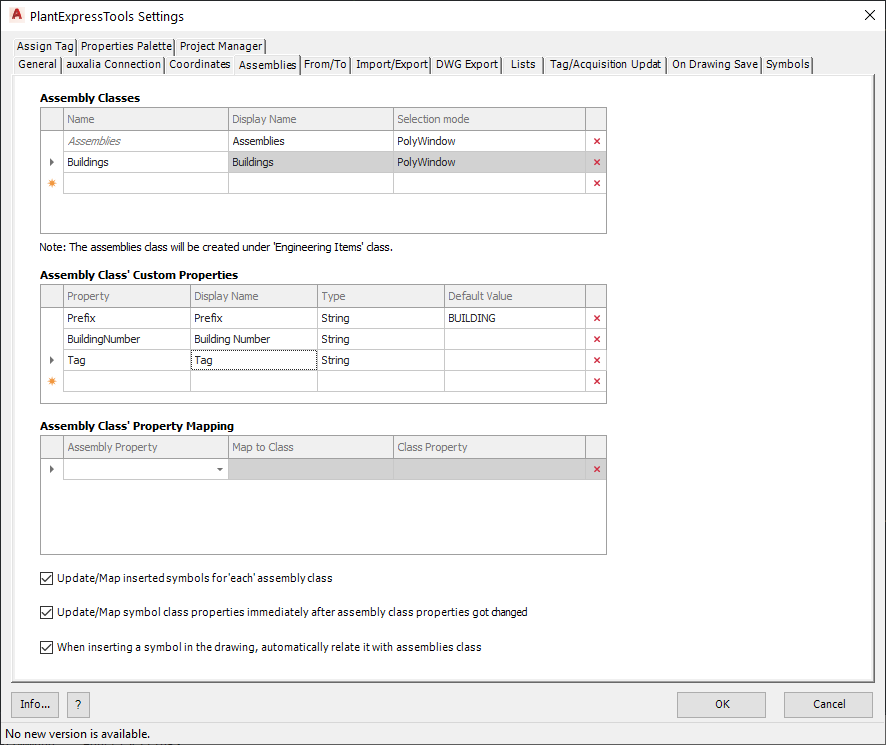
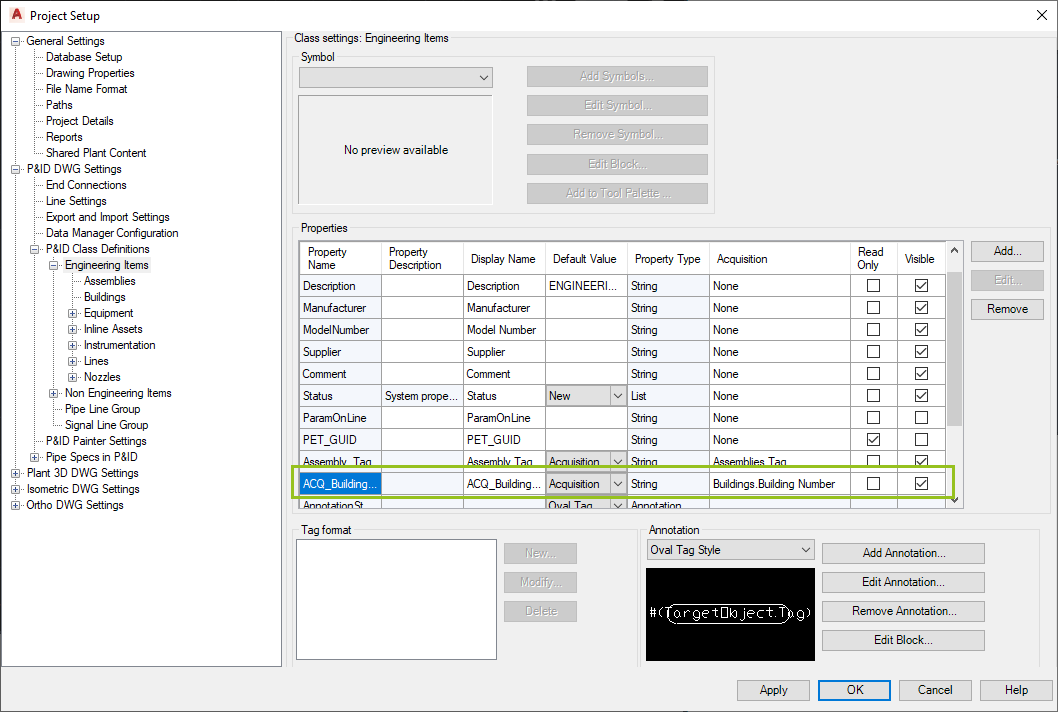
In Project Setup we now see the new class and properties.
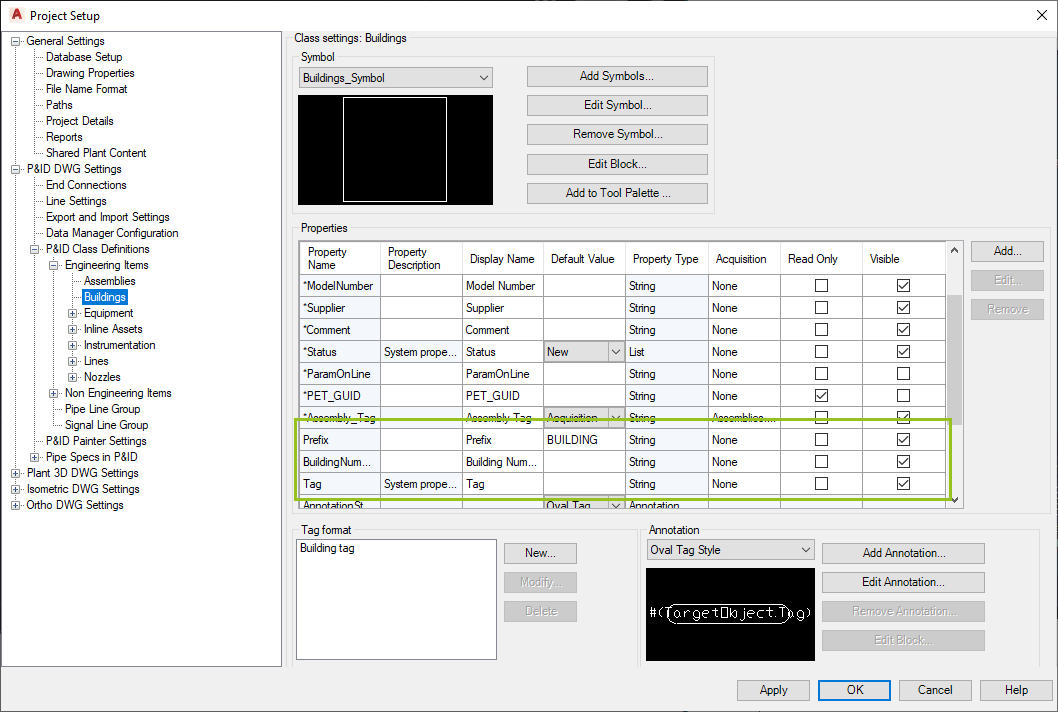
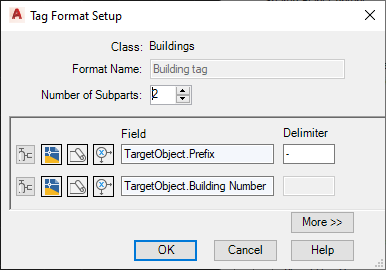
We define a Tag Format.
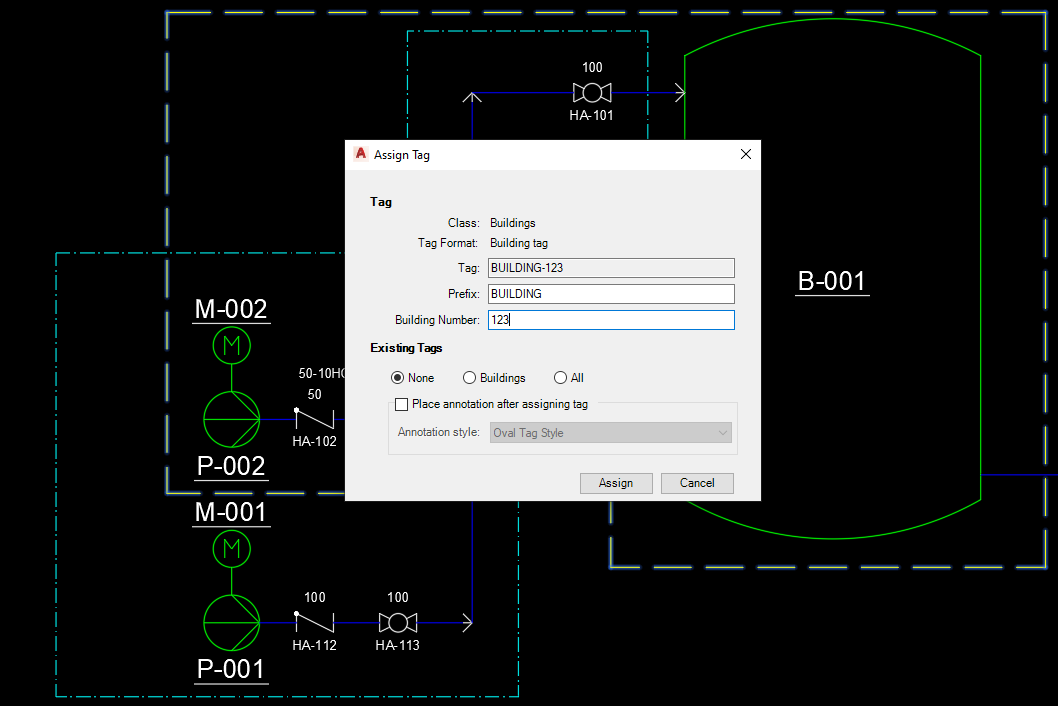
If we assume, that the building is just a number, using only the Build Number for the Tag may lead to Tag conflicts with the Tags of PipeLineGroups since there the Tag is just a number too.
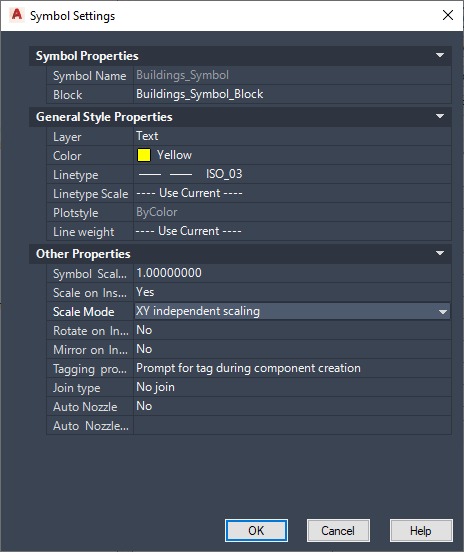
We set the symbol properties for the default symbol.
For EngineeringItems we create a new property which acquires the Building Number.
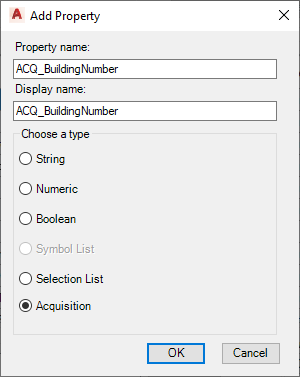
Selecting the Building Number from the Buildings class.
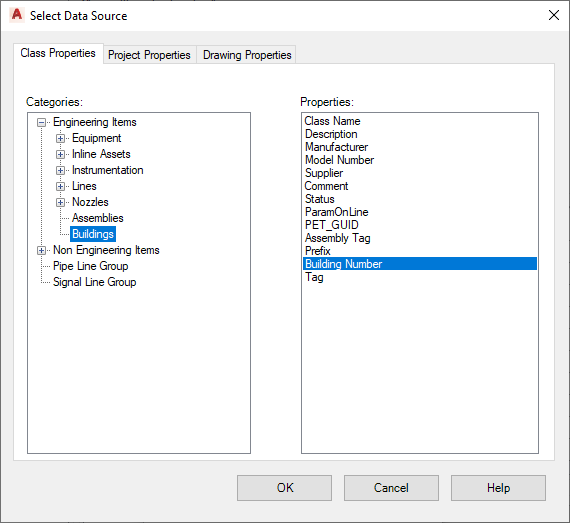
It is ok to only acquire the Building Number and not the Building Tag. The use of the Prefix for the Building Tag just avoids conflicts with the PipeLineGroup Tag, but for the lines and symbols we probably are interested only in the Building Number.
We create a Polyline or use the default symbol from the tool palette or the PlantExpressTools' SymbolsPalette.
As you see, the Assembly's Polylines can overlap.
You convert the Polyline.
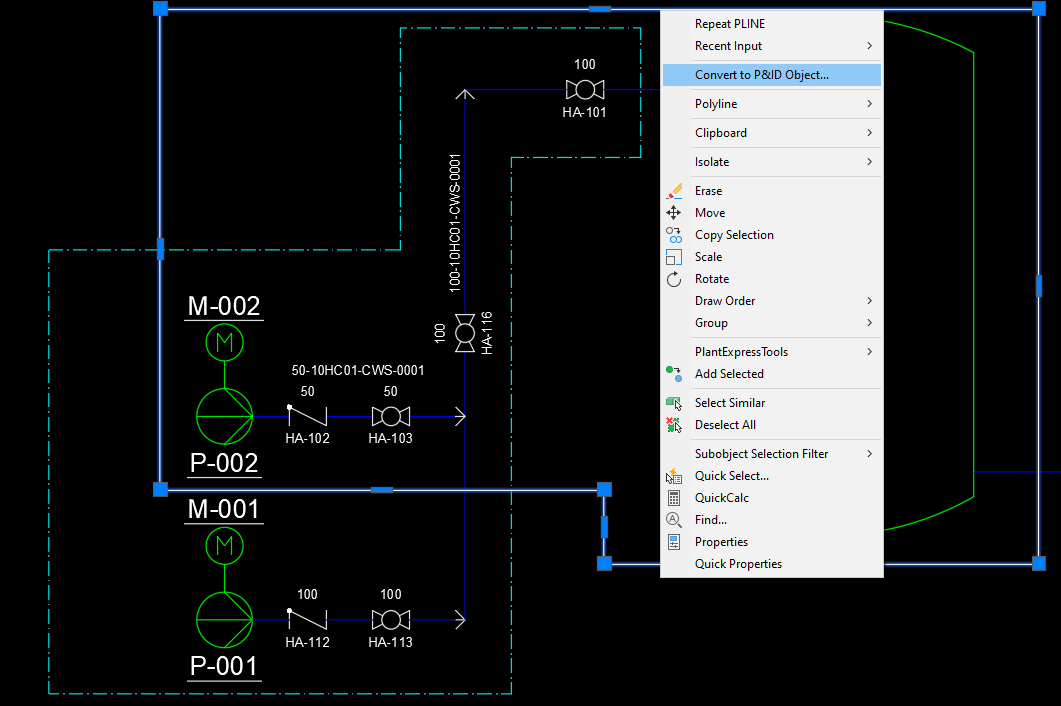
Now you select Buildings.
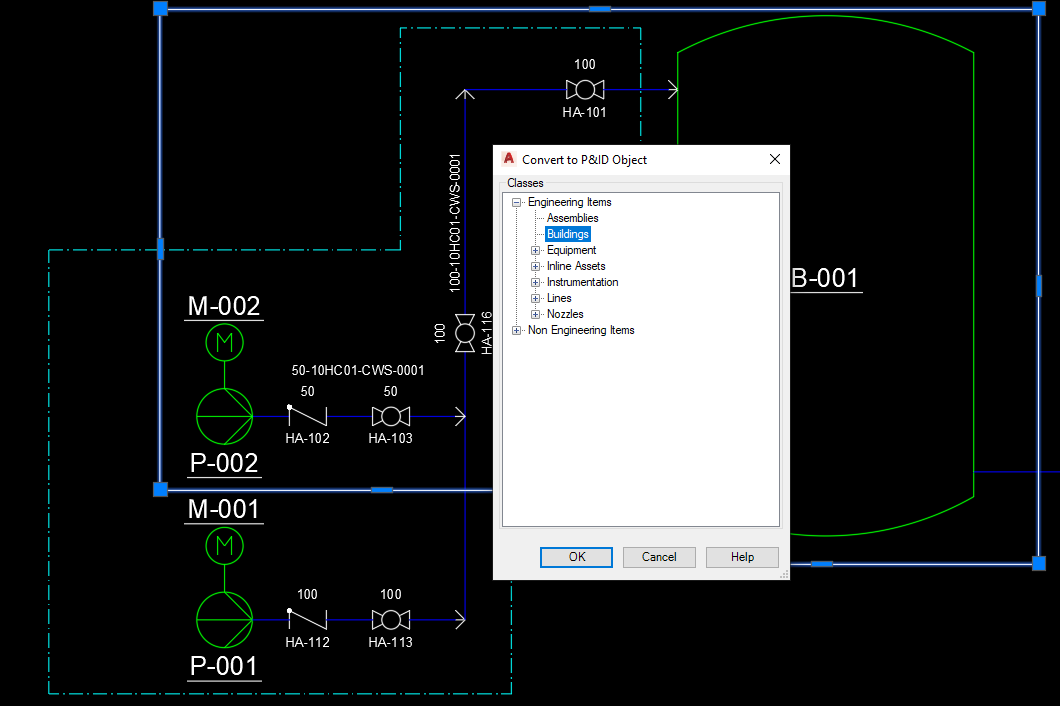
After defining the insertion point the Polyline is converted.
We assign a Tag to the Buildings assembly.
We update the Assemblies again to create/update the relationships between lines and symbols and the assemblies.
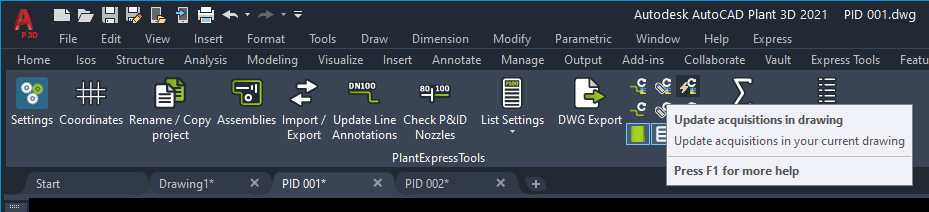
Updating the acquisitions may be needed to.
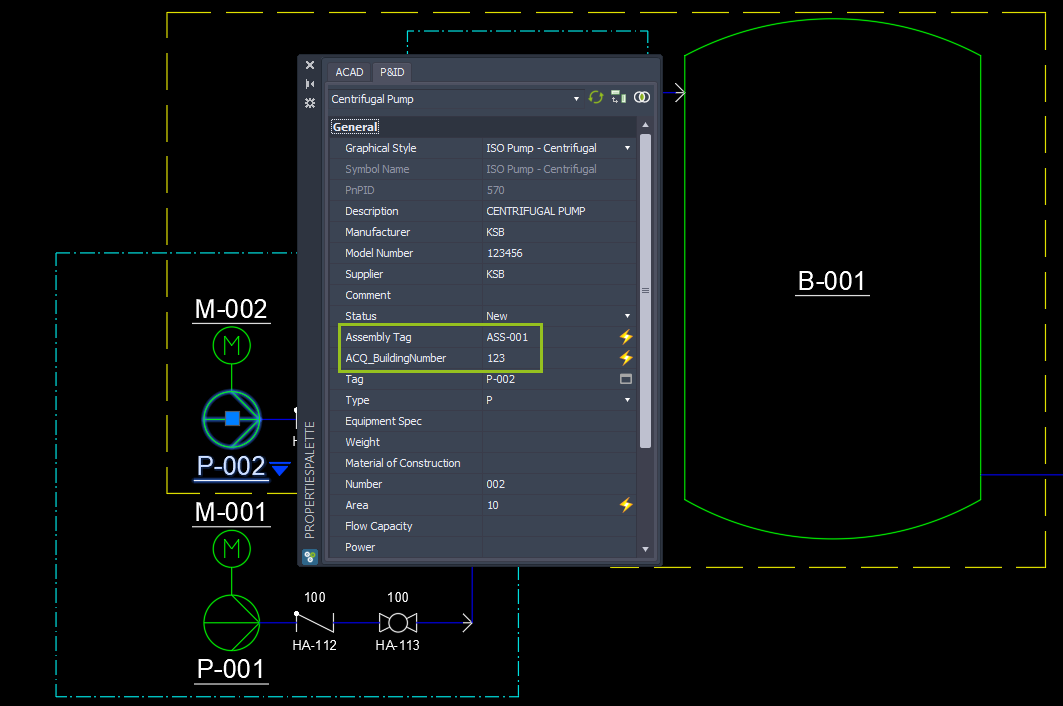
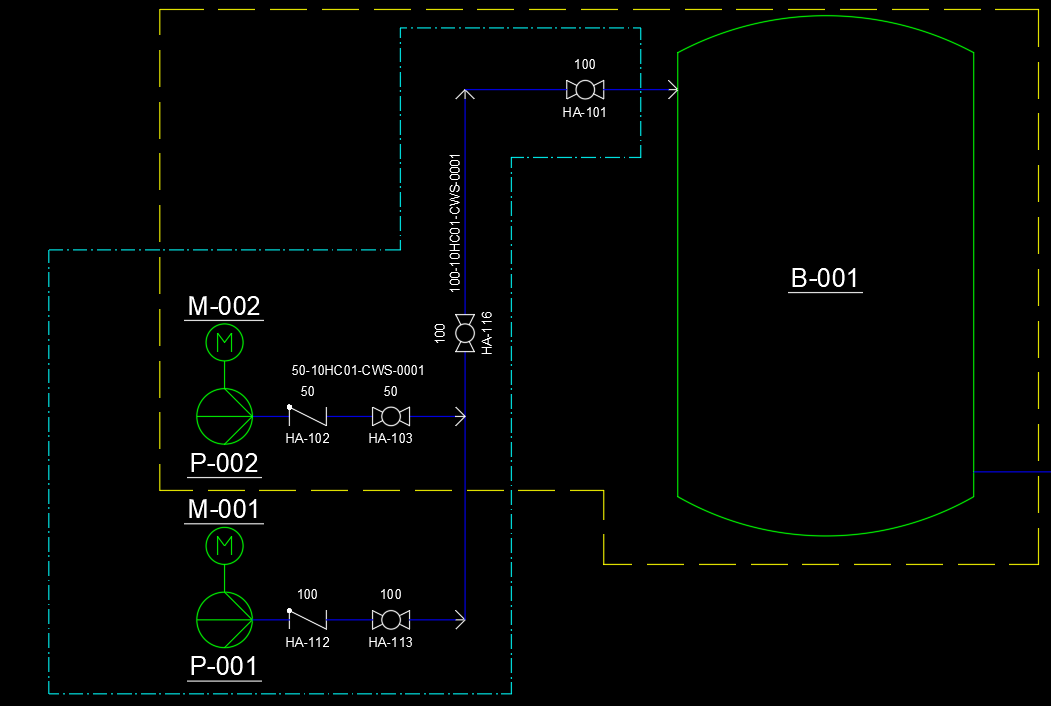
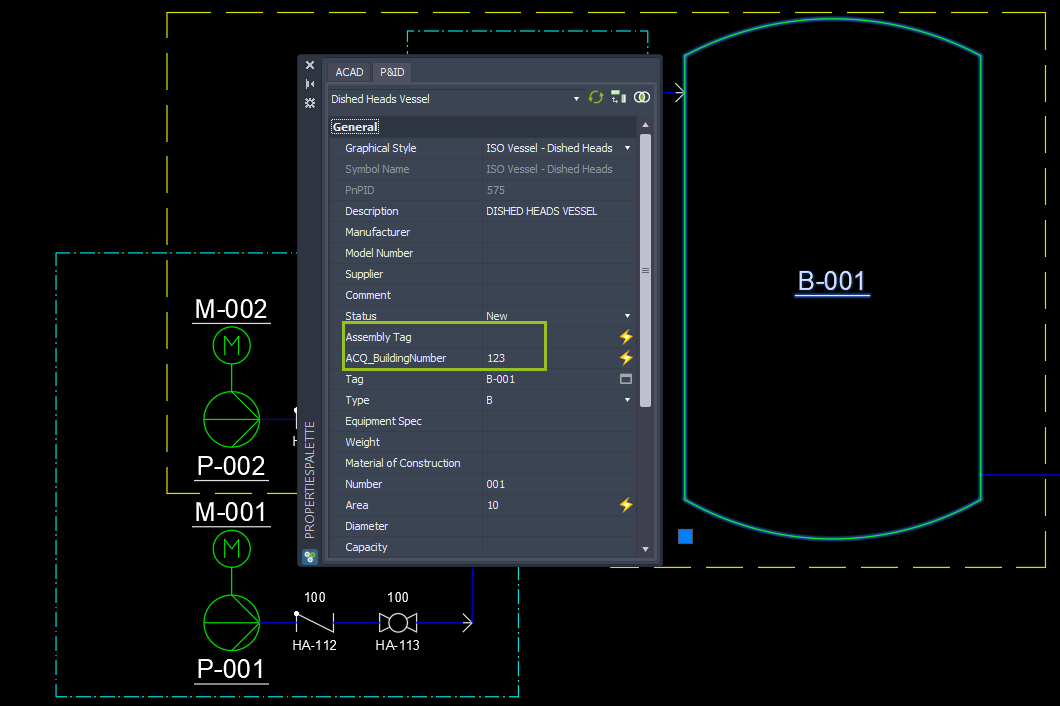
If we select the Tank we see that the Building Number was acquired. The Assembly Tag is empty of course, because the Tank is not in the boundaries of the cyan Assembly.
If we have a look at the Pump in the lower left hand corner you see that this time the Building Number is empty, because the Pump is not in the confines of the yellow Buildings assembly.
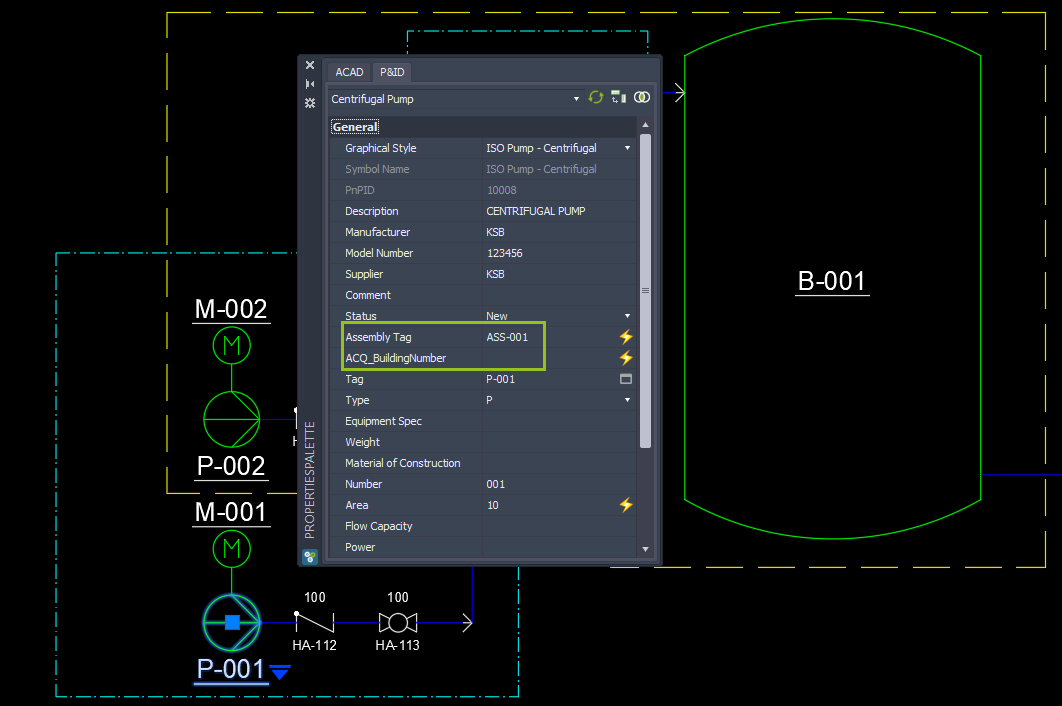
When you click on Pump P-002 you see that both acquired properties are filled out.