|
<< Click to Display Table of Contents >> Setup |
  
|
|
<< Click to Display Table of Contents >> Setup |
|
This chapter explains how the Rule-Based Block Insert is setup before you can use it get blocks inserted automatically.
This feature is linked to PlantProjectCreate. Even if you don't use it you must set it up. Details can be found under: Setup.
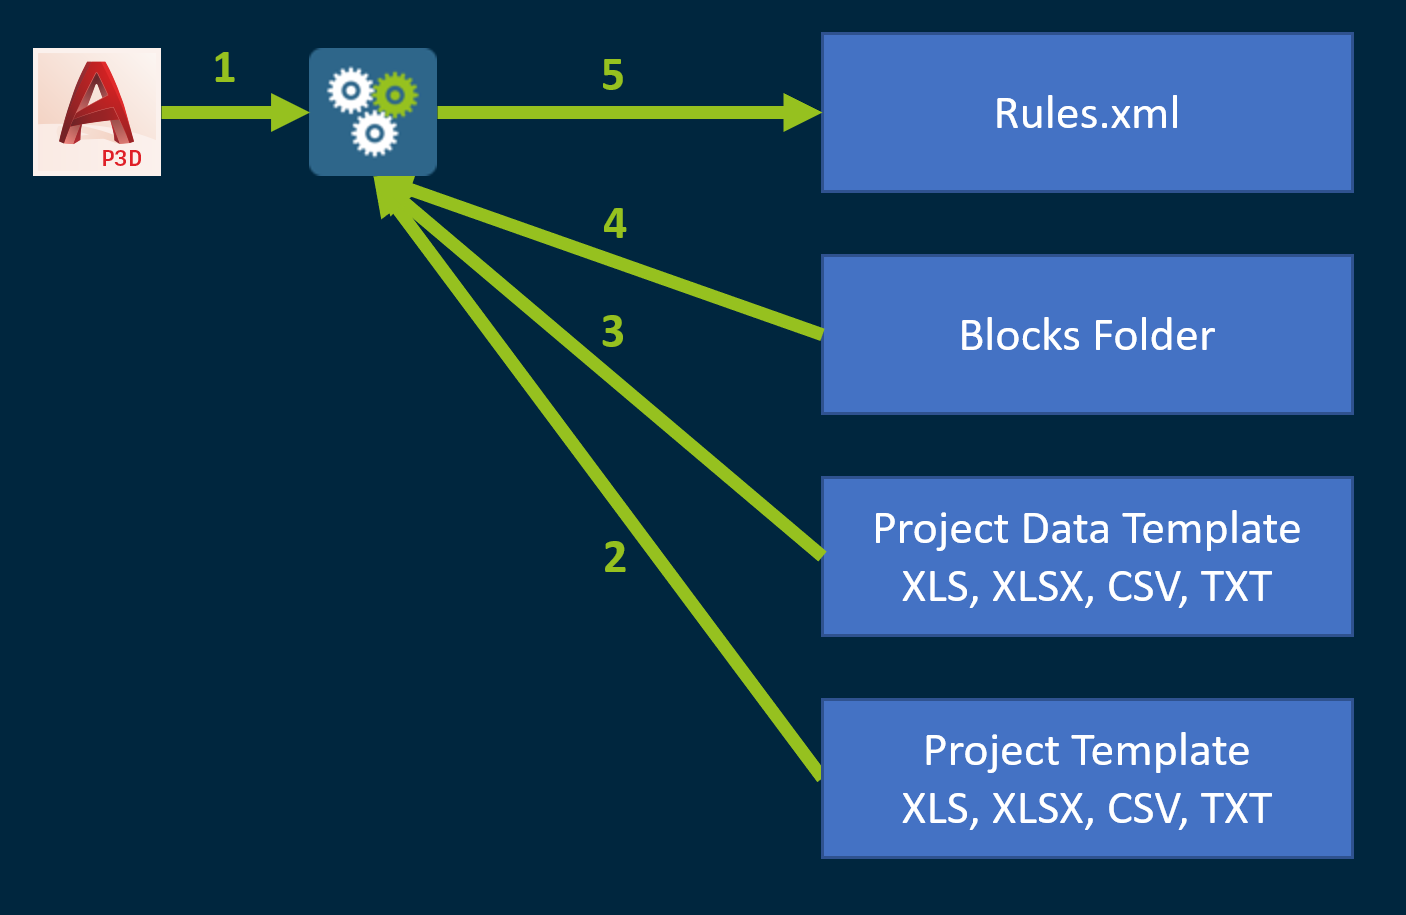
The following image show the workflow of this feature. The configuration of Rule-Based Block Insert is integrated in PlantProjectSetup as Part of PlantExpressTools and therefore a Plugin in Plant 3D (1).
To setup Rule-Based Block Insert you must have the folder where your blocks are (4), the project template (2) which is also used in PlantProjectCreate and the Project Data Template (3). The setup of the rules is then stored in the Rules.xml (5).
To give you some context, the next image shows you what we will later see for drawing PID 001 (Sheet 01). You see the block names we will later use.
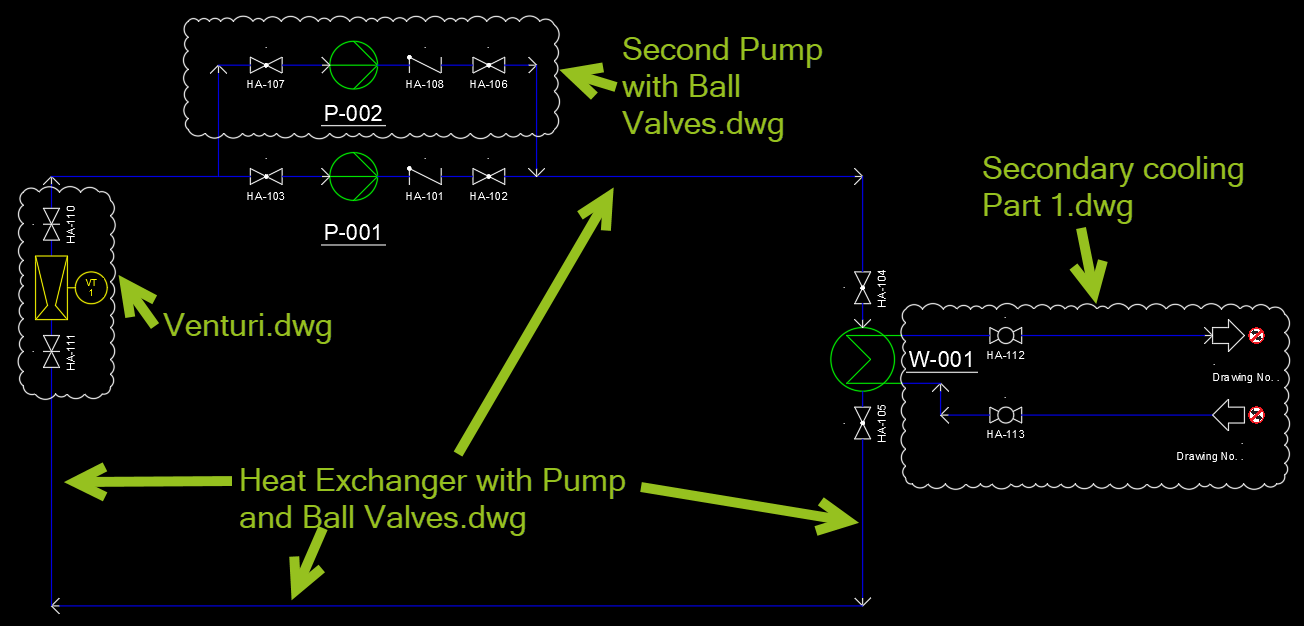
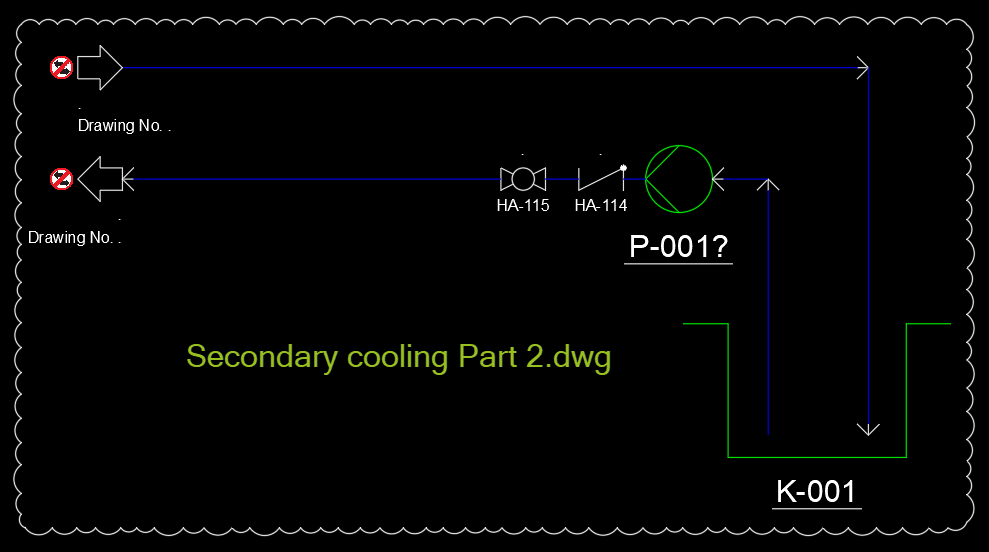
On the second drawing PID 002 (Sheet 02) we will see only this one block.
The Template file is described in detail under Setup. It is needed also for the Rule-Based Block Insert to get the drawing sheet number from the file on which a block is supposed to be inserted.
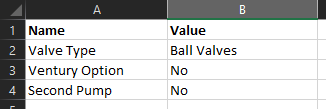
The second file you need is the Project Data Template file. You can use XLSX, XLS, CSV Or TXT.

The Project Data Template file only needs two columns. Name and Value. Name contains all the "variables" you later want to use in the rules and values contain the values which control the outcome of the rules.
For the setup of the rules you must add all the names you later want to use to setup the rules. The values can be empty. They will become necessary only when you later let the blocks be inserted based on the rules you defined. You can of course fill in some values to remind yourself what the type of value you need for a certain name. You may even want to add a third column (maybe Comments) where you add some information about the name.
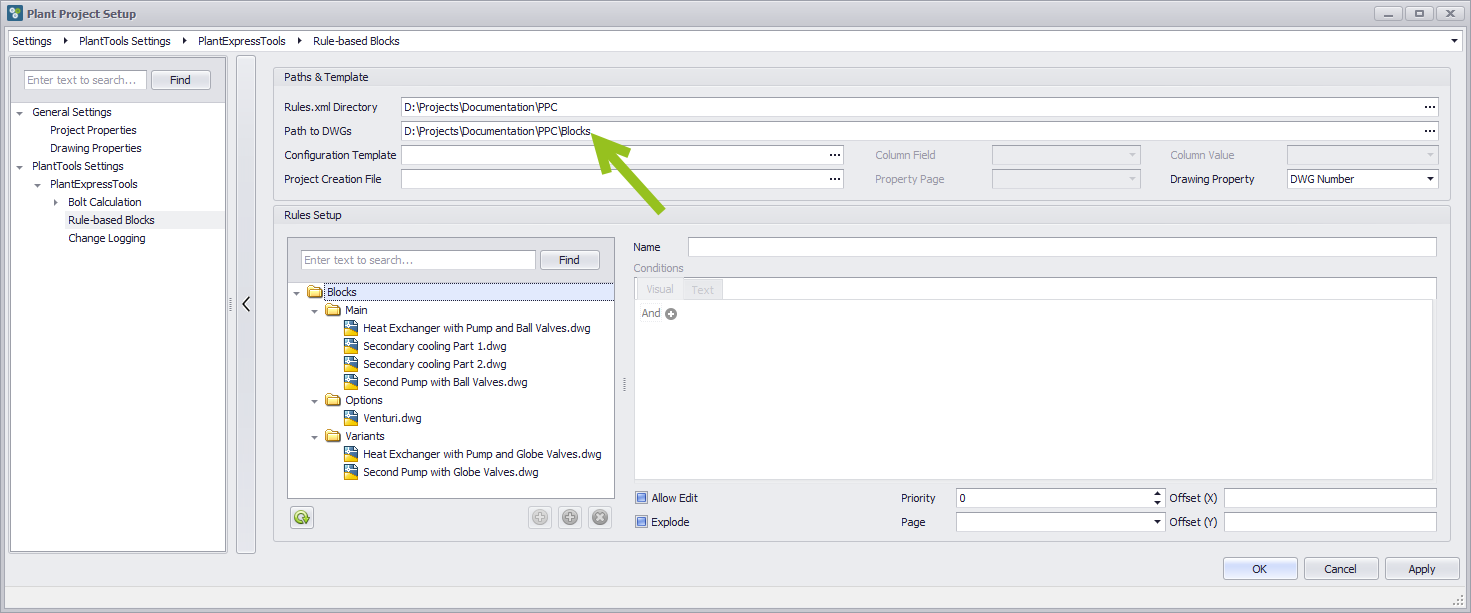
Last you need a folder where you store your blocks/dwgs. This folder can also have a sub folder structure. The DWGs are typically P&ID drawings with P&D objects (symbols and lines) which were saves as blocks with the WBLOCK command.
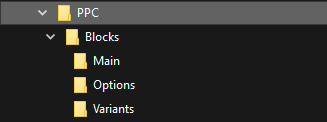
Here are the examples from the Main folder.
As you can see you are completely free in the folder structure depth and naming as well as DWG filenames.

Make sure you have loaded a project with the drawing properties you used for PlantProjectCreate, because we will later need to select the drawing property which contains the Sheet number. If you have a project open which doesn't have this property, you cannot define the rules.
Of course, the property can also have a different name. It just needs to be some property which contains the Sheet number.
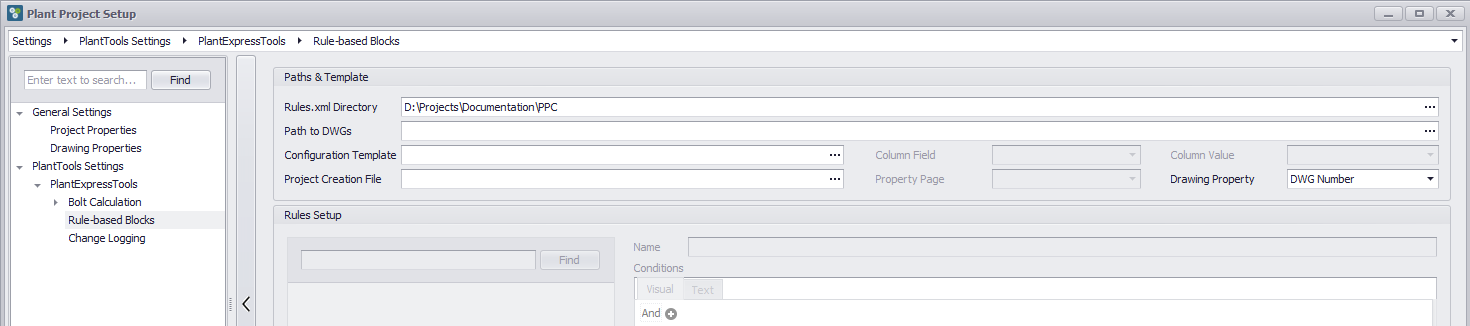
You start the setup of the Rule-Based Block Insert from PlantProjectManager by opening PlantProjectSetup.
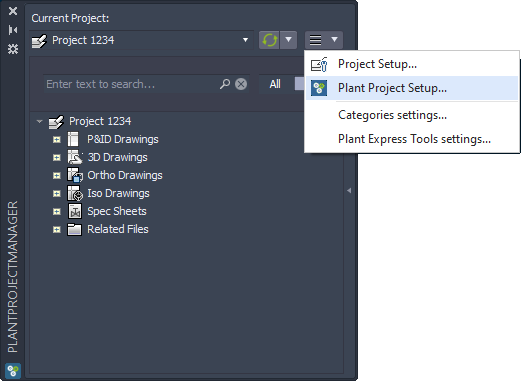
You select the "Rule-Based Blocks" node.
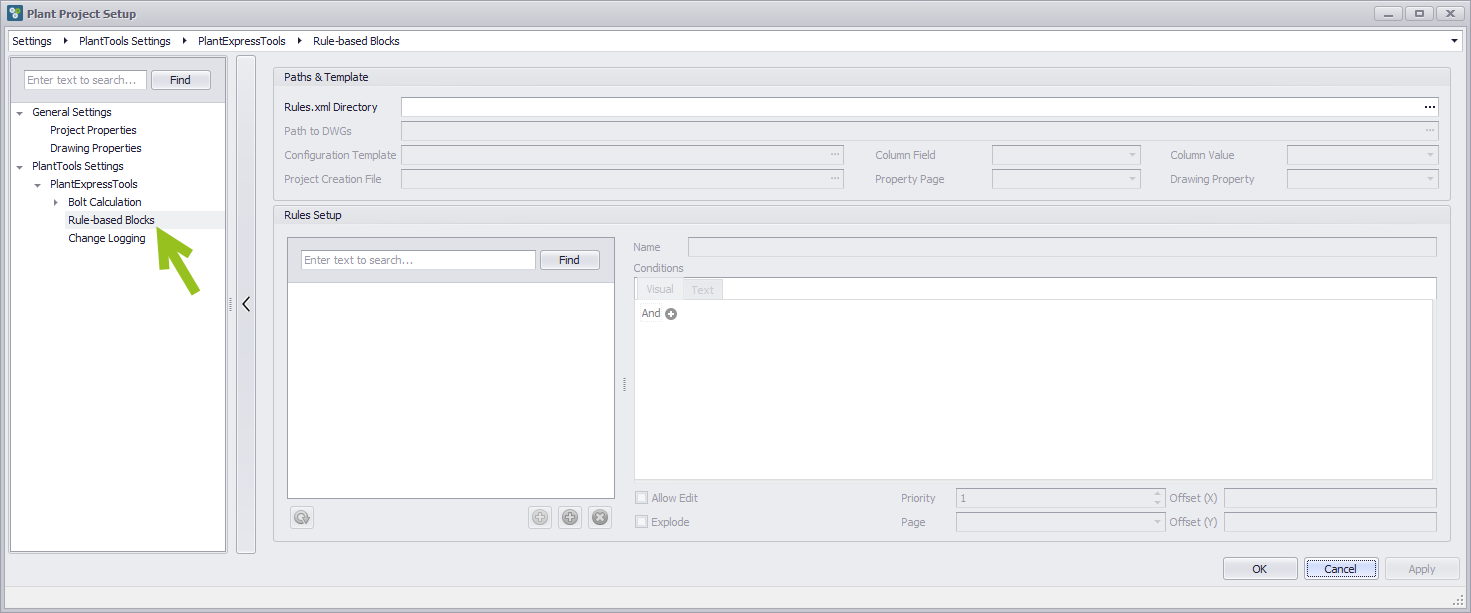
First you must select a path under which the Rules.xml file will be created. This file will contain the rules you are about to define. Typically it is a network drive. Yo ucan use drag & drop and drop a folder into the text box.
The "Drawing Property" will be set to "DWG Number" be default, but we will change this further down the road.
Next you select your folder with the blocks.
You will instantly see the folder structure and dwgs under the selected folder. You can use drag & drop again.
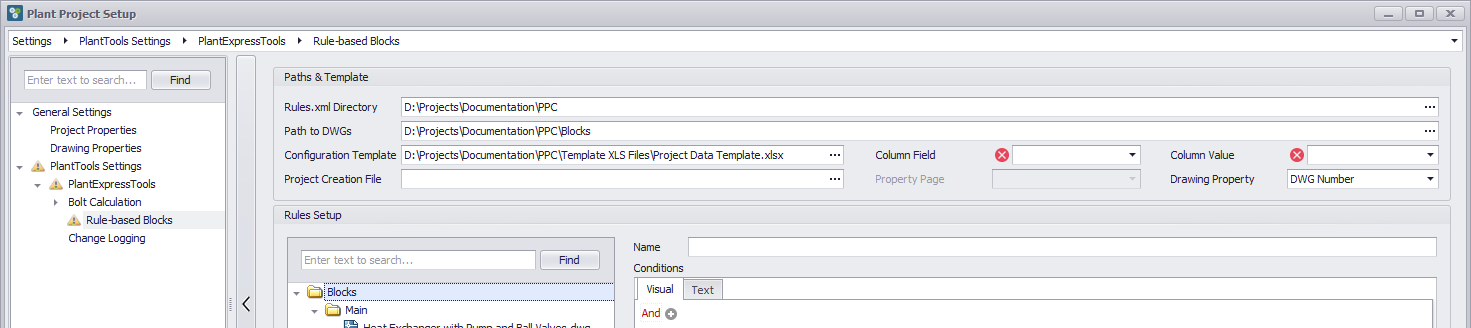
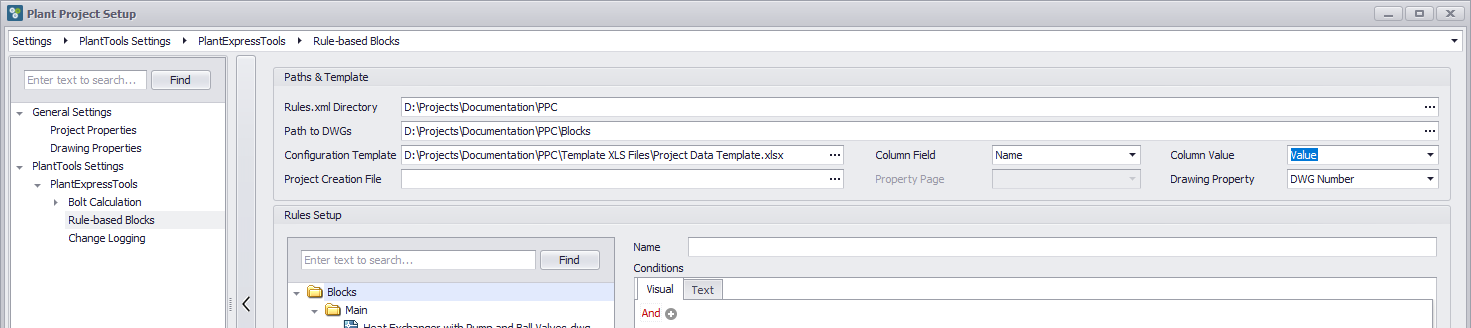
Next you select you Project Data Template which contains the names of the variables you need.
You can use drag & drop.
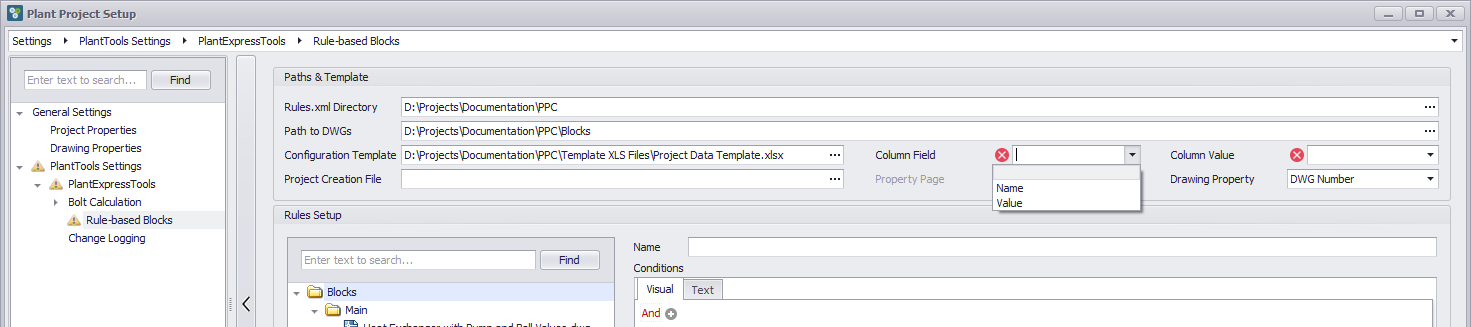
We need to select the Column Field and Column Value.
If you use the drop down list you see the two columns from the Project Data Template. "Columns Field" contains the variable or field names we want to use for the rules. "Column Value" is the columns which contains the values.
This is how it looks like when both have been selected.
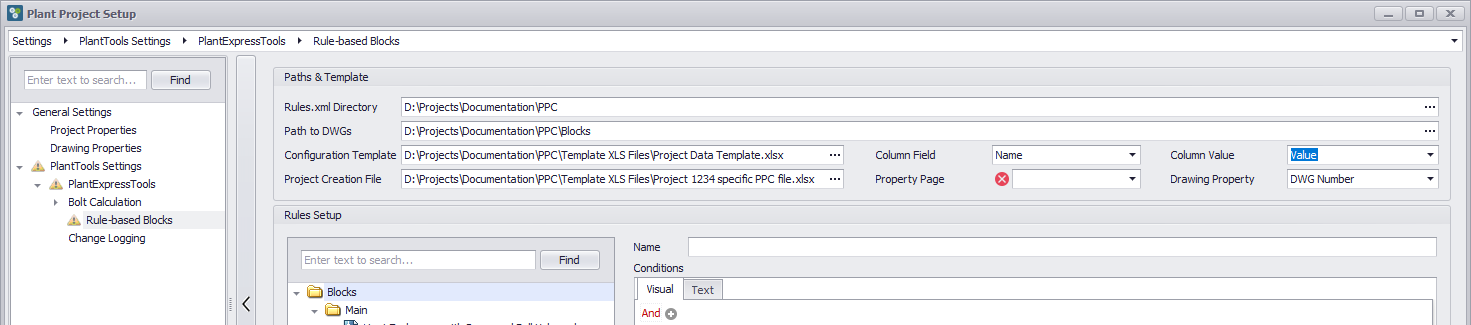
Now we select the Template File which was also used by PlantProjectCreate (Setup).
Here is a reminder about the content. We will need the Sheet No columns later for the rules.

You can use drag & drop again.
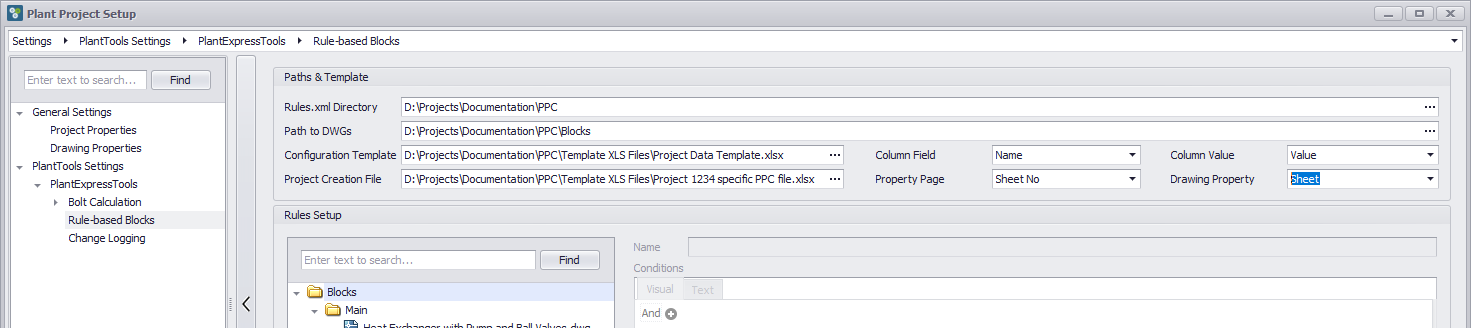
We select the "Sheet No" column from the file and "Sheet" from the list of drawing properties.
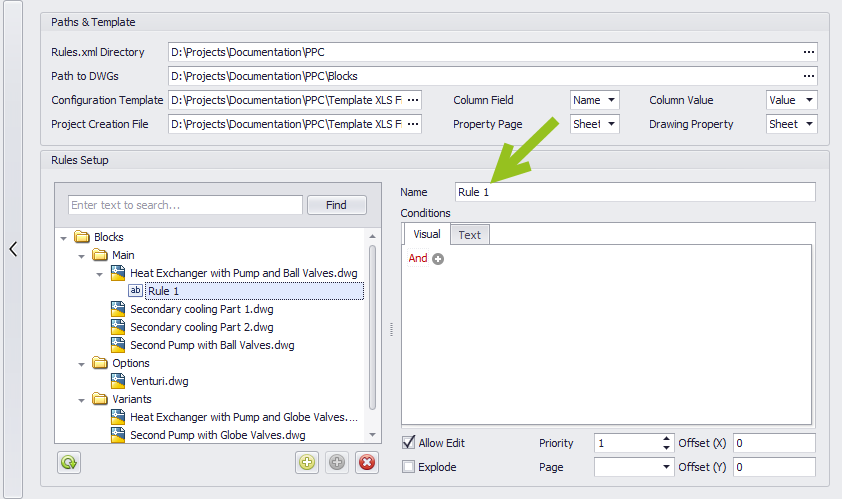
Now we can start with the definition of the first rule.
The way this works is, that you can define one or more rules for a block. If you need a block twice (either in one drawing or in two different drawings) you simply define two rules.
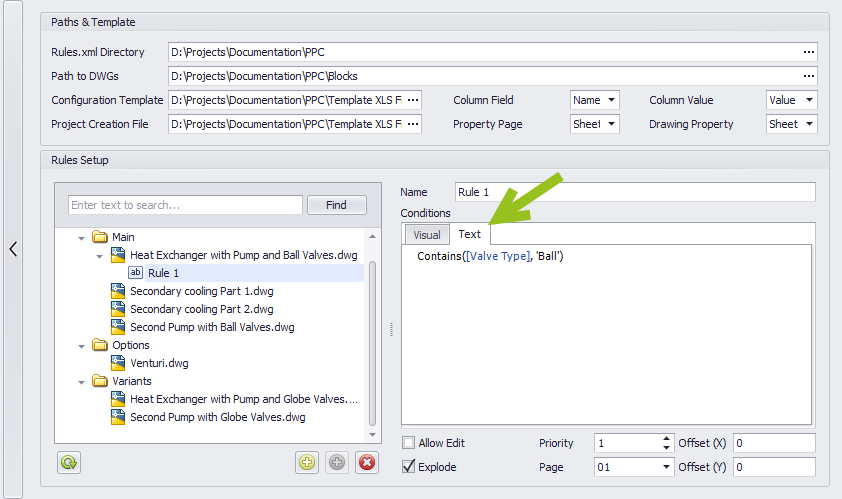
Lets start with the main block and click on "Add" to add a rule.
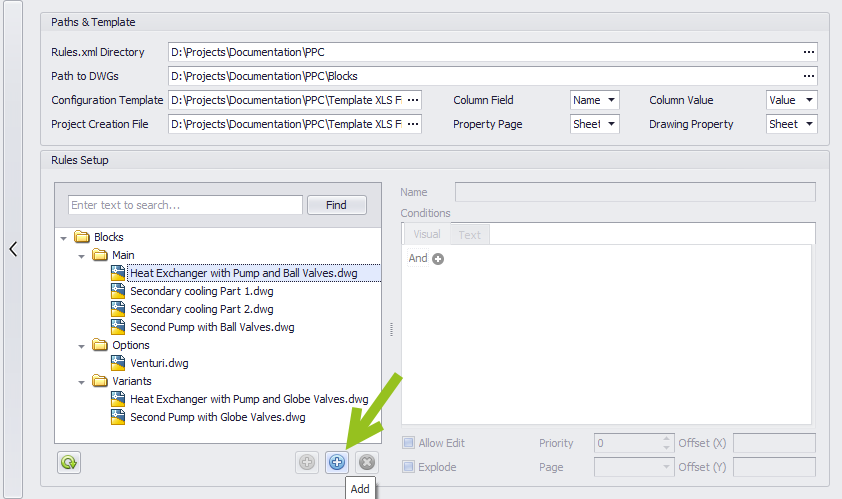
As soon as you did this, a default rule name will be created (here Rule 1) which can be edited at any time (green arrow).
We recommend reading through the tutorial of DevExpress to learn about how to use the Filter Editor.
We start by clicking on green plus sign.
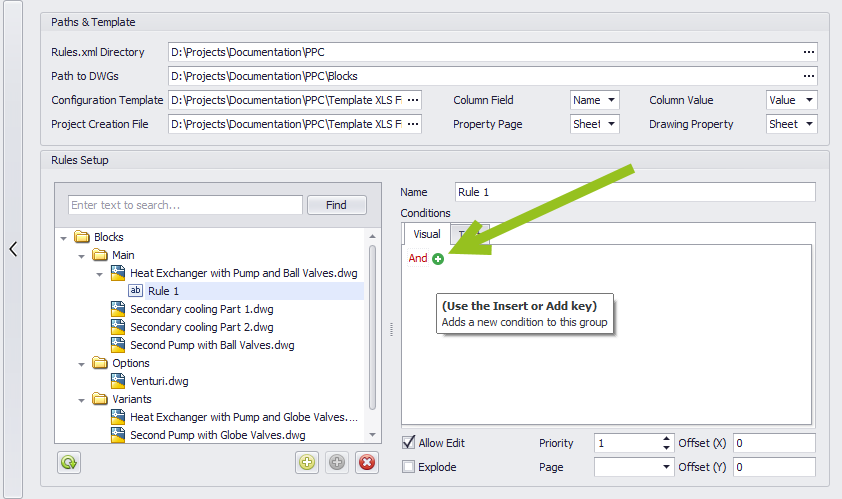
This creates automatically a first line.
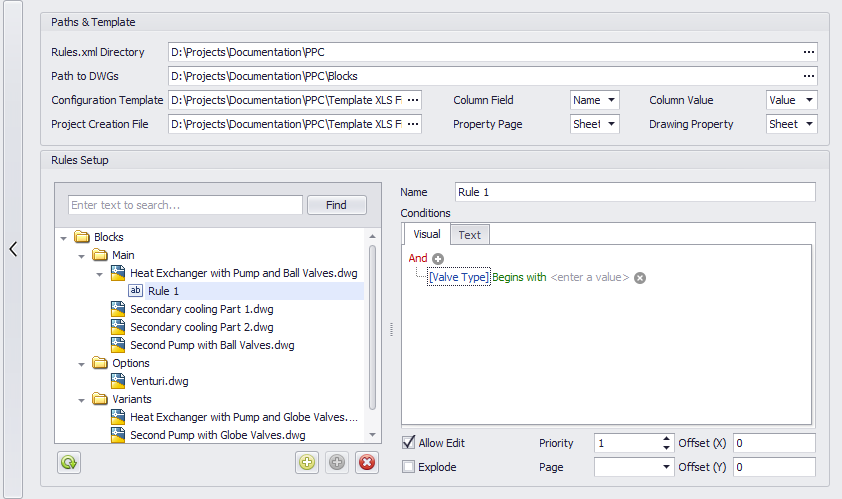
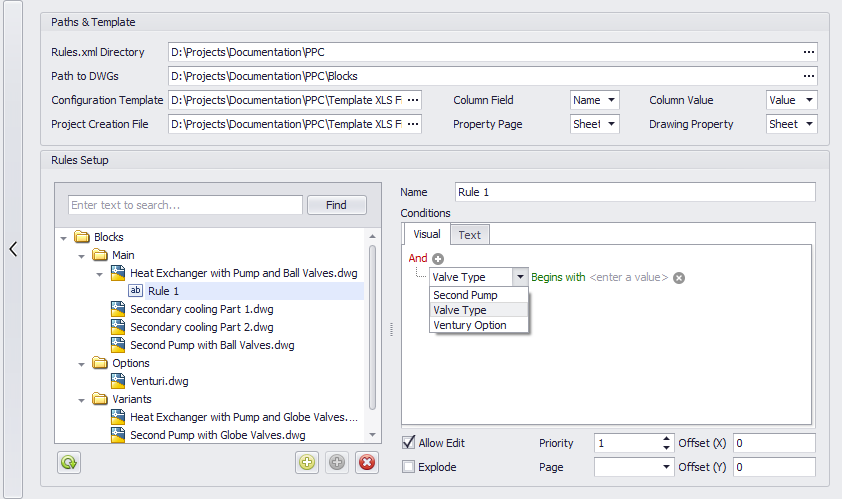
If you click on "Valve Type" you will see all the names you defined in the Project Data Template file.
Next, you can select the condition. For our example we use "Contains".
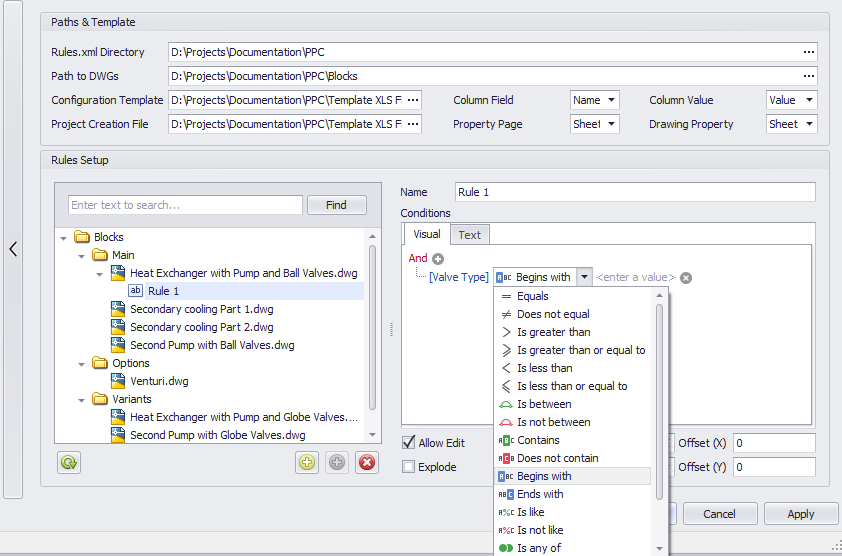
As the value we type in "Ball".
This whole line means, that this block will be inserted if "Ball" is in "Valve Type".
At the bottom we have the option to "Allow Edit". This means, that you can later modify the settings. If you want to force the user to not being able to make changes, then uncheck that box.
The option "Explode" explodes the block after insert. This is typically what you want to enable so you don't need to explode the blocks yourself to be able to edit the PID symbols and lines within the former block.
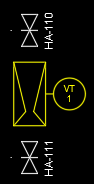
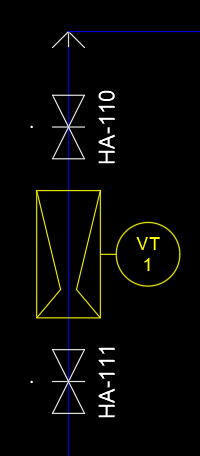
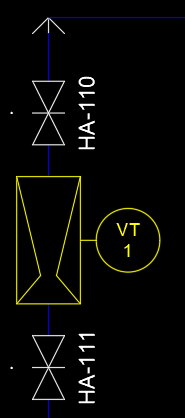
With the priority you can control the order of the inserted blocks. This becomes important if a second block is supposed to be inserted over another. The following three pictures show:
1.On the left, how the block looks like
2.In the middle, how the block looks like when it will be inserted onto another block without the "Explode" option.
3.On the right, how it looks when the block from the left is inserted with "Explode" enabled. You see that the underlying line segment gets interrupted. And to achieve this the priority becomes important when a second block is supposed to be inserted "over" another".
With the two offset values, the inserted block can be inserted with an offset in X and Y.
The blocks in this example will all be inserted at 0,0, because they were created at the place where they are supposed to be placed later.
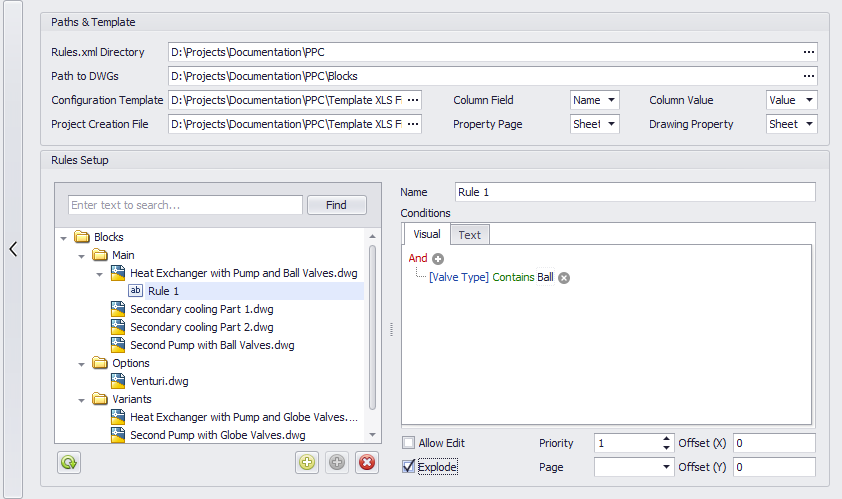
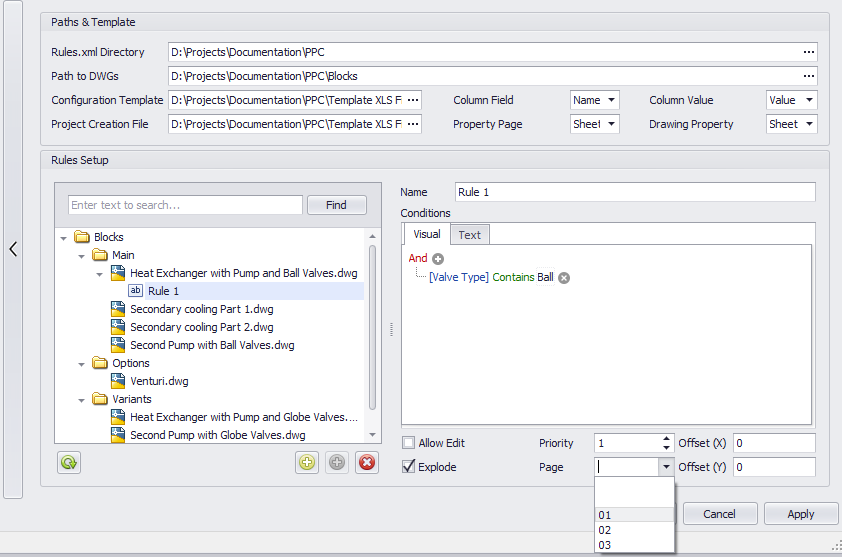
Finally the selection of the Page allows you to define on which page/drawing the block should be inserted.
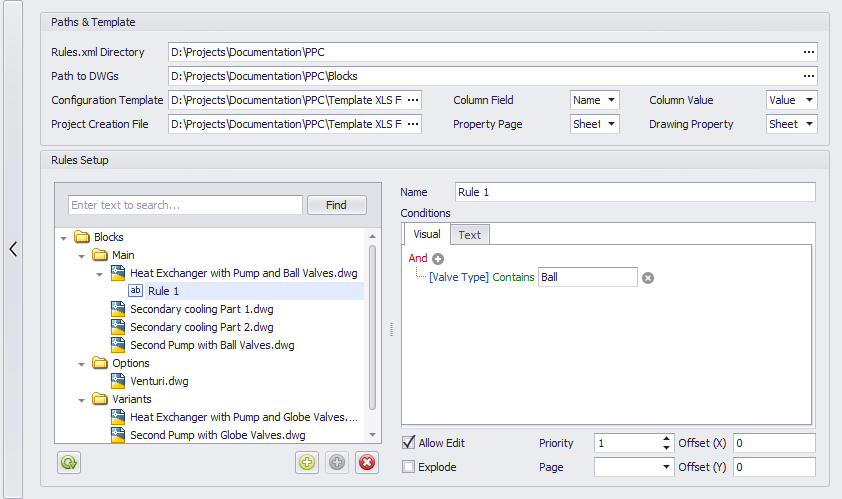
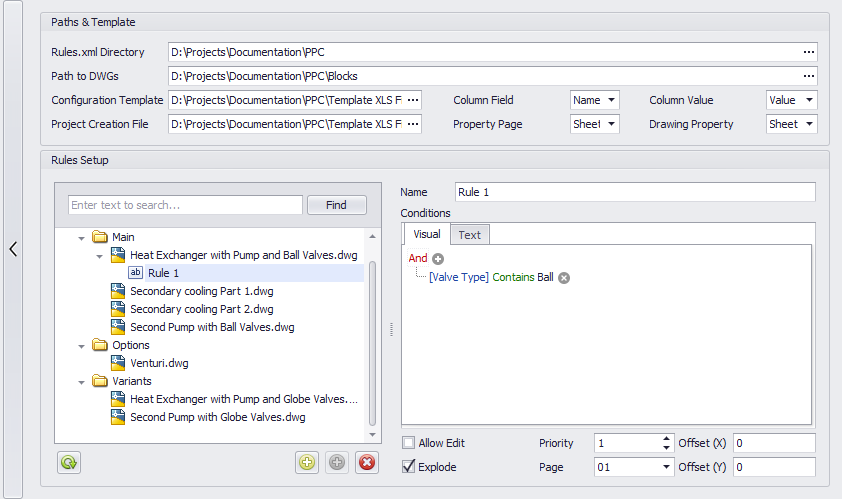
This is final result of the settings for the first rule.
For more complex filter expressions you can also switch to the text mode where you see the expression in a different way. Editing is possible here as well.
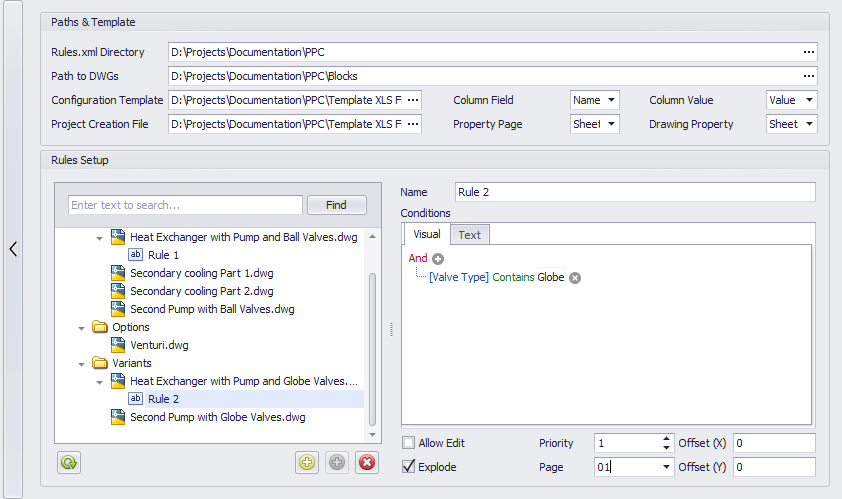
The second rule's expressions and settings can be seen here.
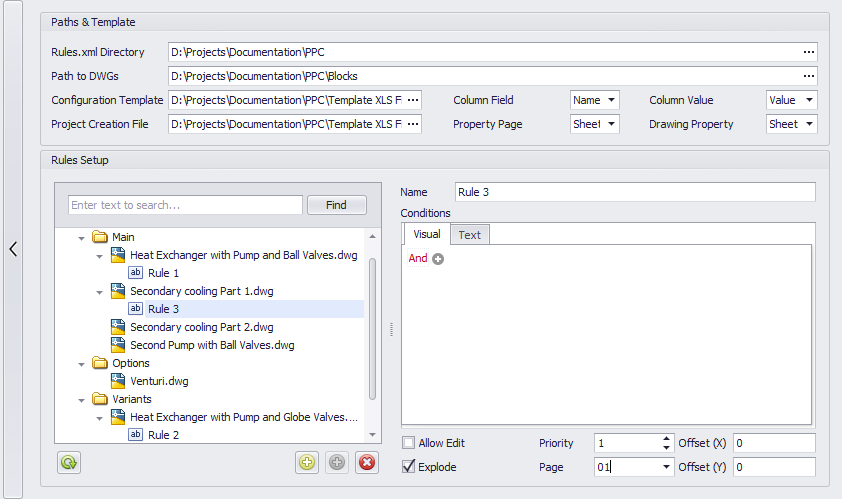
The third rule actually doesn't get an expression, because this block is supposed to be inserted in any case.
The fourth rules as well, but this block is supposed to be inserted on Sheet 02. So we select this under Page.

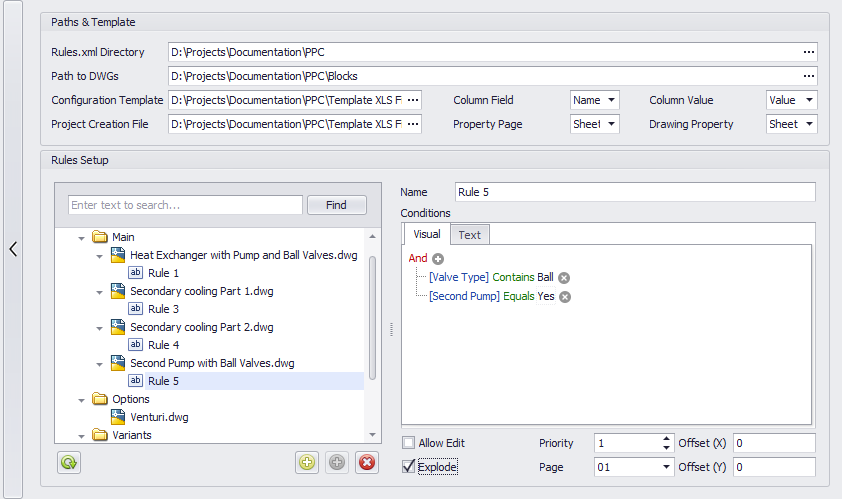
The next rule needs two conditions. The first one is we already know. But then we click again on the green plus sign.
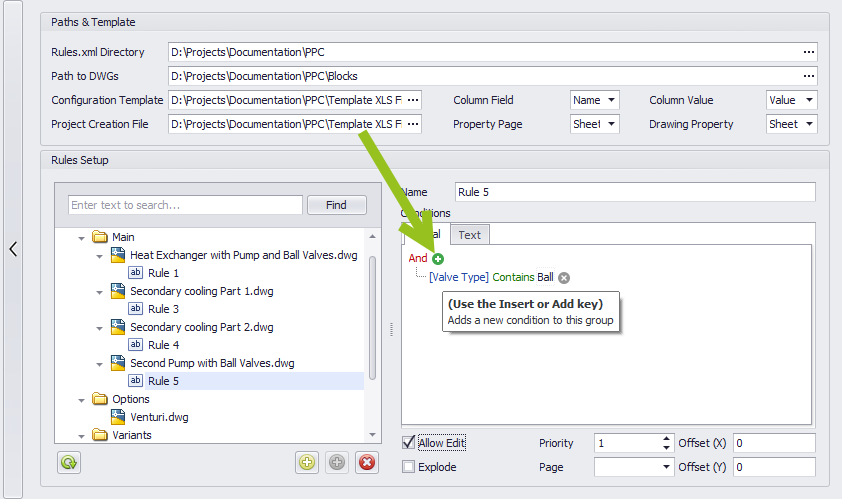
And this is how the second condition looks like.
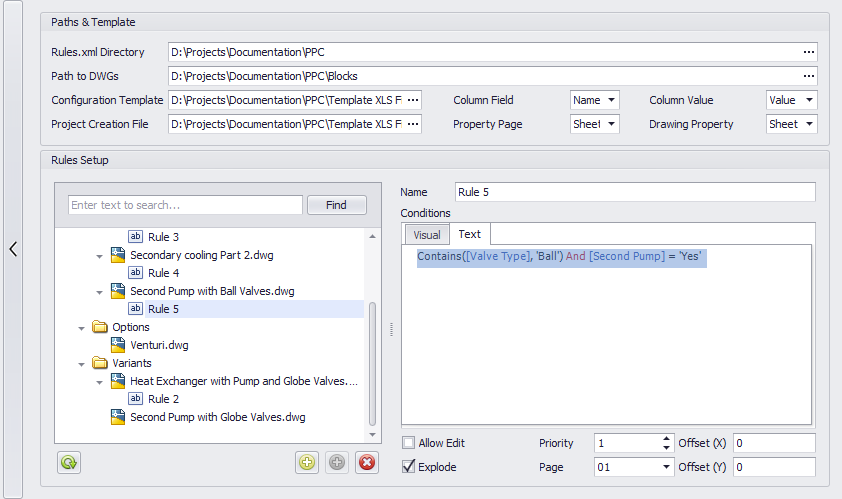
In text mode it looks like this. This time we copy the expression from the text mode window.
And now create another rule, switch to text mode...
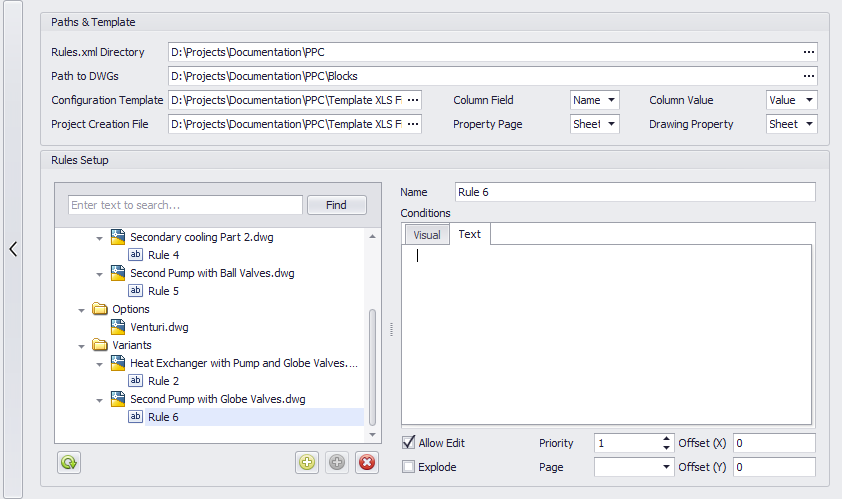
... and paste the expression into the window.
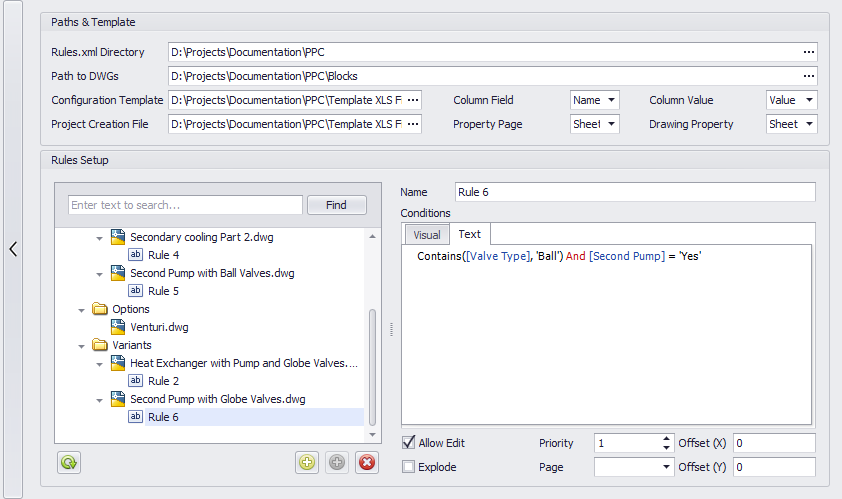
Now we switch back to the visual mode.

And change the expression by changing Ball with Globe.
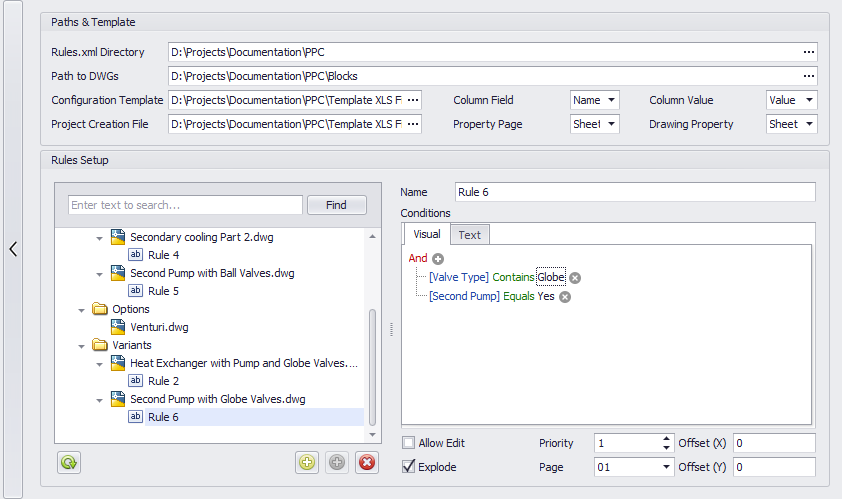
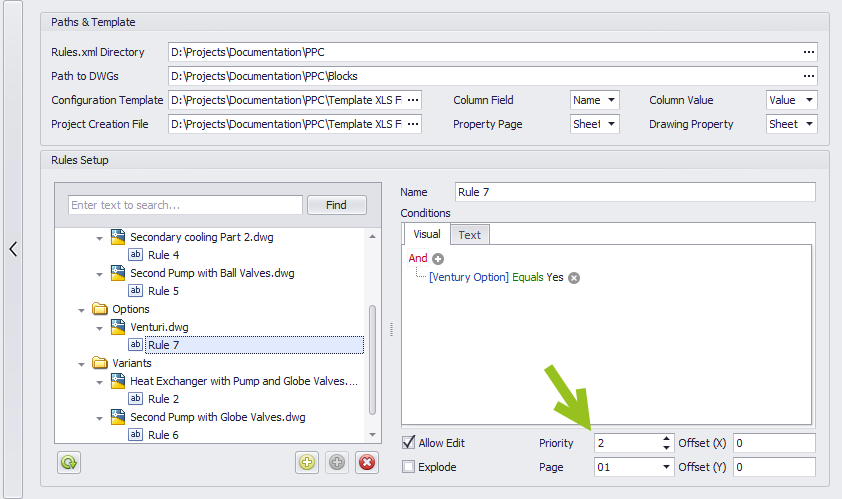
The final rule will be for the Venturi block. Here we set the priority to 2, because it is supposed to be inserted after the other blocks.
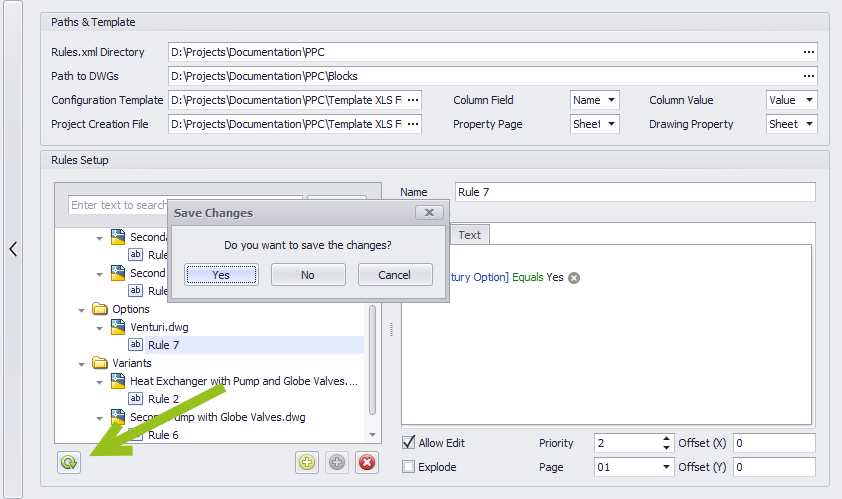
The Refresh button has two purposes. It checks if there are unsaved changes. If this is the case, then you will be prompted with a dialog asking you if you want to save the changes.
The second purpose is, to reload the Rules.xml file in case you modified the file externally (see Rules.xml). In this case the rules currently showing in the tree differ from the content in the Rules.xml file and you will also be asked if you want to save the changes (the one currently shown in the tree). In this case you use probably No, because otherwise your manually made changes in the Rules.xml will just be overwritten with what's in your tree.
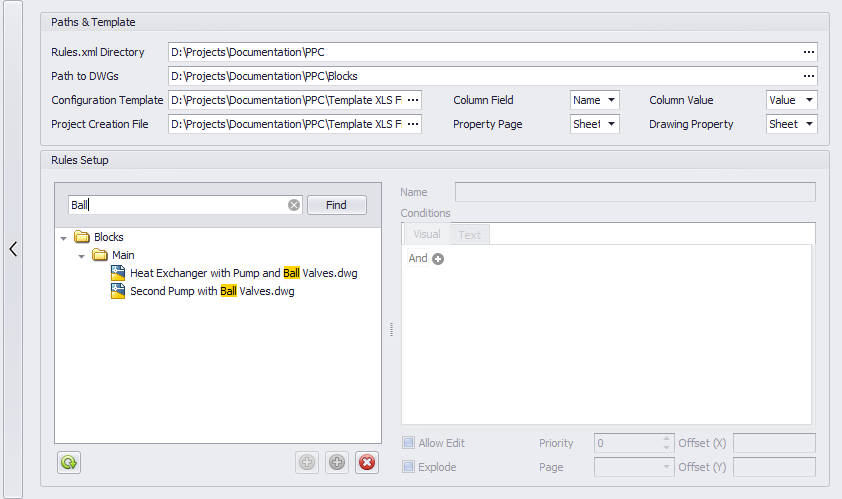
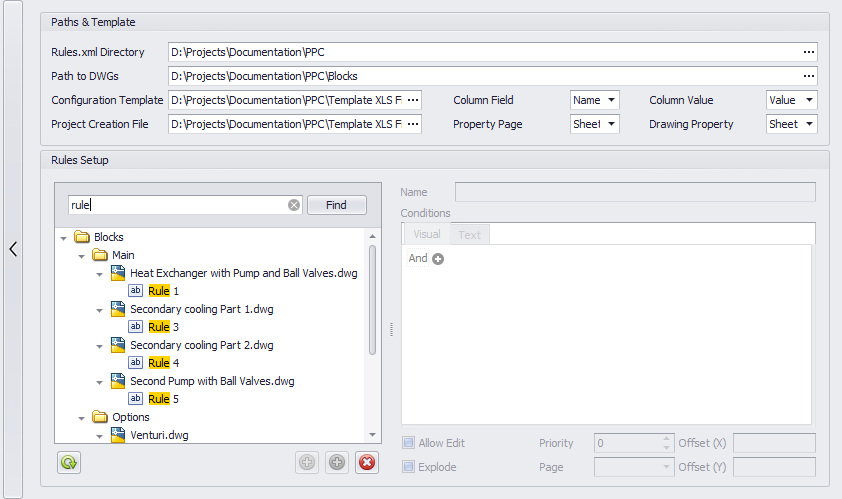
The filtering can be used to find and filter the tree. This works on all nodes in the tree. It is enough to just start typing and the filtering automatically begins.
It may actually make sense to have a fixed text in the name of the rule. For example, let all your rules start with rule and some additional text.
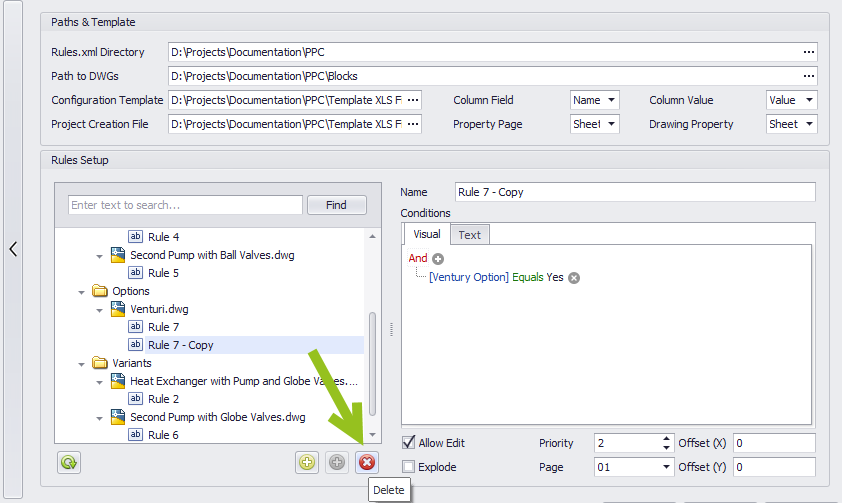
Rules can also be copied with the copy button. Select the rule you want to copy and then click on the button.
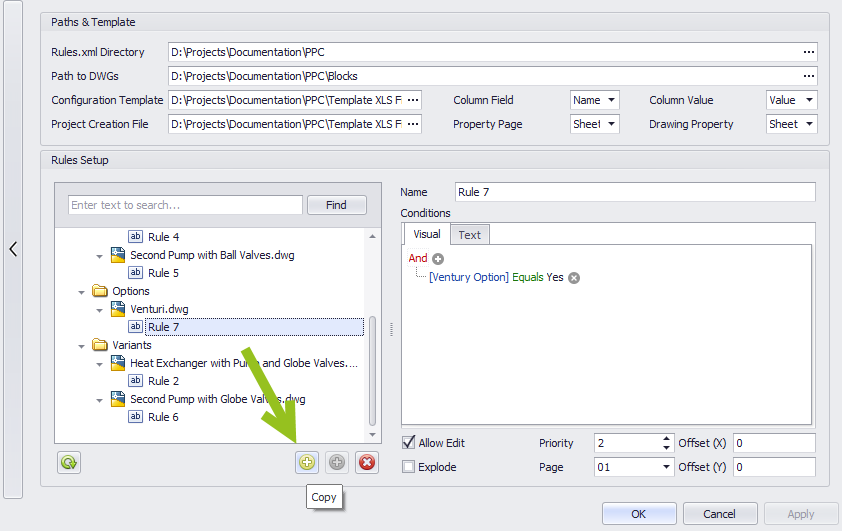
This creates a copy which you can then rename.

With the delete button you can also delete a rule, by first clicking on the rule you want to delete and then click on the delete button.