|
<< Click to Display Table of Contents >> New List using Excel |
  
|
|
<< Click to Display Table of Contents >> New List using Excel |
|
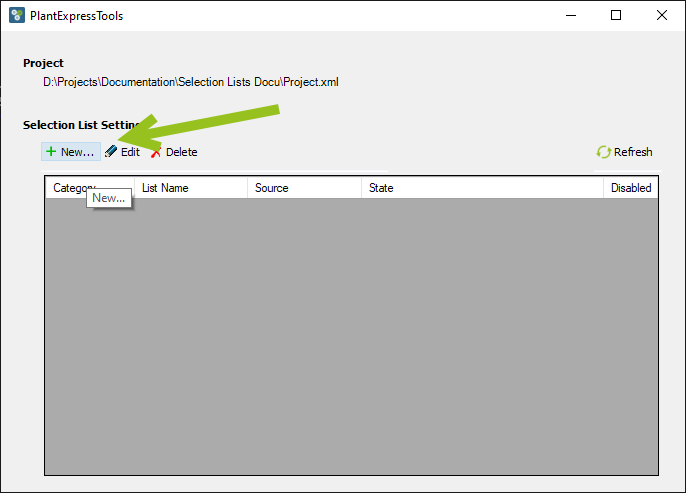
To create a new configuration for importing the content of a data source into a Selection List, you open the main dialog from the PlantExpressTools ribbon.

When the main dialog opens you click on "New...".
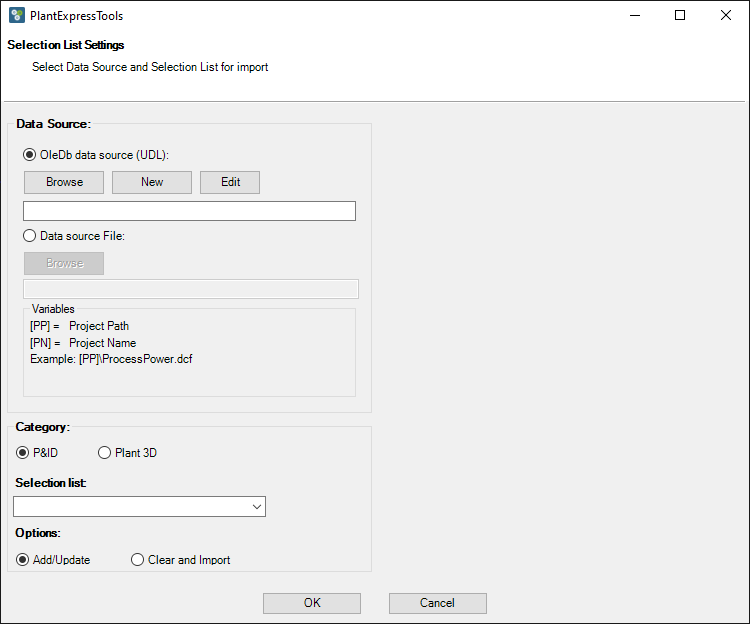
Then the dialog for the configuration opens.
The example we use in this chapter is an Excel (xlsx) file with the following content:
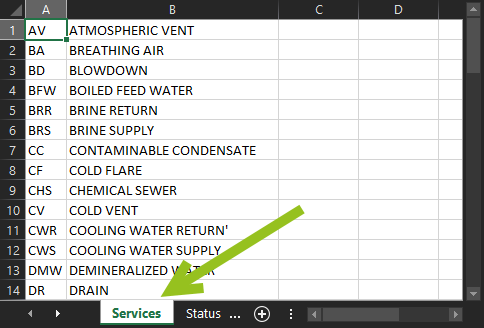
This is mainly the standard content of the Services Selection List of Plant 3D. However, at the and there is an additional row.
Also recognize, that there are multiple worksheets in the Excel file. This becomes important later.
We select "Data source File:" and click on "Browse".

In the file dialog we select "Excel files (*.xlsx)" and select our Excel file. Note that the file is in a folder under the project folder. The location of the Excel file isn't important, but often these files contain content which is project specific and therefore it makes sense to have these files somewhere under the project.
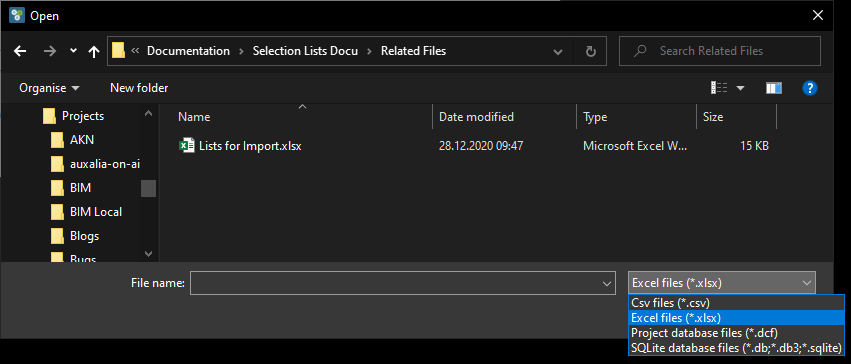
After selecting the Excel file we see the path and file name under the "Browse" button.
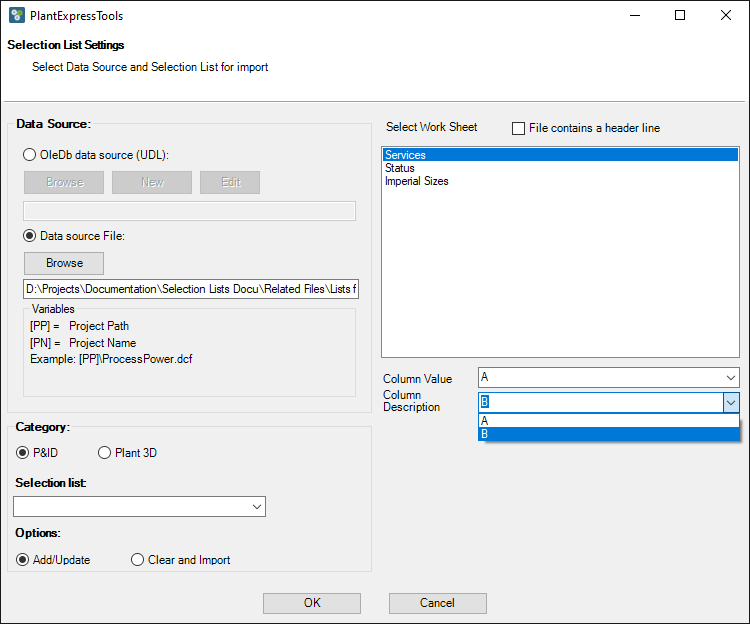
On the right we now see the worksheets of our Excel file.
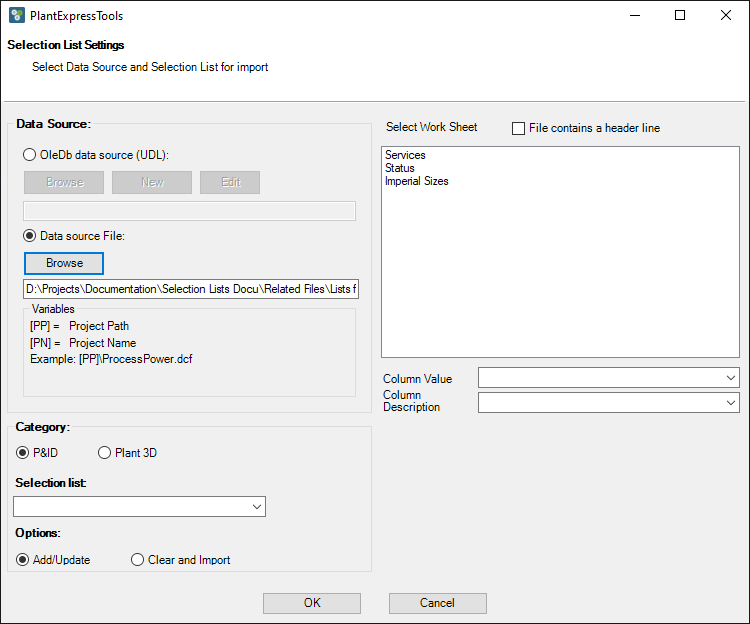
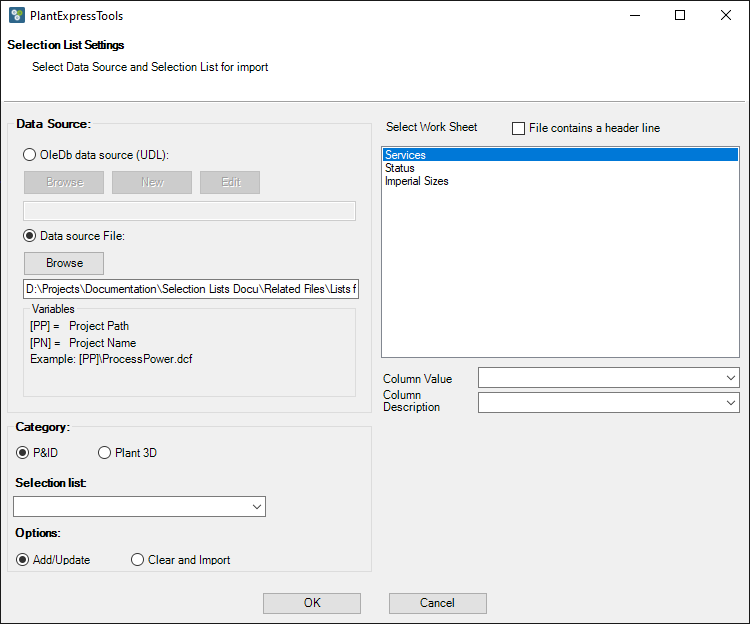
We select the "Services" worksheet. In our example, there is no header row in the Excel file. That means, that we don't need to check the "File contains a header line".
Under "Column Value" we select column A of our worksheet which contains the key value which will later be selected from the Selection List.
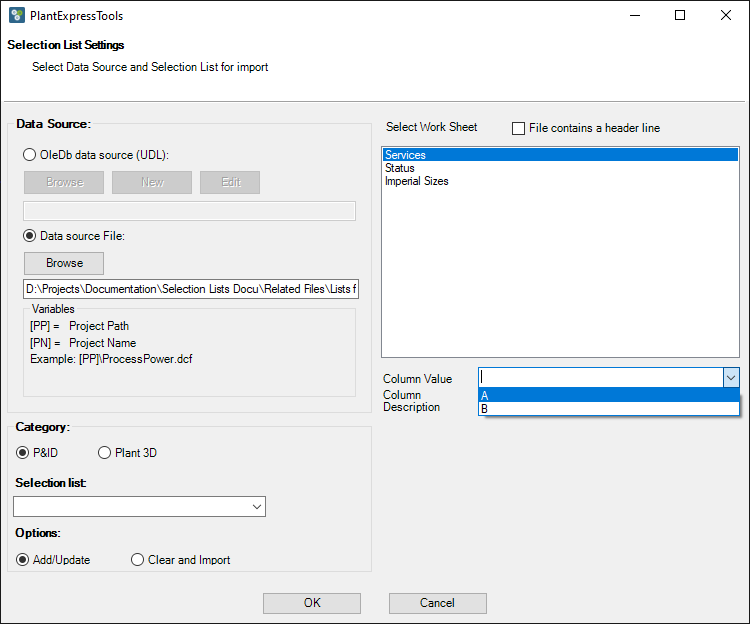
For "Column Description" we select columns B from our worksheet.
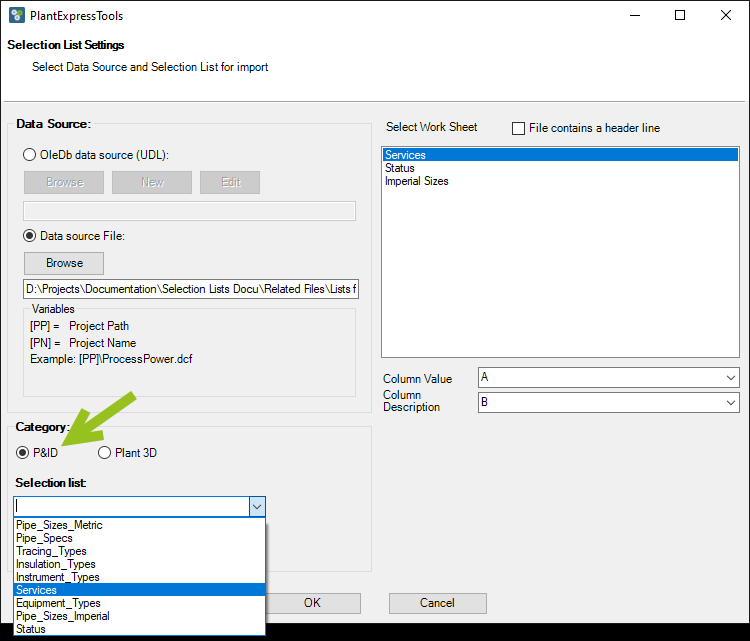
Next we select the category where the Selection List we want to update resides. In our case the "Services" Selection List in P&ID.
Remember: Selection Lists are independent in P&ID and 3D. If you want to copy Selection Lists between P&ID and 3D you can use Copy Selection Lists between P&ID and 3D.
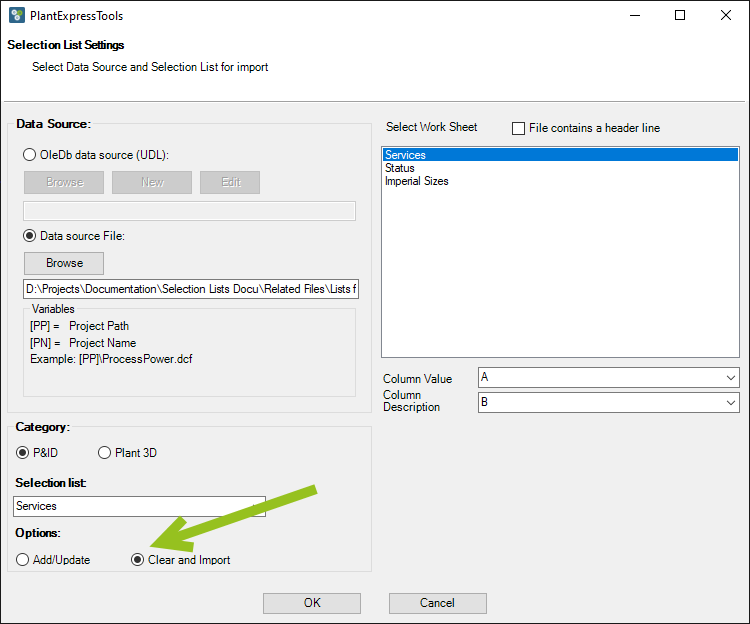
Finally, you choose either "Add/Update" or "Clear and Import".
"Add/Update" will add only those rows in the Selection List which are in the worksheet but not in the Selection List. It also updates the description if the description column in the worksheet differs from the description in the Selection List.
"Clear and Import" clears the content of the Selection list and imports everything from the worksheet into the Selection List. This ensures that values in the Selection List which aren't in the worksheet anymore, will be removed.
"Clear and Import" is the common option.
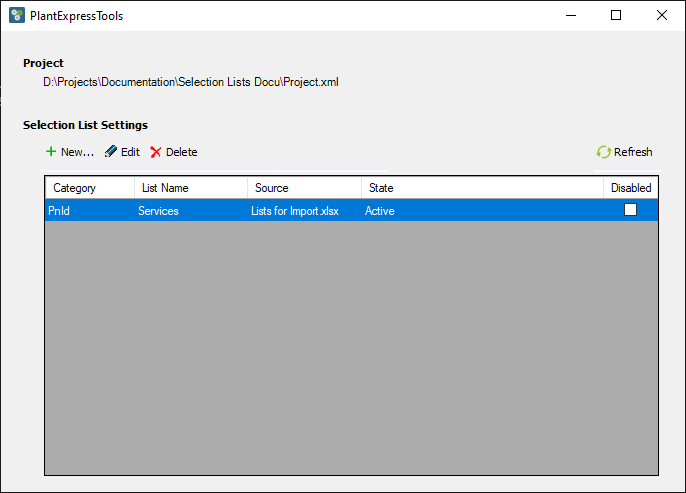
When we click on OK we see a line for this configuration in the main dialog. We see that the State shows "Active".
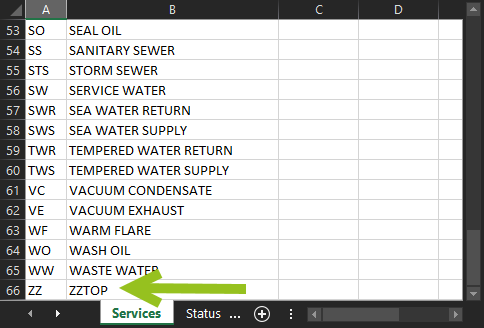
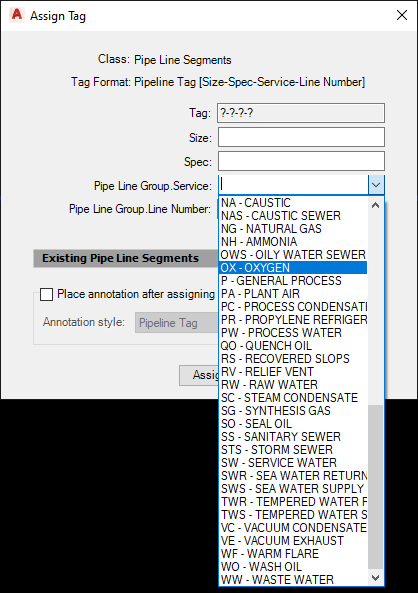
Before we update the Selection List, lets have a look at the current content with the default values from Plant 3D. We see it ends with "WW - WASTE WATER".
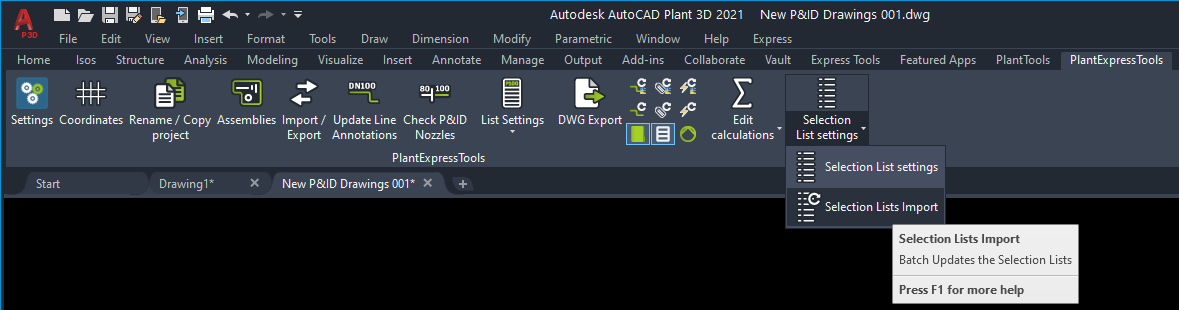
Now we update the Selection List with "Selection Lists Import" from the Ribbon.
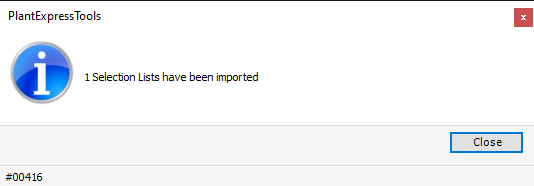
After executing this command, we get a dialog which tells us how many Selection Lists were updated.
You can have more than just one active Selection List.
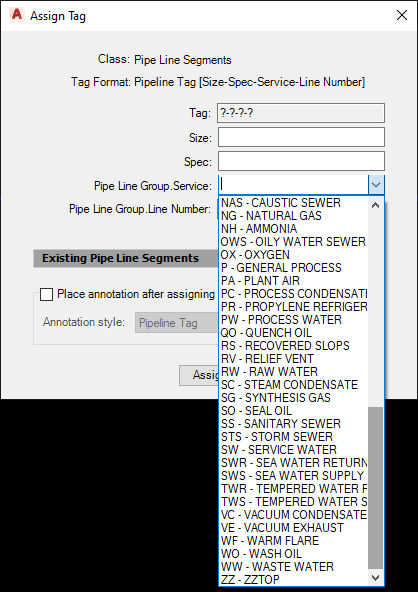
If you now check the Services list we see the additional "ZZ - ZZTOP" row.
Next Chapter: Edit List using Excel