|
<< Click to Display Table of Contents >> Connecting |
  
|
|
<< Click to Display Table of Contents >> Connecting |
|
This chapter describes the process of connecting OPCs.
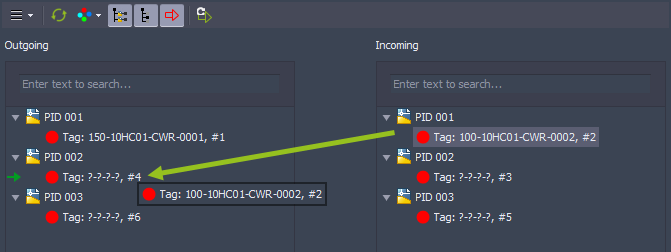
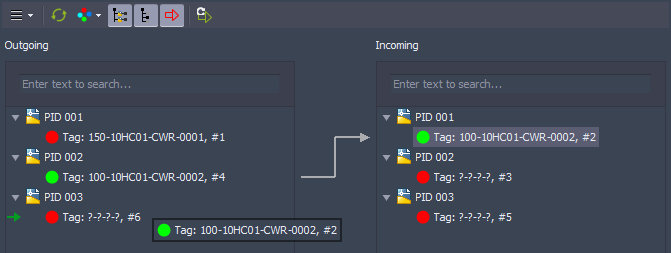
To connect two OPCs you simply drag and drop one OPC over the other. The direction you drag and drop determines which side is leading. The Flow Direction does not matter. You can also connect OPCs if both sides have already line numbers. Just connect.
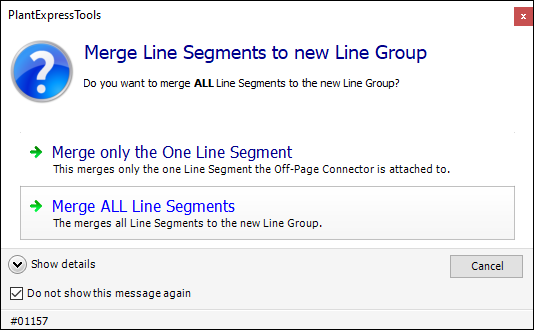
When you drop you will get this dialog (unless it is already set to be suppressed). If you click on 'Cancel' you terminate the connection process.
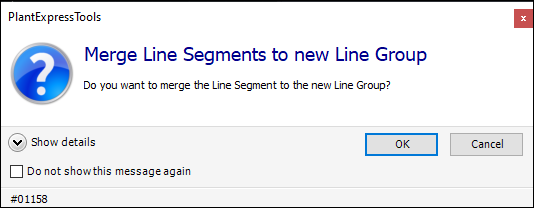
With the checkbox 'Do not show this message again' you can suppress this dialog from appearing again in the future.
If you click OK the connection will be created.

During the connection process you will see a progress panel. Depending on the size of the project and the Project Setup the creation of the connection may take from one second to a few seconds.

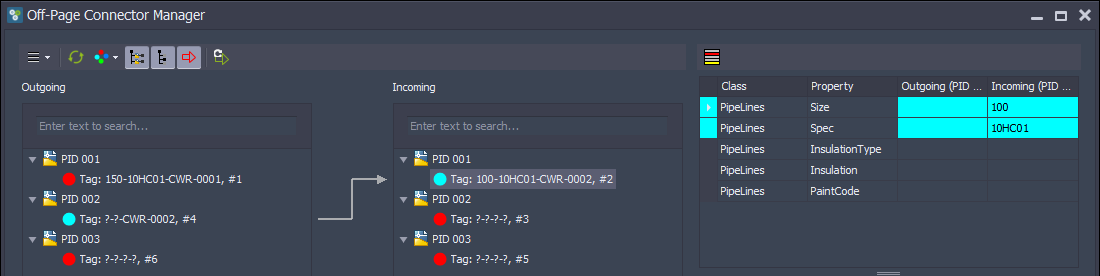
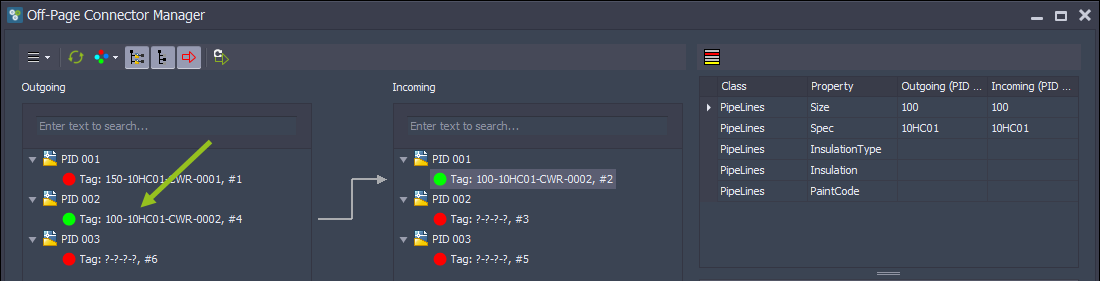
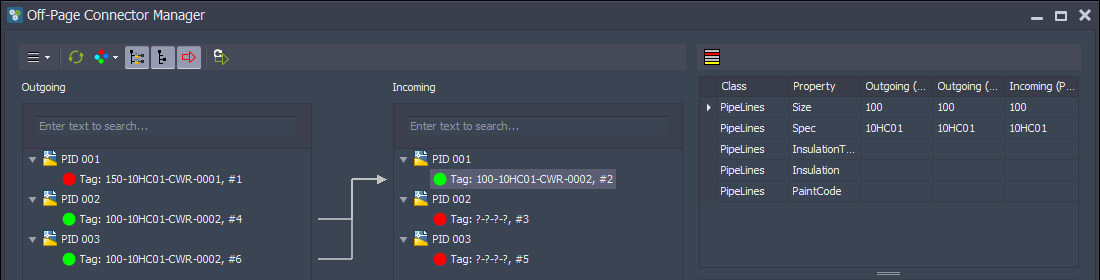
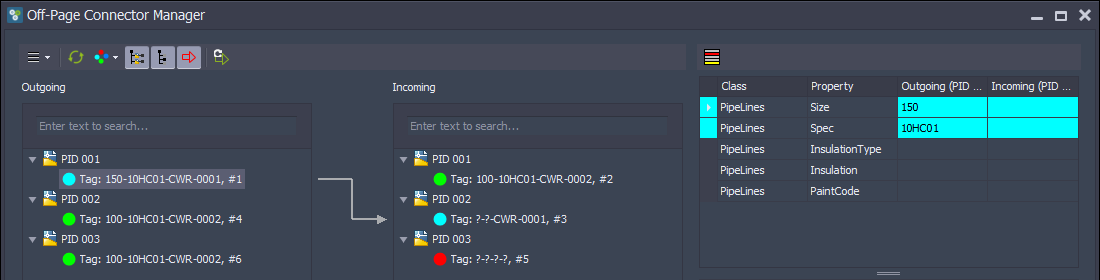
After the connection has been created you see the inconsistencies (cyan) between the properties. In this case the inconsistencies are between properties which are connected on the OPCs. You also see an arrow between the two trees. The inconsistencies are not only visible in the Mapping Grid, but also in the trees.
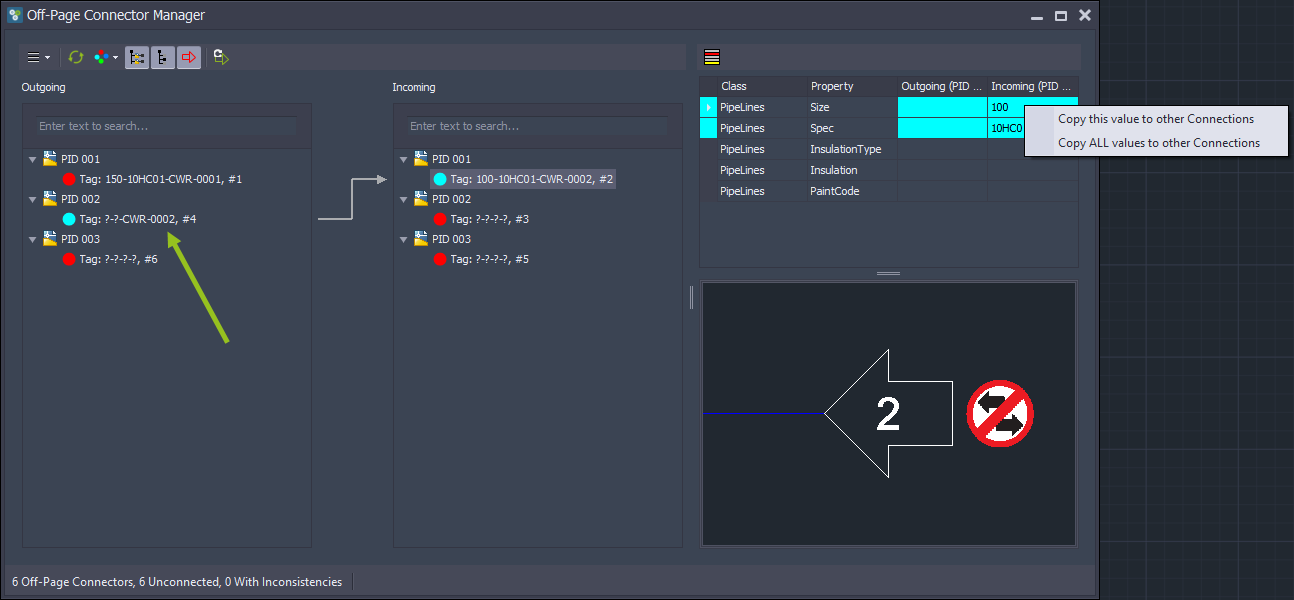
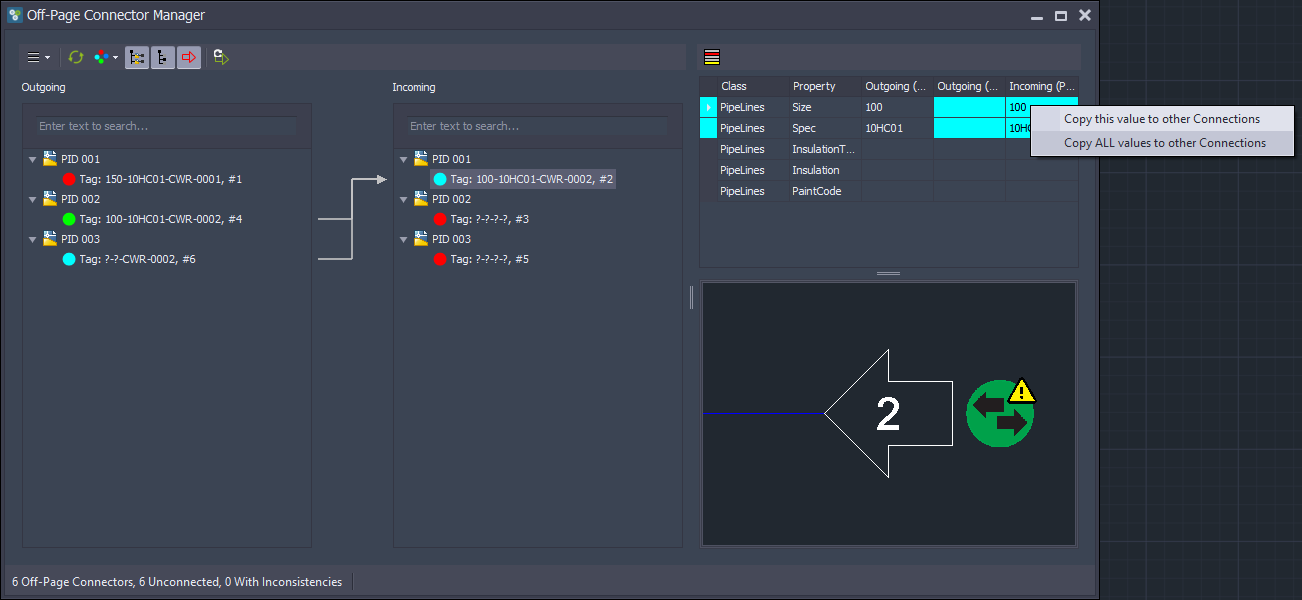
In the Mapping Grid you can now copy individual or all values from left to right or right to left. You decide which value to use by using the context menu in the cell/column you want to keep. In this case we want to copy the values from the incoming column and therefor select 'Copy ALL values to other Connections'.
What you see in the left tree is, that the Service and Line Number are updated, because this Line Segment is now part of the Line Group which we dragged from the right tree.
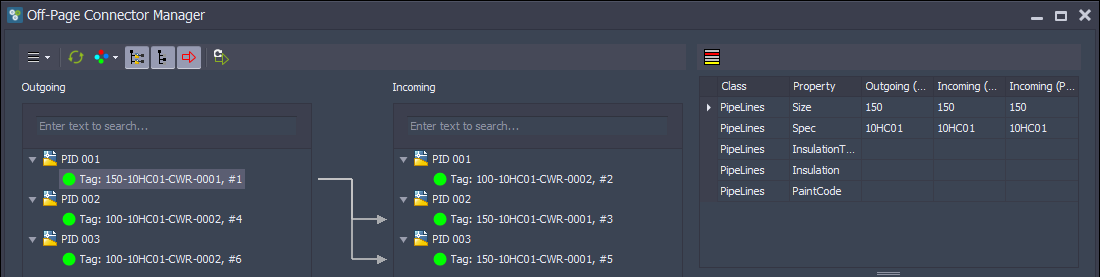
Now all inconsistencies are resolved and the state in the trees change to 'Connected' (green). We also see, that the Size and Spec are updated in the Tag of the Line Segment in the left tree.
If you want to create a multi-connection you simply drag and drop another OPC. The process is the same as before.
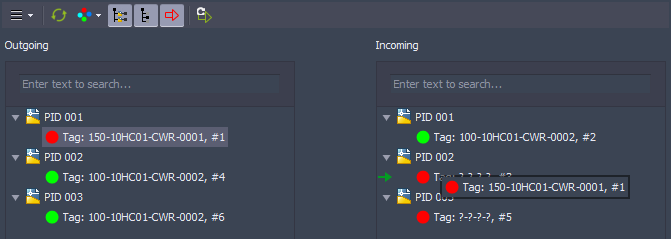
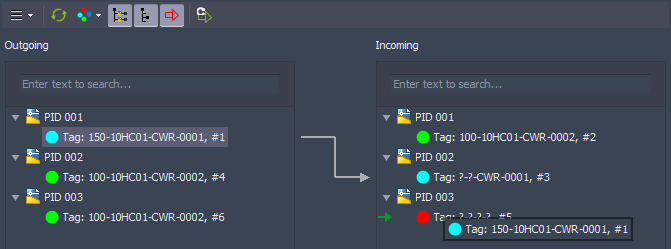
If we drag and drop the right OPC again to the left we create a n:1 connection.
This time the connection will be instant, because we choose 'Do not show this message again' in the dialog 'Merge Line Segments to new Line Group'. We only see the progress panel.

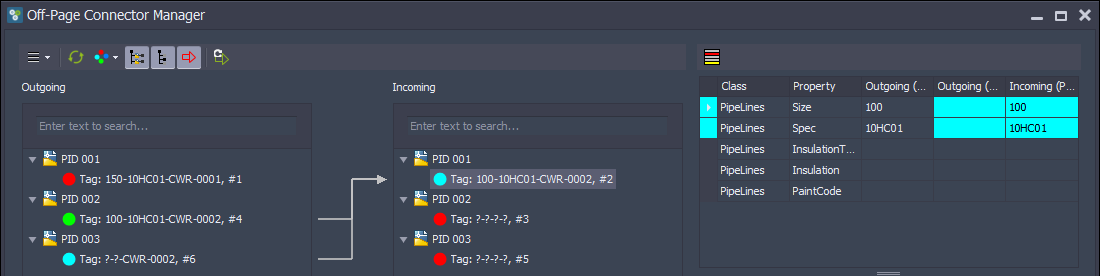
Again, we have inconsistencies. But what you also see are two outgoing columns and one incoming.
The process of copying the values is the same as before.
And now all inconsistencies are solved again.
This time we drag and drop from the left tree over to the right tree.
Because the receiving OPC in drawing PID 002 has multiple line segments to the line group...
...the OPC Manager offers you to merge ALL line segments to the new group (the one you dragged).
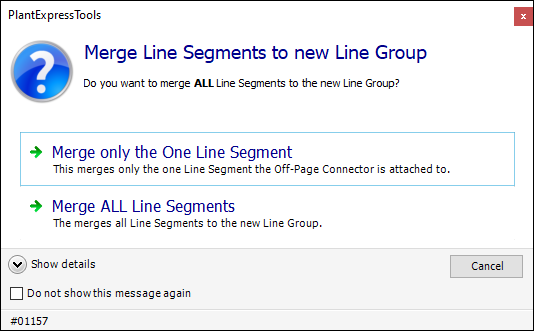
You can now either merge just the one Line Segment which is attached to the OPC or you can merge ALL Line Segments.
If you always want to merge One or ALL you enable 'Do not show this message again' and then click on one of the two options. For this example we enable the checkbox and click on 'Merge ALL Line Segments'.
We have to wait again.

And we inconsistencies again. We also see that the right tree got the Service and Line Number from the left tree.
Instead of resolving the inconsistency right away, we drag the left OPC over to the remaining OPC.
Now we see a 1:n connection with all the inconsistencies.

If you now copy ALL values from the outgoing column...

...it will be copied into ALL other Incoming columns and all inconsistencies are resolved in one go.
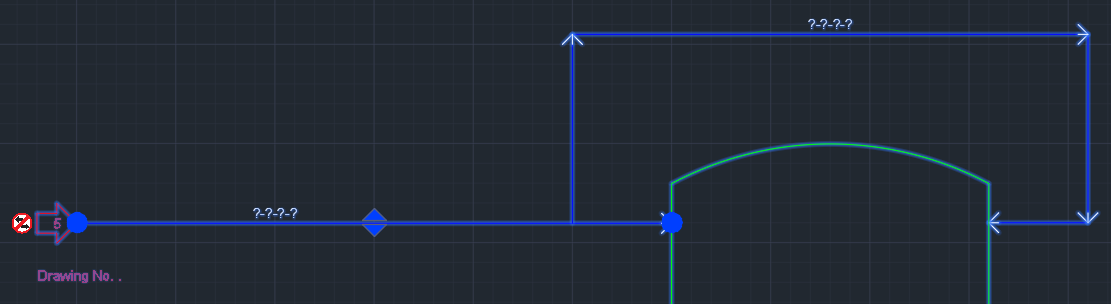
If you open one drawing after the other you see that all annotations on the line segments and OPCs are updated.
If the annotations don't get updated you can either run SYNCHSTYLE or check the setting 'Execute SYNCHSTYLES when opening a drawing (Activate & General).
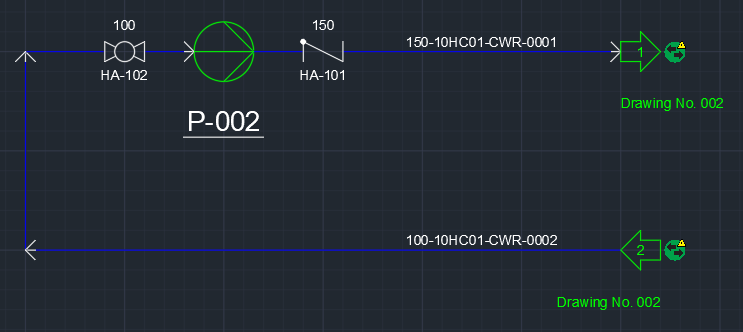
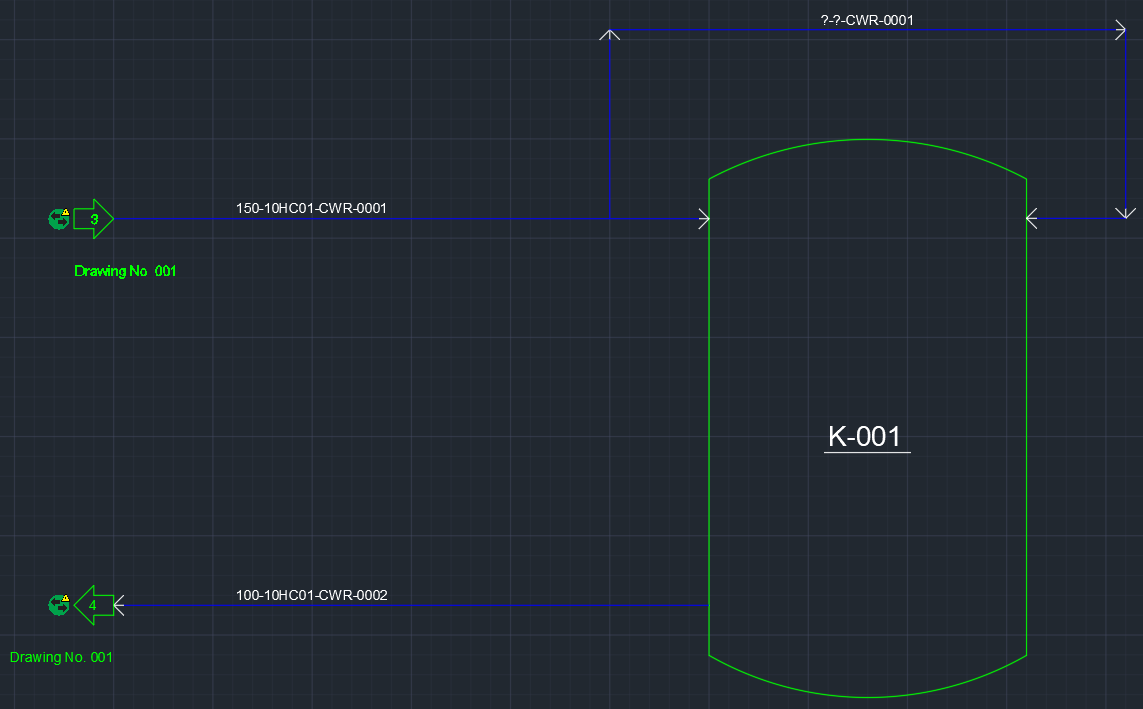
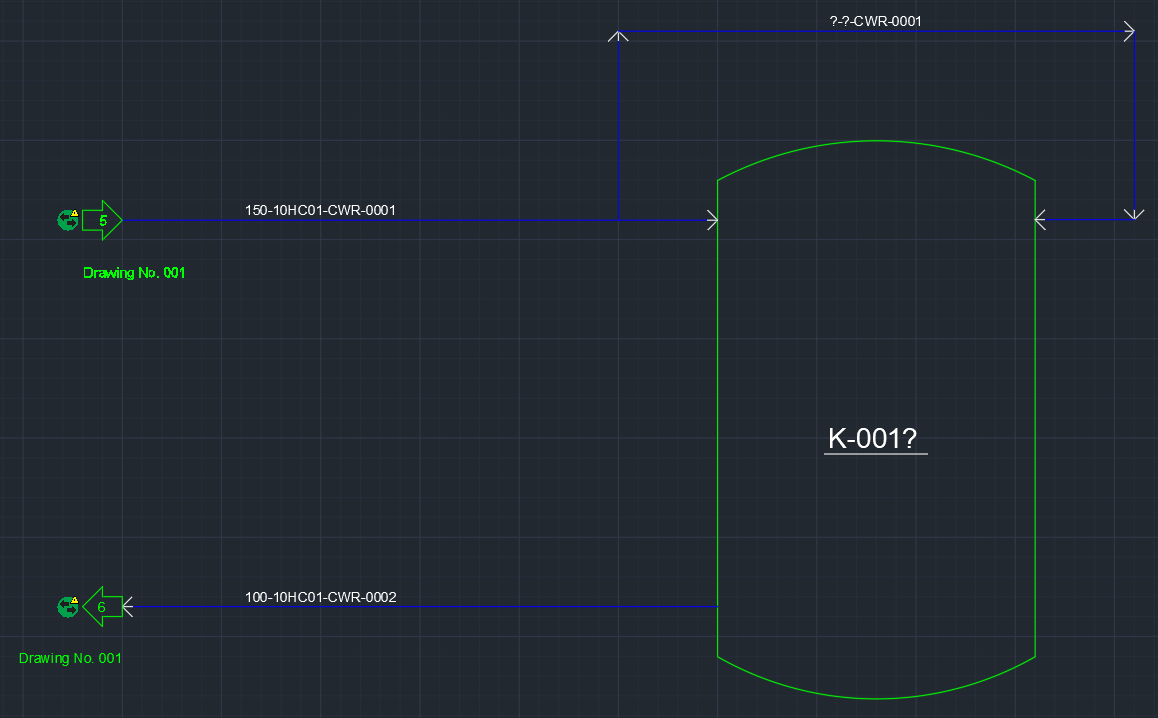
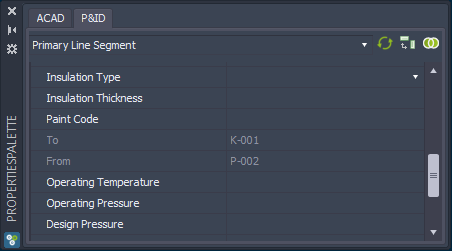
If you have multiple connections as in the example above, the From and To properties in the line segments will be updated.
In this example, we have the line starting from P-002 and connecting to K-001 and K-002.
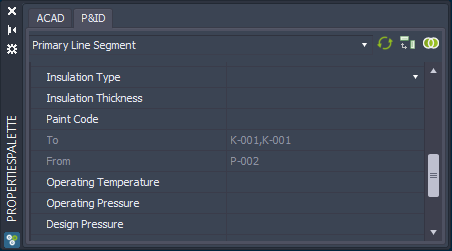
When you select the line segments in the other two drawings, you see that they start on P-002.

When connecting Pipe/SignalLineSegments or copying property values between Pipe/SignalLineSegment or Off-Page Connectors those changes will be written instantly into the Change Log database if the "Store changed values only" option is enabled (see Setup).
Next Chapter: Disconnecting