|
<< Click to Display Table of Contents >> Project Properties |
  
|
|
<< Click to Display Table of Contents >> Project Properties |
|
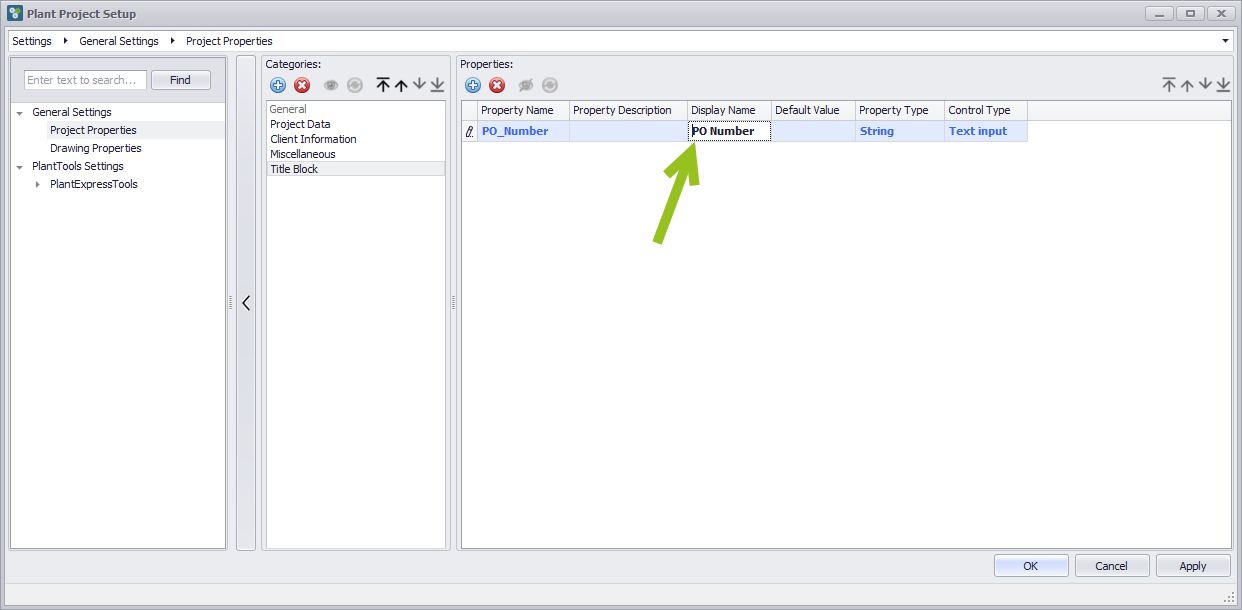
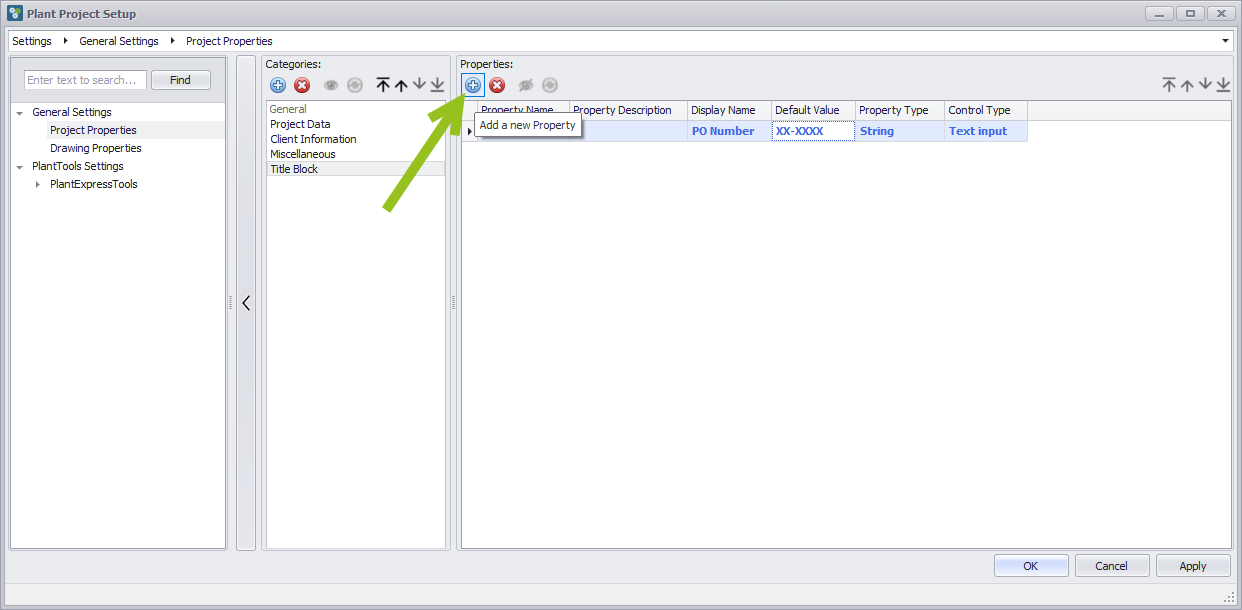
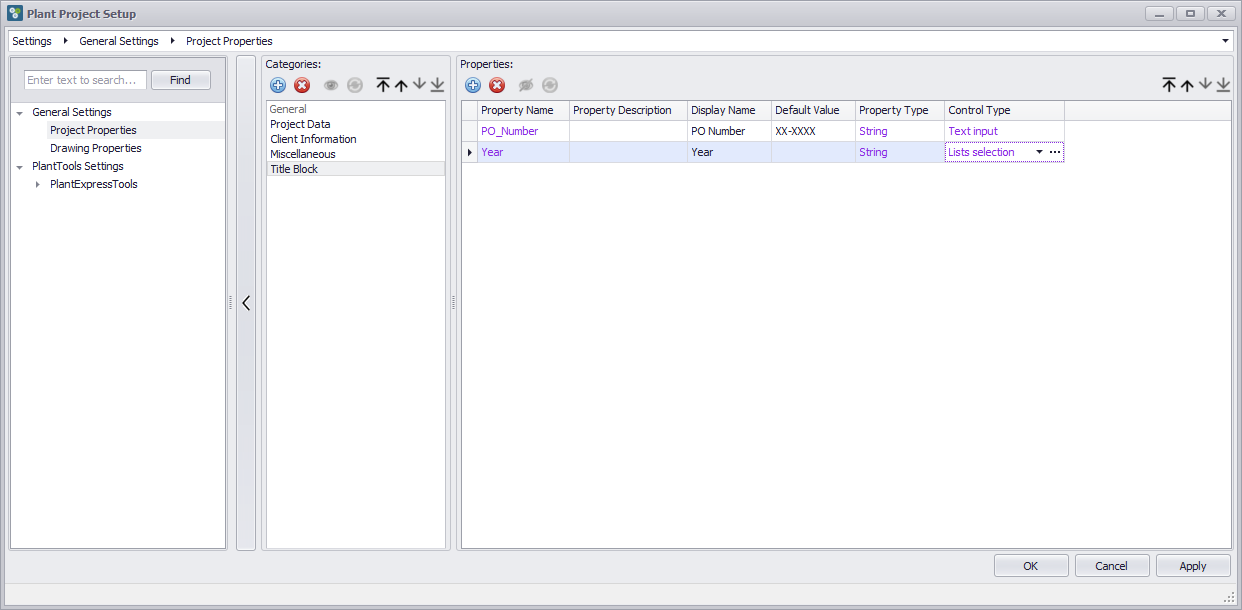
If you want to create a new Property you click on the + icon in the toolbar above the Properties section. You can of course create a Property also for existing Categories.
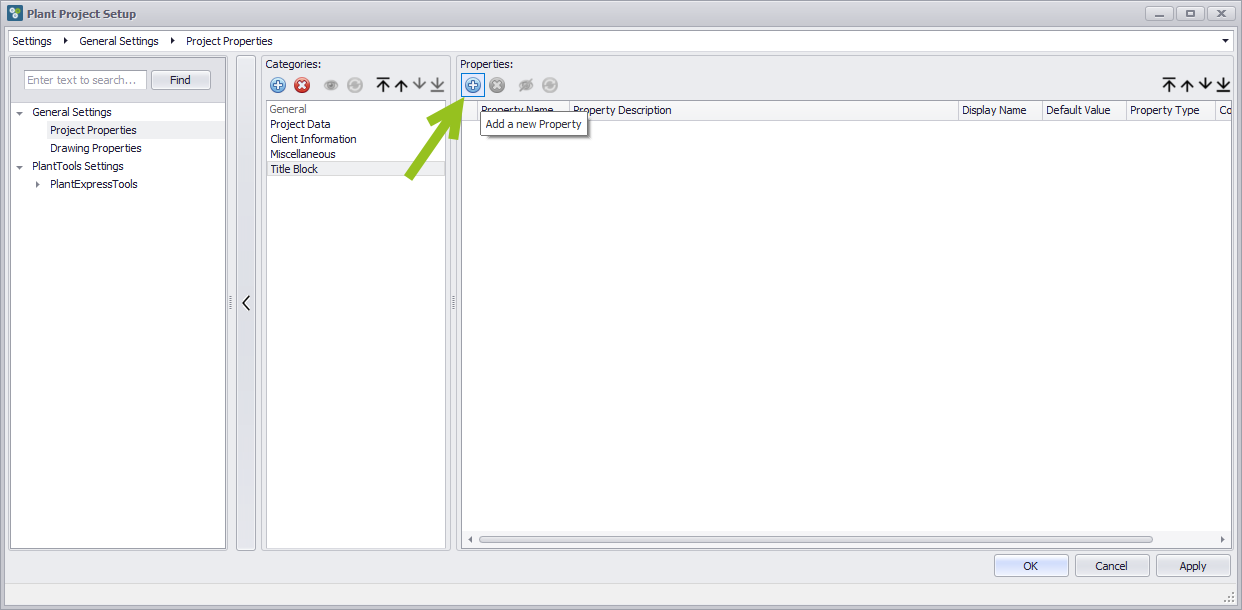
Like for the Categories, a box shows up under the Properties toolbar where you type in the Property name.

You can also use blanks in the name. When you are done you press return or the check sign at the end.
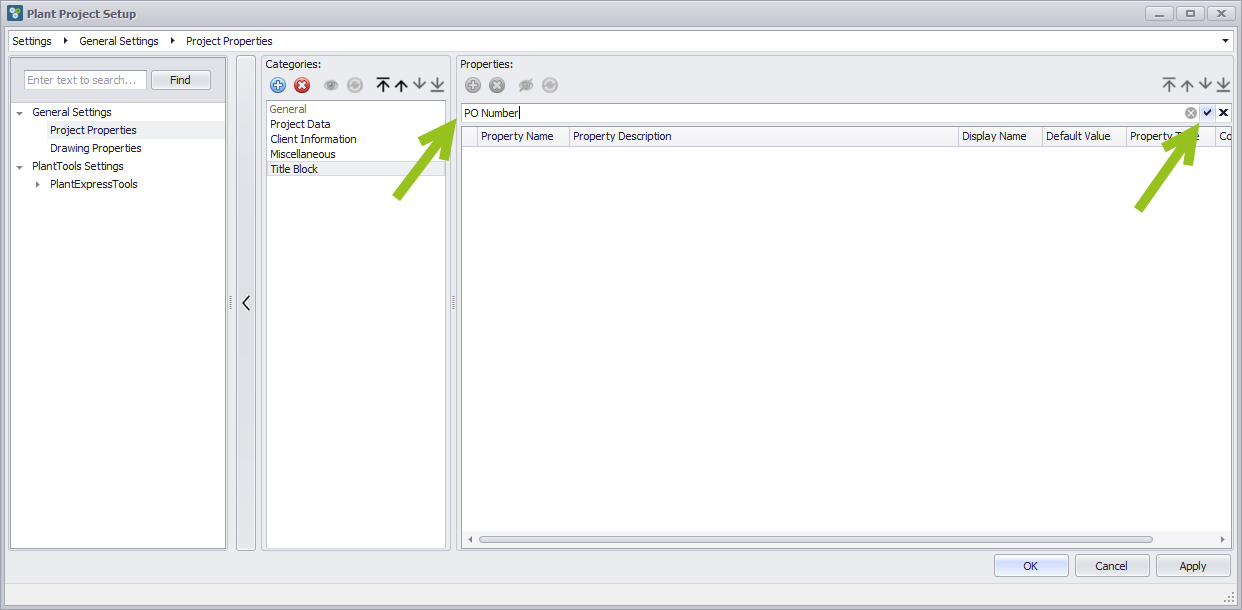
When you use spaces in the name, PlantProjectSetup will automatically use an underscore to avoid issued with Plant 3D.
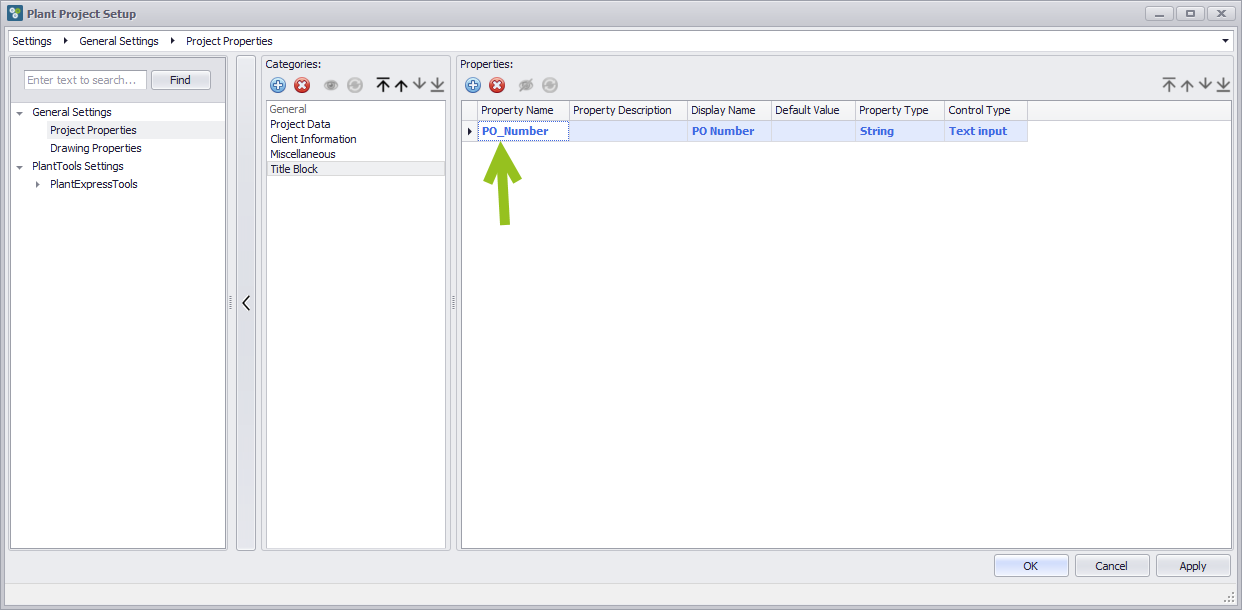
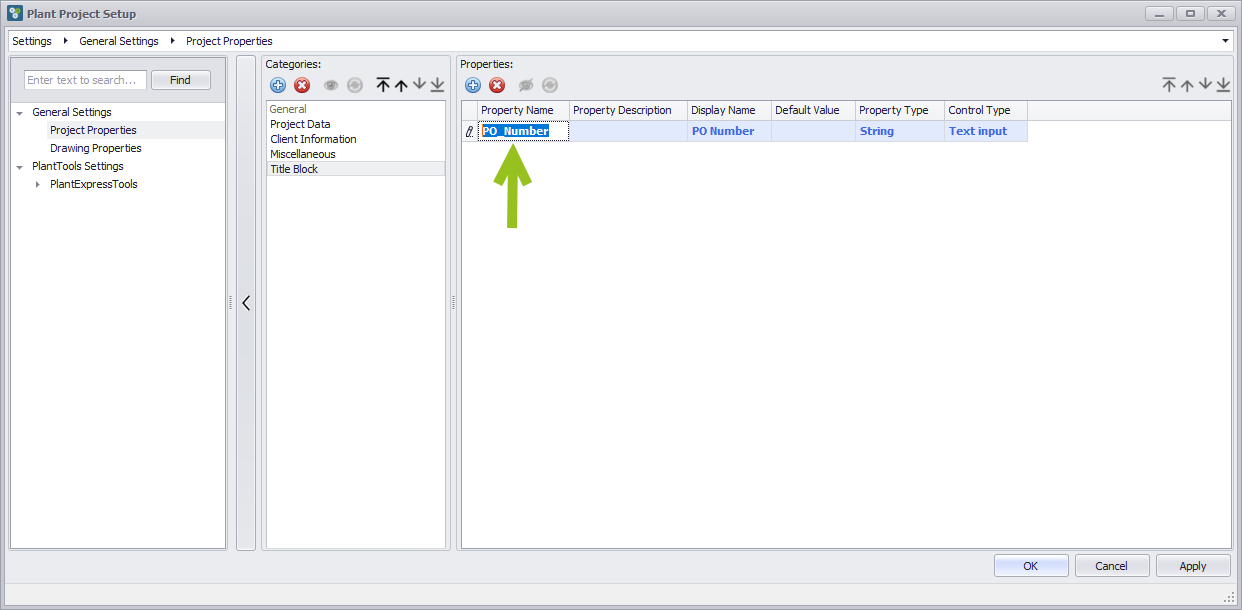
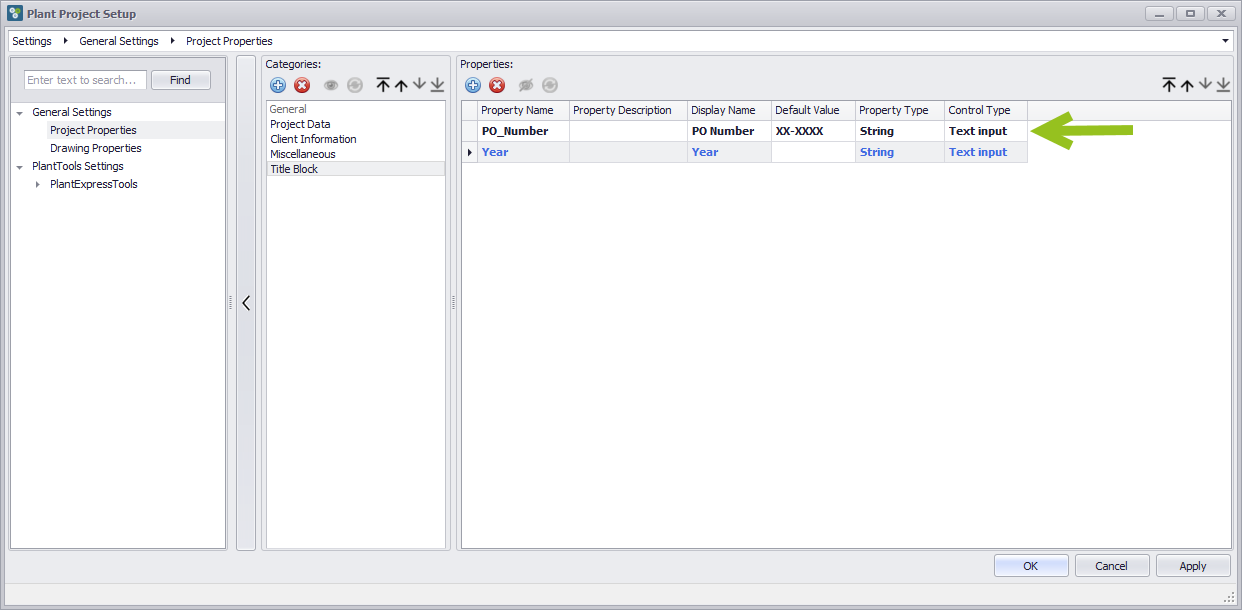
As long as the text color is blue or black you can still edit the Property details.
To edit a call (e.g. Display Name) you click in it...
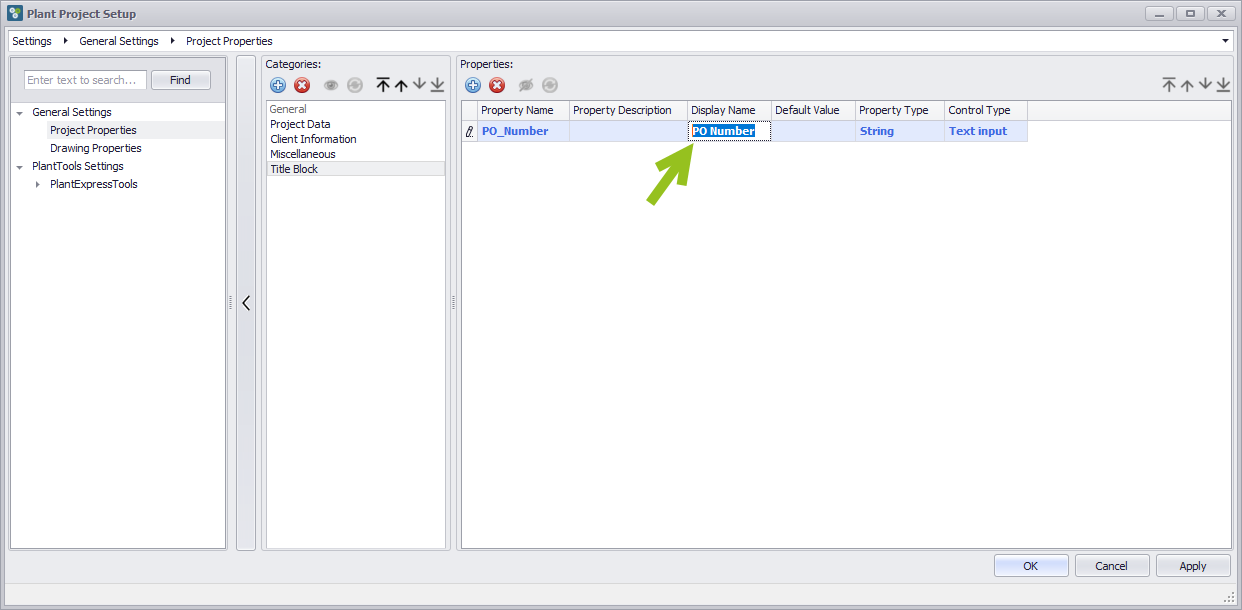
... and then press F2.
You can still change the Property Name.
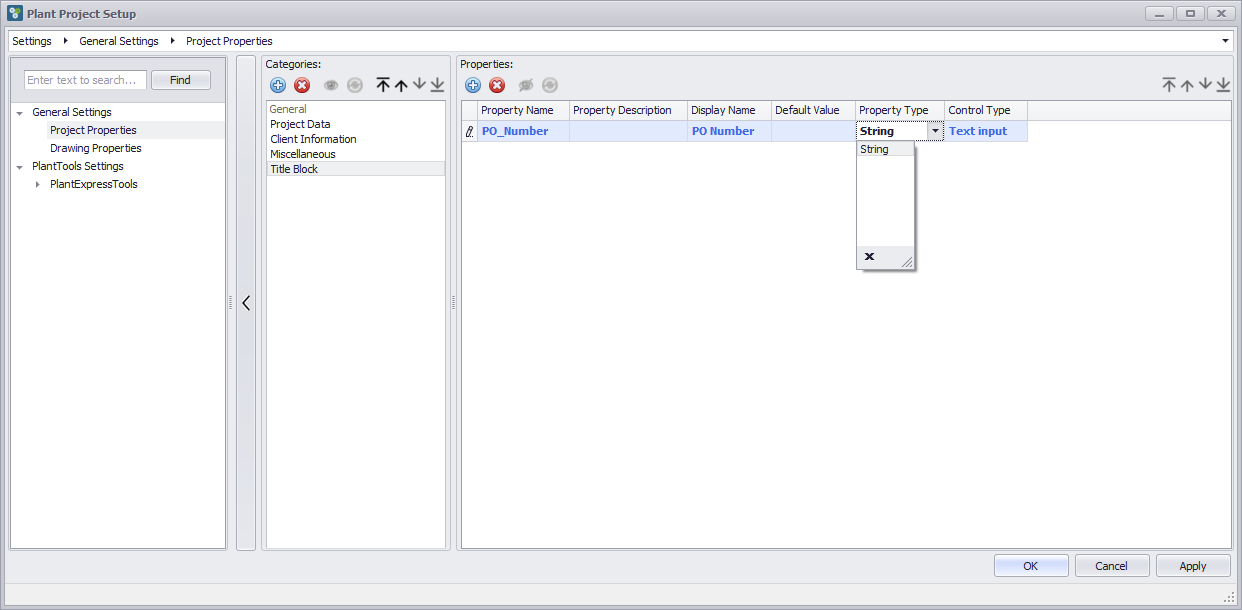
For the Property Type there is only String. At some point there may be additional Property Types like Date/Time or numeric.
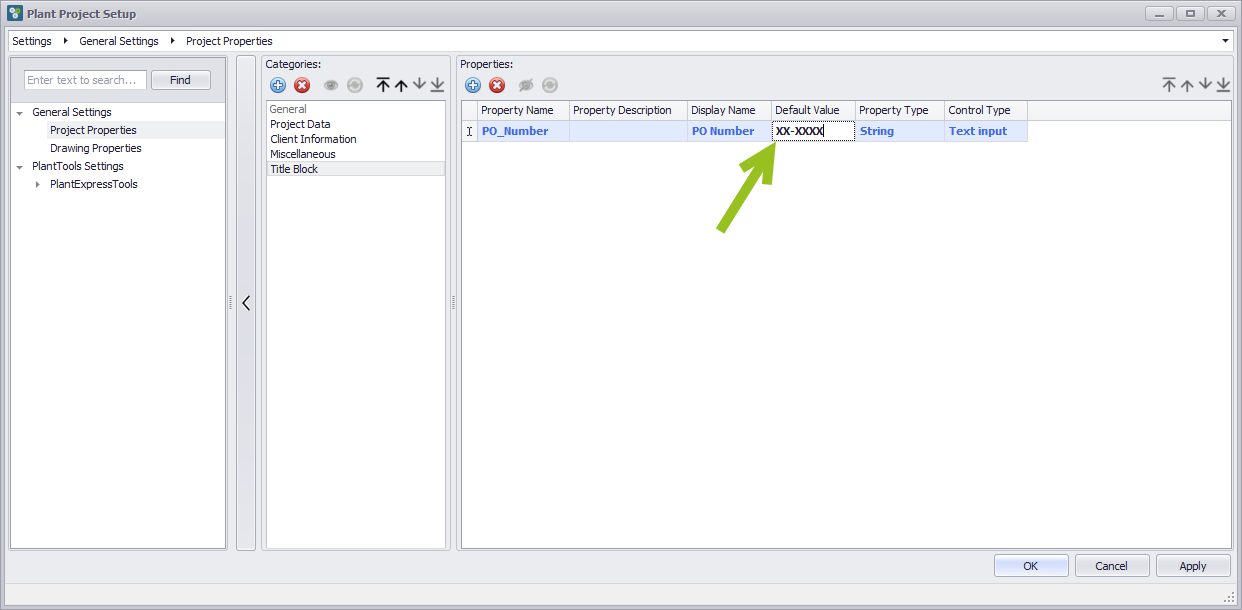
You can also type in a Default Value. Although, a Default Value for a Project Property has an effect only when you later us this project as a template for new projects.
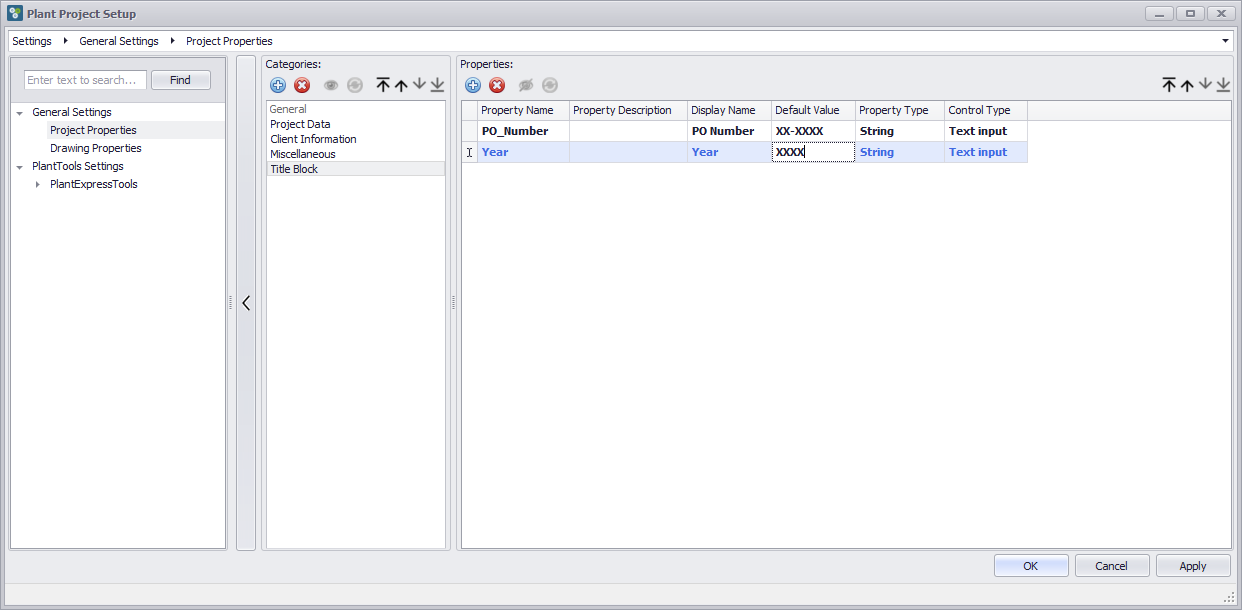
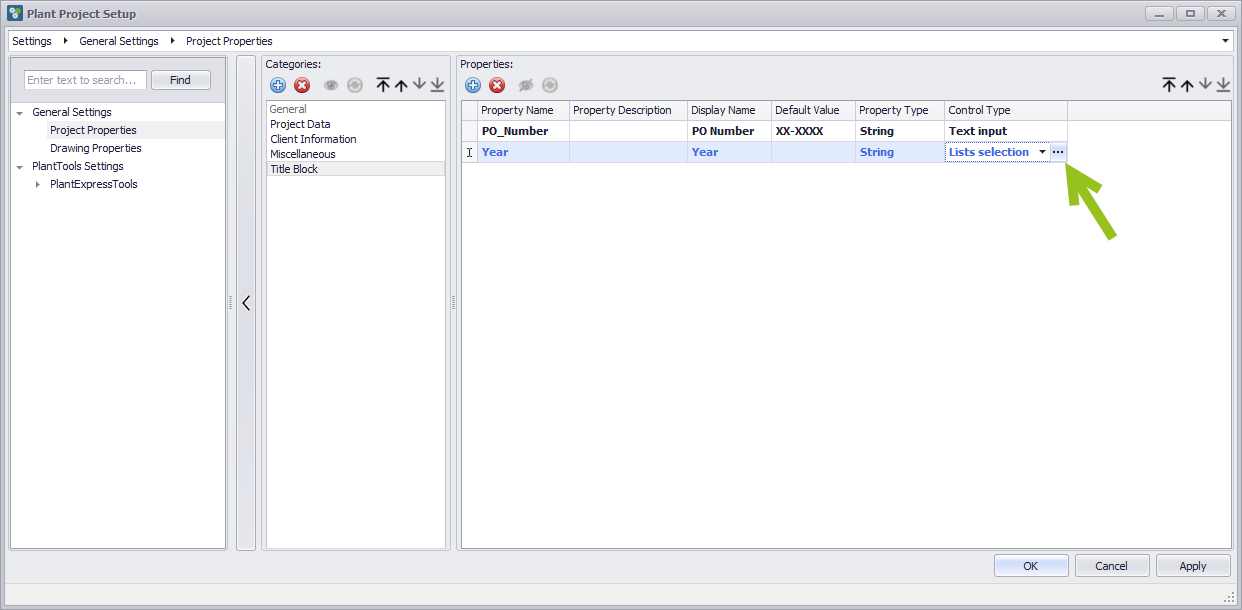
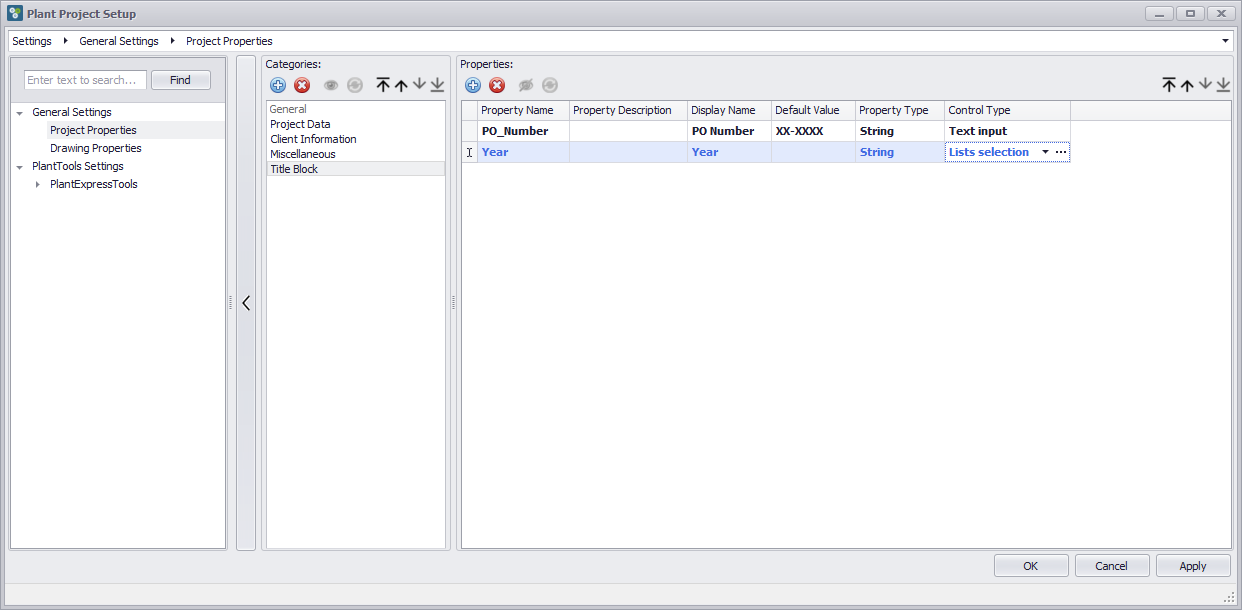
Now we create another Property.
We name it Year.
If you want you can type in a default Value.
Now we select "Lists Selection". This allows us to later have a Selection List for the Property. This is something not possible with Plant 3D directly, but PlantProjectManager does support this.
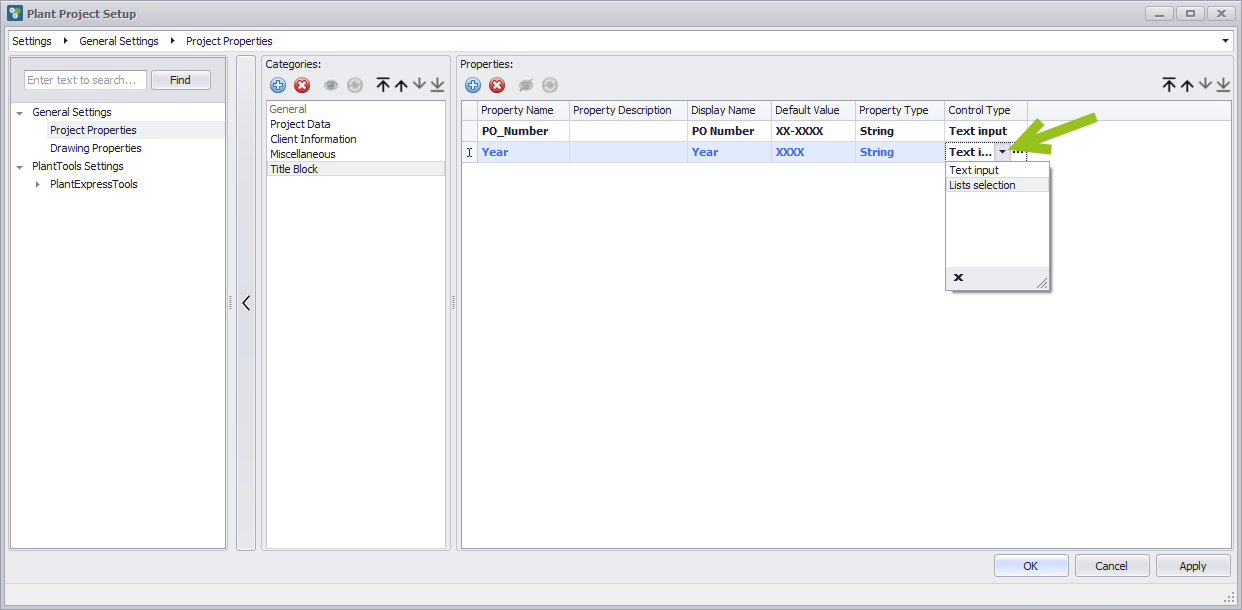
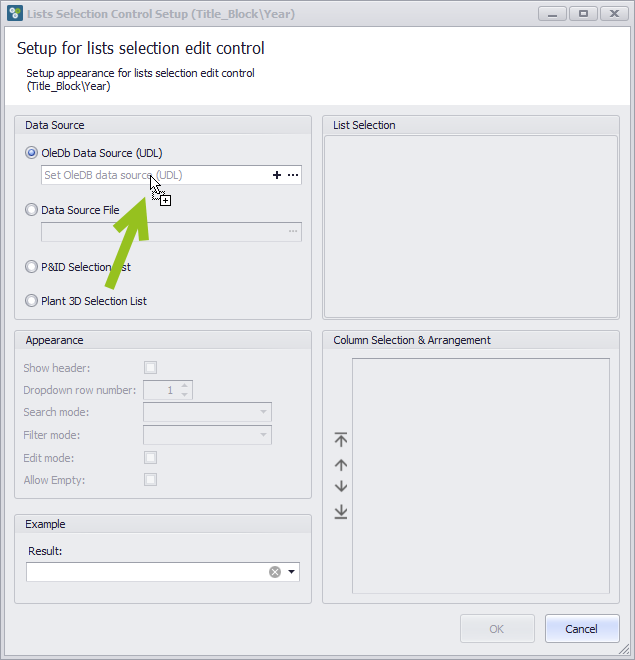
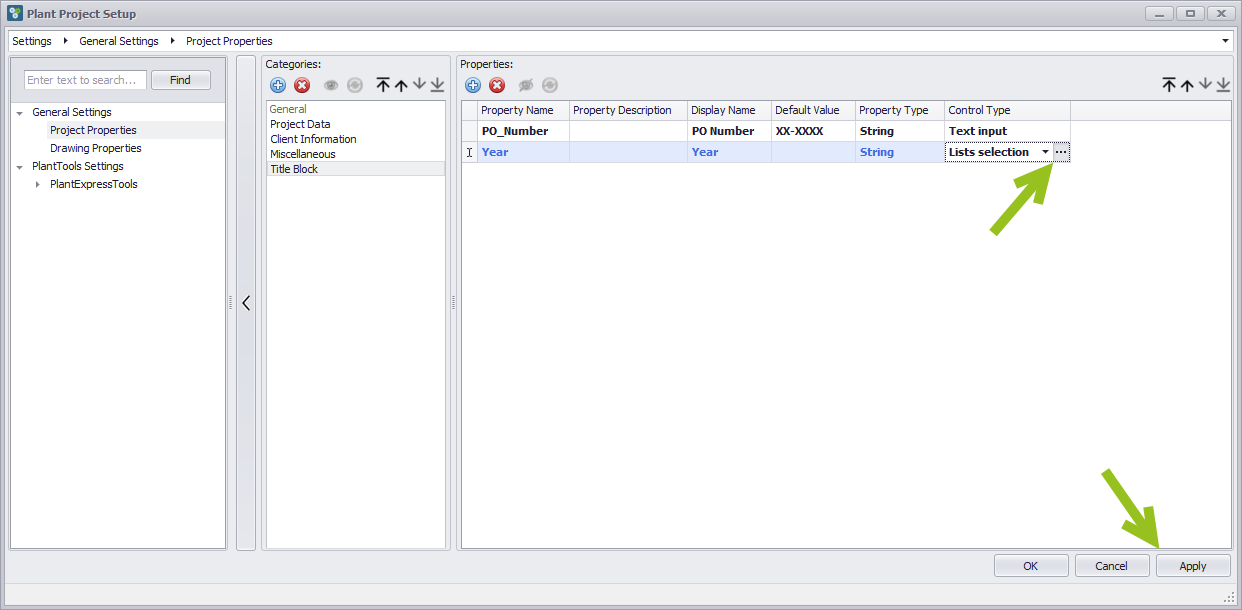
Next you click at the "..." button.
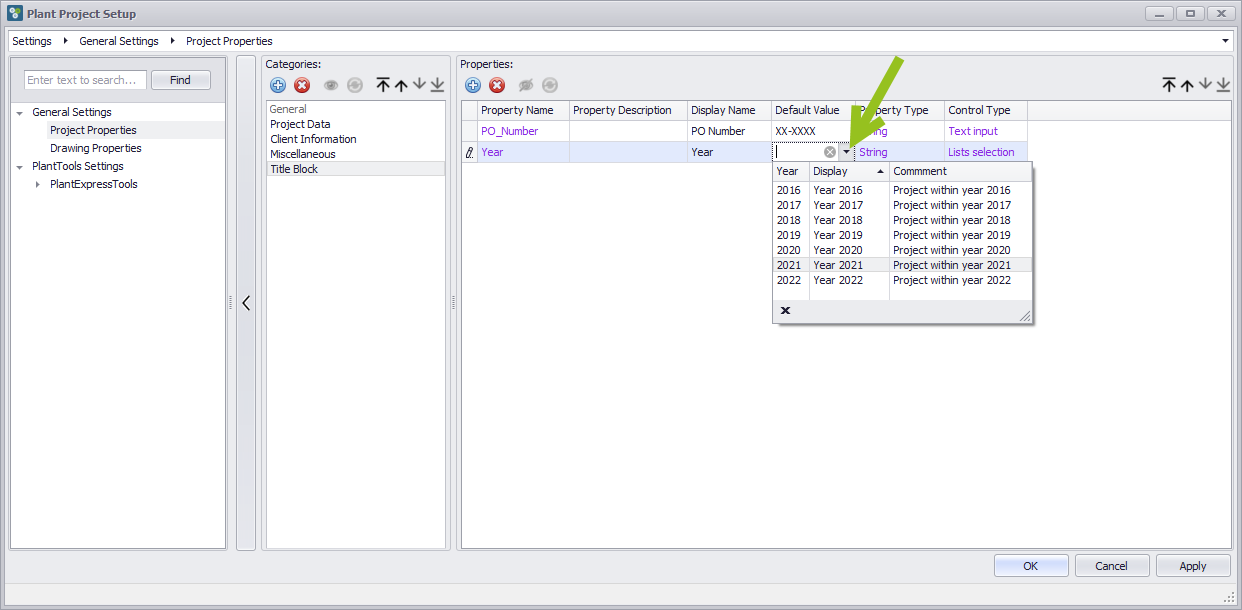
Setup Selection List for Property
A new dialog opens which asks you to first select a data source.
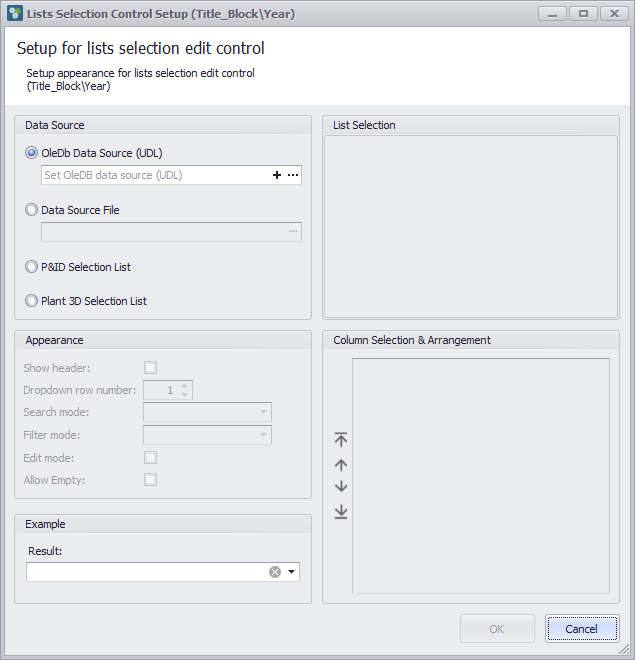
This is similar to the Selection Lists feature. This dialog also allows you to use CSV, XLSX, SQLite and UDL files. If you are not familiar with that I recommend having a look at some chapters of the Selection List feature (New List using Excel, New List using CSV, New List using SQLite, New List using MS Access, New List using SQL Server).
In addition, you can also use existing Selection Lists from P&ID or 3D for your Property.
In this chapter I will concentrate on the use of a UDL file. The UDL file I prepared points to a simple MS Access Database. Note, that you can use [PP] in the UDL File as well. However, then "Test Connection" won't work.
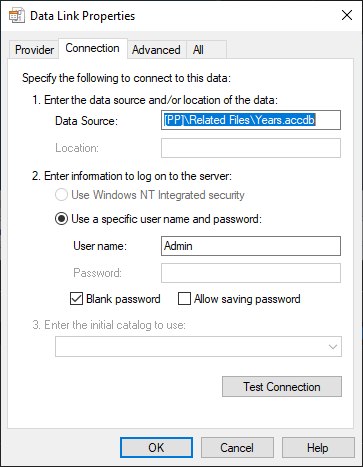
The full path looks like this:
D:\Projects\Documentation\PlantProjectManager\Related Files\Years.udl
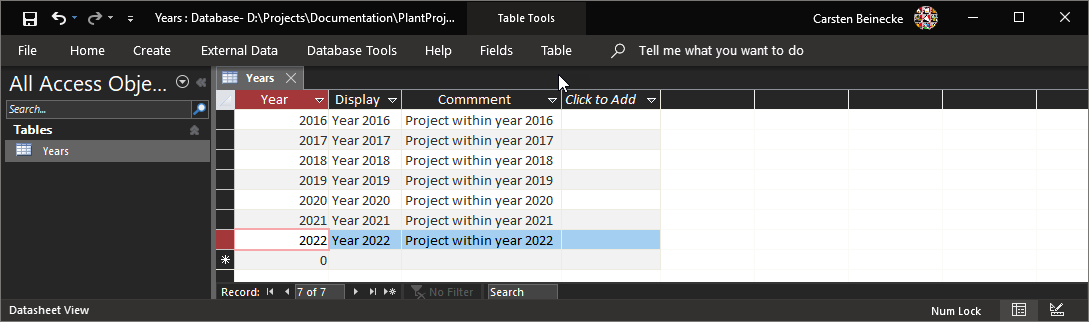
And this is the sample content for this exercise:
You can simply Drag and Drop the UDL file into the text box. Or you click on the "..." button. If you don't have a UDL file yet, you can click on the + button to create a new UDL file.
The dialog will automatically adapt the path to the UDL file and make it a relative path with the use of [PP].
After dropping the UDL file some controls in the user interface will be populated.
You see the list of tables (in this example there is just one table in the MS Access Database). We see Column Value and Column Description with "Comment". We see three columns and some result under Example.
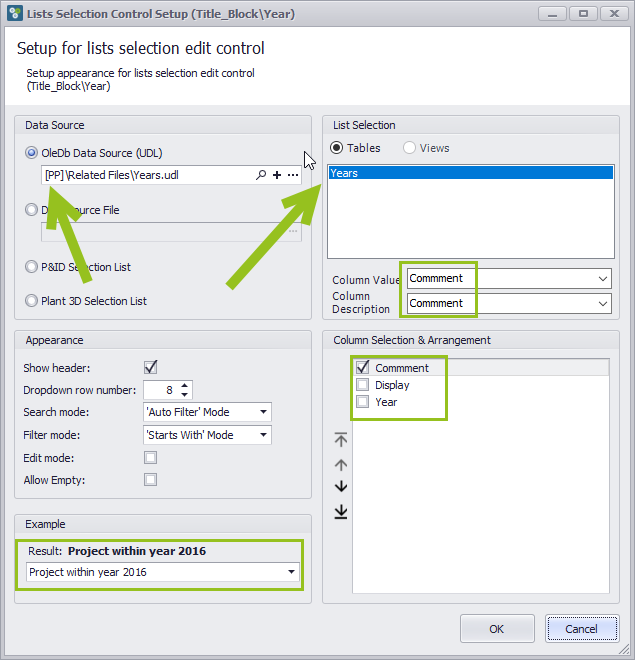
Let's have a look at the example section. Using the dropdown list give us a good idea were we are and what we need to adapt.
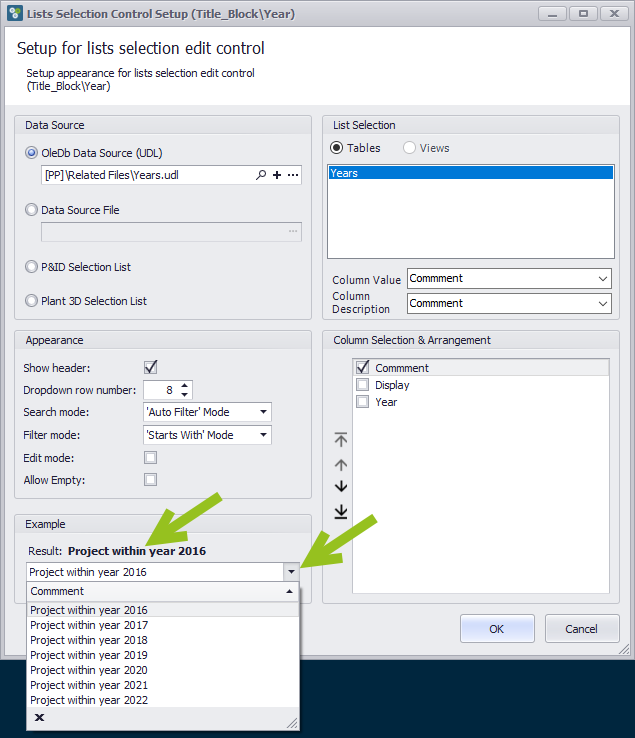
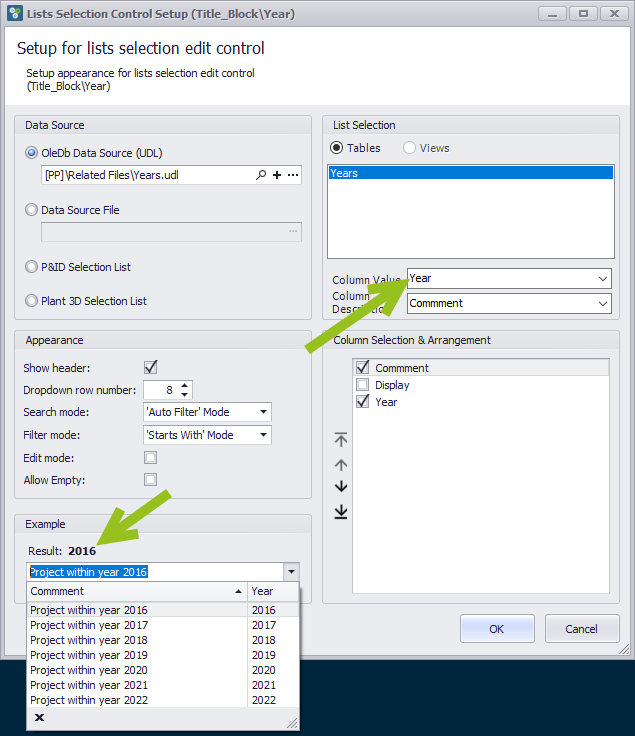
Let's just change the Column Value to Year. We now see "2016" as the result.
The three arrows explain where the setting appears.
Column Value is the Key value which is actually stored in the Property.
Columns Description is what will be shown to the user in the Property (as you can see not necessarily the Key value).
Column Selection & Arrangement defined which columns from the datasource are shown and in which order.This will then appear in the dropdown list.
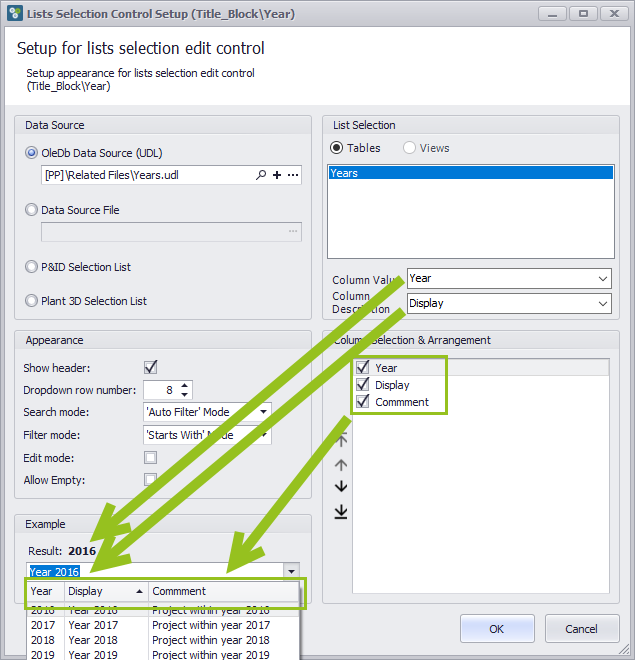
When you selected something from the list, the columns defined under "Column Description" is shown, but internally in the Property the "Column Value" is stored.

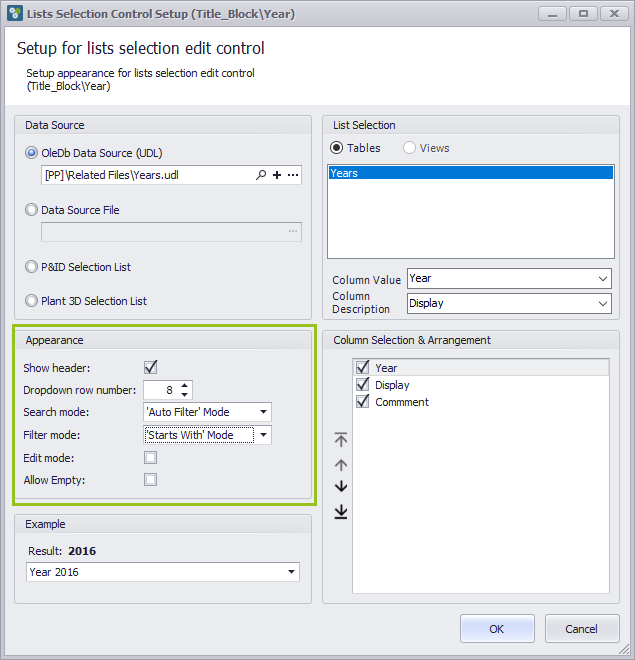
There are also some additional Appearance settings which control the behavior of the Selection List.
"Show header" defines if the dropdown list shows the header row from the datasource.
"Dropdown row number" is the number of rows in the dropdown list.
"Search mode" is typically set to Auto-Filter which allows you to just type in something and the whole dropdown list gets filtered.
"Filter mode" can be set to "Starts With" or "Contains". Starts With starts filtering the dropdown list from the start with the text you type in. Otherwise the dropdown list will be filters if the text is somewhere in the dropdown list.
"Edit mode" allows you to type in a value which isn't in the dropdown list.
"Allow Empty" allows empty values when typing in.
When we leave the dialog the text color is still blue.
Therefore you can click on the "..." again to enter the dialog again to make changes.
But as soon as you click on Apply or OK the changes are stored and you cannot enter the dialog anymore.
You can also use the Selection List to select a default value if needed.
All other options to delete, restore, Show/Hide and move a Property up and down are the same as for Categories and therefore aren't repeated again.
Next Chapter: Drawing Properties